Chevron and Stripes Mini Quilt- Handmade Birthday Club

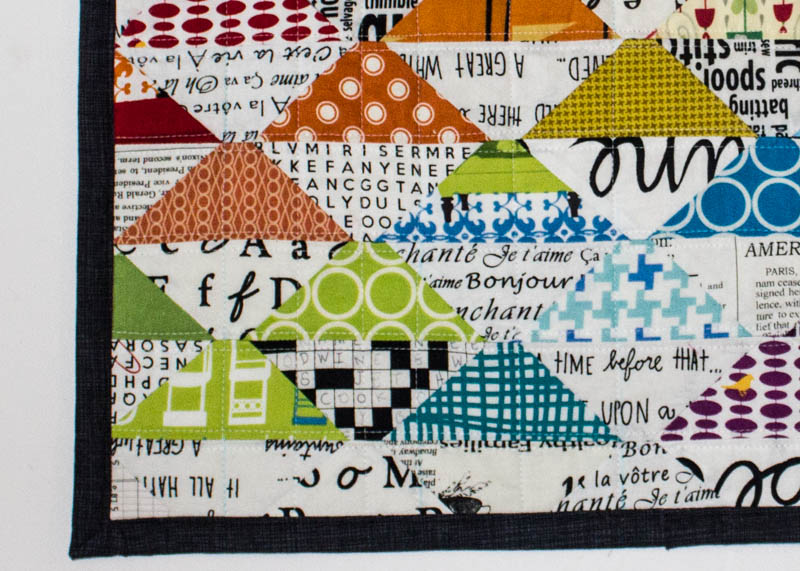
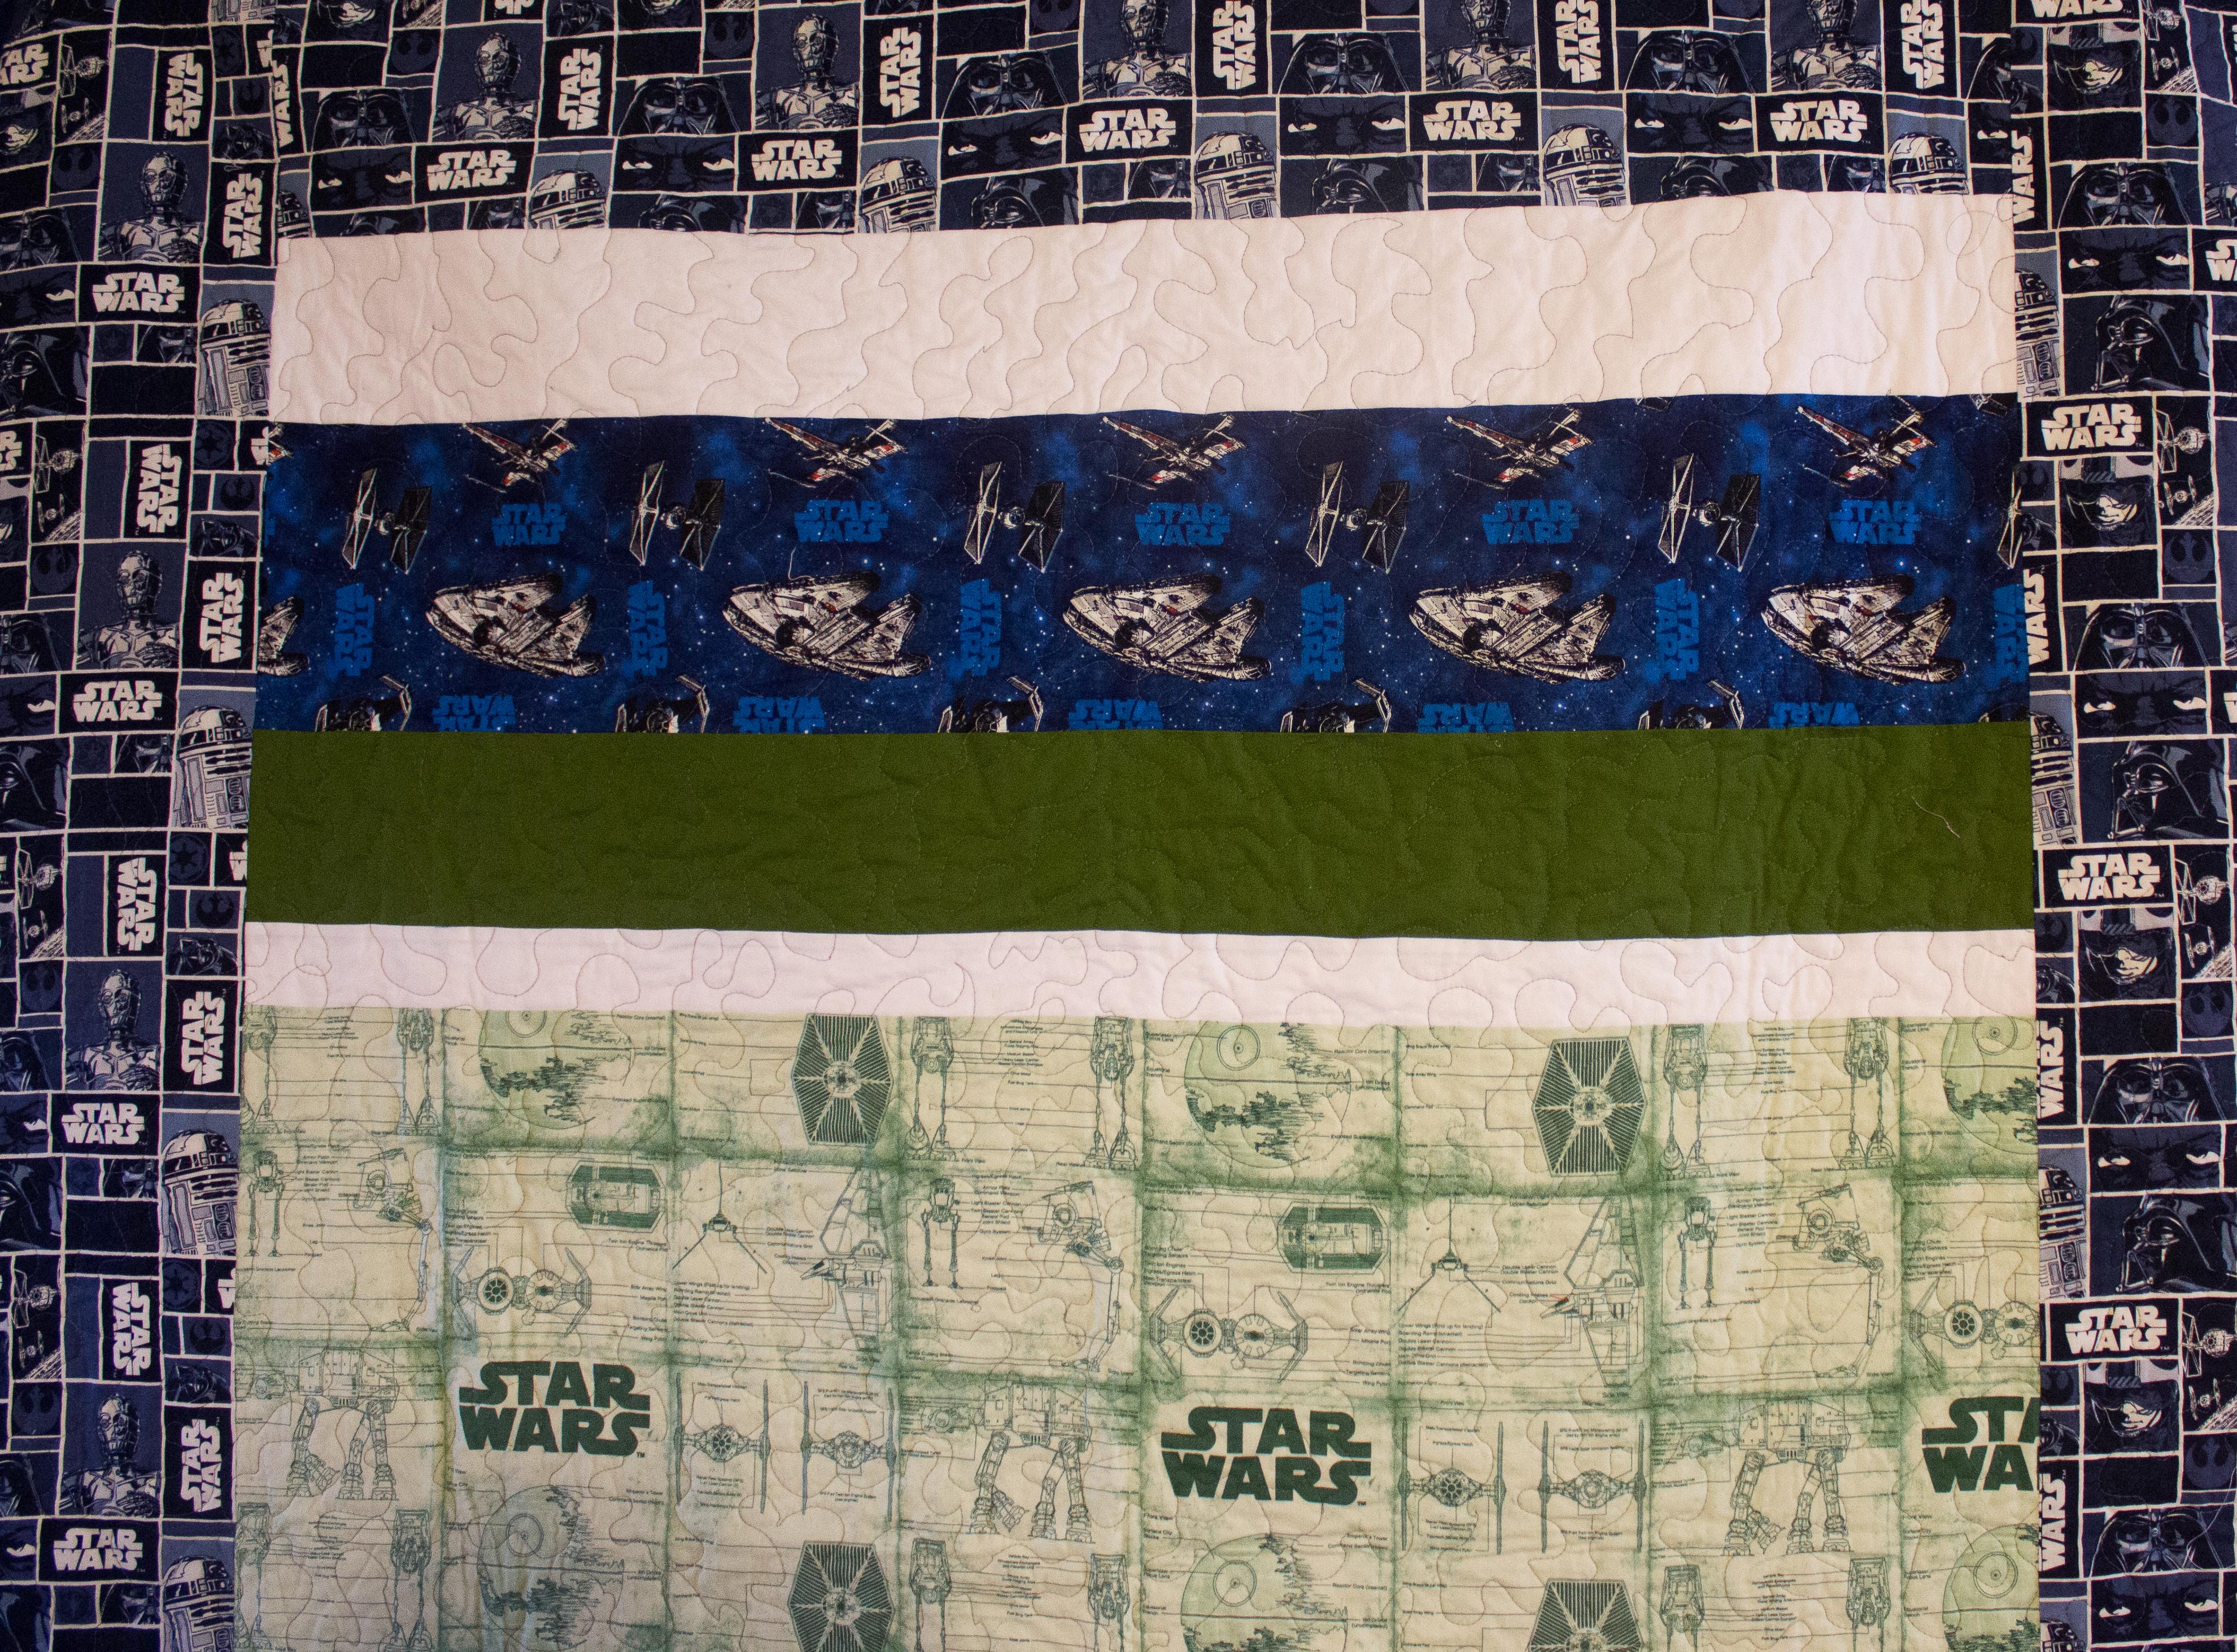
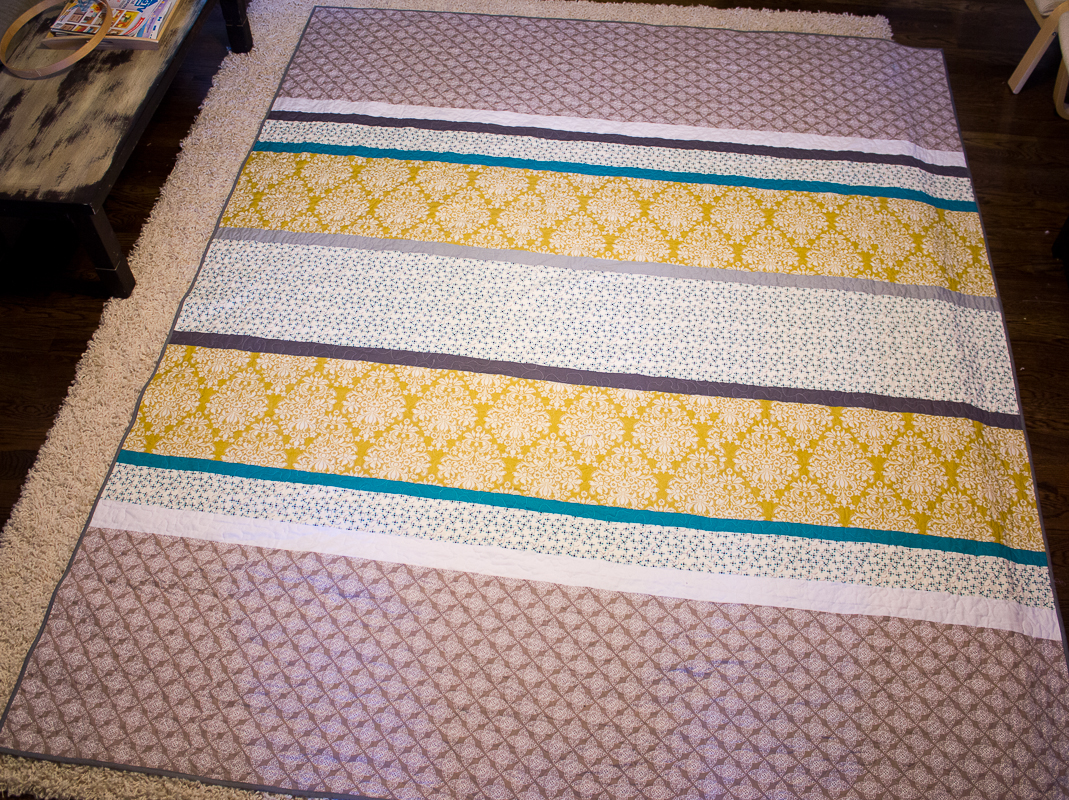
I have another installment of the gifts for my handmade birthday club members to share with you today. This is a mini quilt that I made for Jamie. Jamie had given us a great list of suggested fabrics and color schemes along with a link to her pinterest boards. While perusing her quilt board for ideas, I came across this chevron fly block that I thought would be perfect for a mini quilt. The best part is that the block is that it’s made up of half-square triangles- so easy! I played around a lot with layout and color but in the end decided to go with shades of gray with a pop of this alison glass feathers print for color. Once I made the chevron portion, I improvised the rest of the quilt top- putting the different ideas up on my design wall until I settled on varying widths of the fabrics for a bit of a stripe effect.

Jamie's Chevron Mini (1 of 3)

I backed the quilt in some geometric print that I had in my stash and did matchstick straight-line quilting on the white sections of the quilt to make the front design pop even more. I bound the quilt in Kona Olive which I just recently picked up thanks to Kristin continually lauding its ability to coordinate with any project. I have to say I might agree with her. Love extra color pop it added to my mini. And I promise the binding looks better than it appears in these pictures. For some reason it looks super wavy in the pics but it wasn’t in real life!

Jamie's Chevron Mini (3 of 3)I just recently got two of my half-birthday presents in the mail from my fellow birthday club members and one of them put these great envelope sleeves in the top of a mini quilt. I hadn’t thought to add that little detail before so I decided to try it out on this one and it was quite easy and will make it much easier to hang!

Jamie's Chevron Mini (2 of 3)

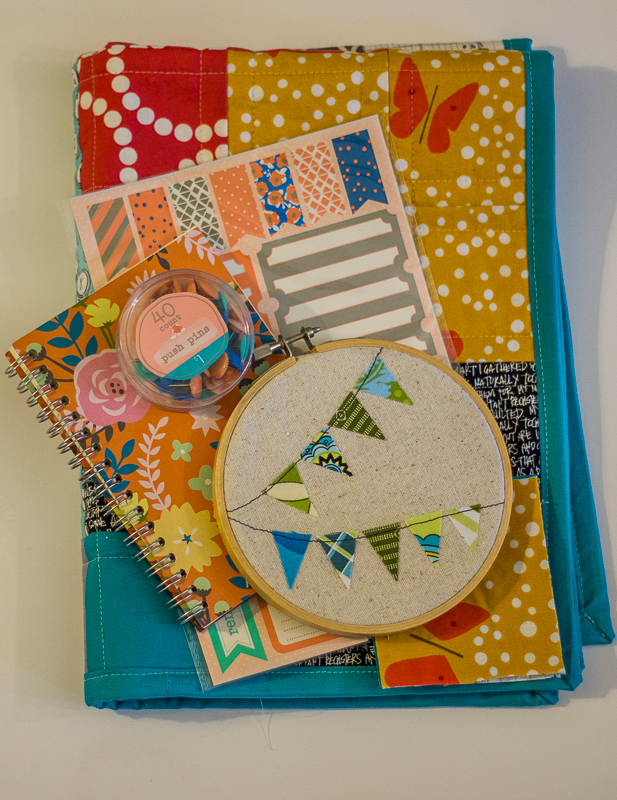
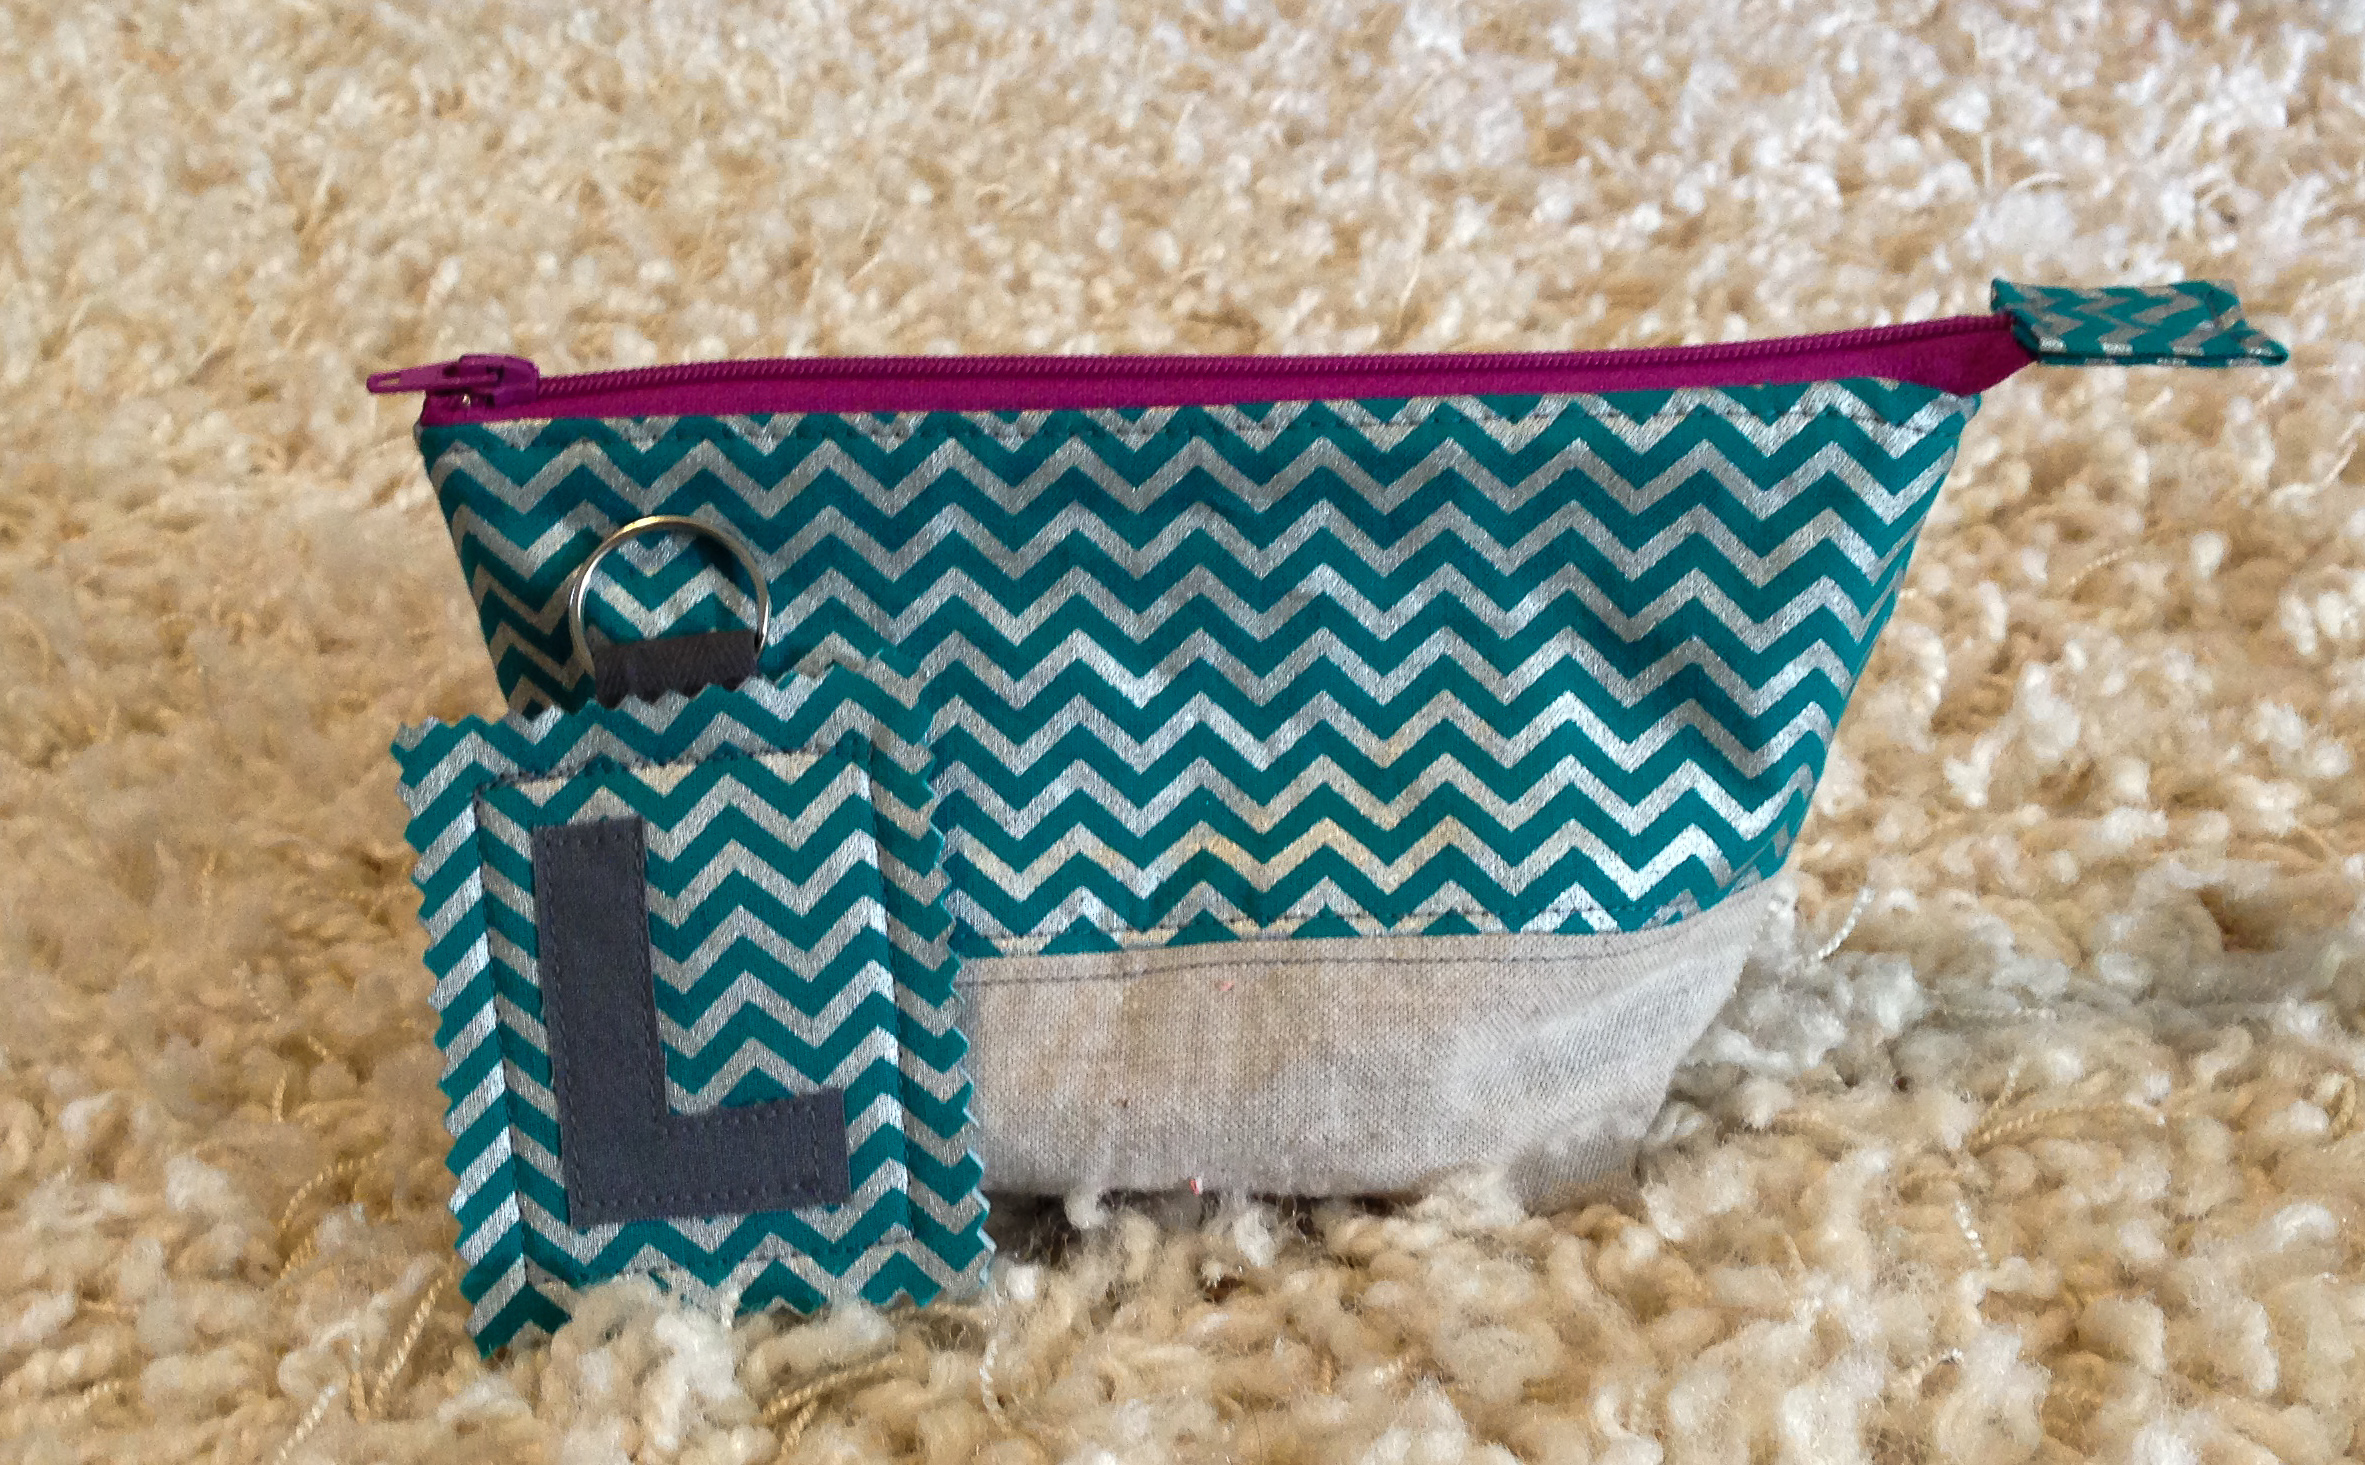
I had a leftover chevron piece so I made a quick little zipper pouch out of it and added some fun office supplies to finish up my birthday gift. I really love how this turned out and hope my recipient loves it as much as I do!

Advertisement

Handmade Birthday Club: Distorted Triangles Mini Quilt

My next handmade birthday gift (see previous one here) is to Jeni in Canada. (@quiltedontherock). She finally got it after two weeks in the mail so I can share it with y’all here. Jeni said that she loved black & white with pops of color, text prints, and mini piecing. I decided to make her a mini quilt based off this pin that I found. I used my text bundle that I won from Pink Castle Fabric’s IG giveaway and then some fabrics from my stash to make the loose rainbow running down the mini.

new final (2 of 2)


Sooo I wanted to make a triangle quilt, but so far all I’ve ever done is half-square triangles. I looked up some tutorials on pinterest (you can check out my quilt board here) and then made up my own triangle template based on what I thought would be a good size. I think I should have researched it a little more before jumping into it. Somehow I messed something up because I ended up with pointless triangles. See what I meant in my last post about the maths not working out for me most of the time? I almost scrapped the project after the first row but I’d already cut out all the triangles so I just continued with it and figured I’d see if it looked better all put together. Once I got it finished up, it kinda grew on me and I decided it was kinda of a cool look. Hopefully Jeni agrees!


Jeni's Triangle Mini Quilt (1 of 3)

FYI I starched and ironed all the triangles after I cut them out and it made the sewing process much easier! I used my walking foot and quilted it 1/4” on either side of the horizontal rows and then random widths of straight lines going down the vertical length of the quilt . I used the same black sketch print for both the backing and binding.

If anyone has any suggestions as to what I did wrong, please feel free to weigh in. I almost didn’t publish this post because it shows an imperfect project but I think it’s important to show our flaws as well as our successes. Keepin’ it real here, folks!


Handmade birthday club

April (5 of 5)Those of you who are on Instagram may have seen references to the handmade birthday club. I missed out on it for the first signup round but when my friend Lisa (@modern_balabusta) posted another signup list for a late to the handmade birthday party, I jumped on the train. Basically you have a group of makers who agree to send a handmade item to each other in their birthday month. The group is arranged with only (mostly) one person per month so the participants don’t get overwhelmed.
Lisa’s birthday was April 27th and I got my gift mailed off a few days late but it was the first gift so she cut us all some slack. It was so fun to get to make something for a fellow sew-er who I know will enjoy the value of a handmade gift! Based on Lisa’s list of preferred fabrics and after perusing her Pinterest boards, I made her this mini quilt as her main gift item. Isn’t it so cute?

April (1 of 5)

April (3 of 5)

I’ve always wanted to make a plus quilt and it was quite easy once I sat down to do it. I didn’t follow any pattern; just cut out 3.5″ squares and arranged them on my design wall until I liked the arrangement. Then I sewed them together- making long rows, then sewing the rows together. I decided on a straight line quilting pattern down either side of the seam allowances using the side of my walking foot as a guide (about .5″ from seam). The finished quilt measures at about 18″x24″.
I picked up a few fun office supplies at target to coordinate with my gift and threw in one of my hoops that I had made up already. I think it’s a fun gift and I hope Lisa enjoys it!

April (2 of 5)April (4 of 5)


The Clemson Clock- and a semi-Pinterest Fail

I have the finale of my handmade Christmas presents to share with you today and in the spirit of keeping it real, I’m going to share my semi-fail project. I saw this handmade fabric clock on Pinterest a while back and pinned it with the thought it would make a good present idea. I had some leftever Clemson fabric from the quilts for my dad and brother and decided to try out this project for my dad’s Christmas present. He has an office that is slowly being re-decorated with Clemson paraphernalia, and this would be the perfect touch.

The basic premise of this idea is that you cut out the hexagons from cardstock, cut out the fabric hexagons a 1/4″ bigger, glue them around the cardstock, and then glue the hexagons to each other. Let me tell you, cutting out and gluing all those hexagons was no joke! I think my first problem was that my cardstock was not heavy enough. Also I wasn’t careful enough with the glue and you can see dried patches on the front of the clock. In the process, I wasn’t sure that the whole thing would end up staying together. It did end up staying together but I had to add a few pieces behind because I ended up with gaps (guess my hexagons weren’t cut perfectly even- such a surprise since I’m known for my precision 😉 ).clemson clock

In the end, it turned out ok. I think once it’s mounted up on the wall, you won’t notice all the imperfections, but it definitely doesn’t look as profesh as I wanted it to and doesn’t reflect the amount of time invested in it. We will just chalk this one up to a good learning experience and move on.

Star Wars Quilt

My younger brother is a huge Star Wars fan, and for his 18th birthday I thought a special Star Wars quilt was in order. I searched Pinterest for quilt ideas (you can see my quilt board here) and never really found exactly what I was looking for; so I decided to head to my local Joann Fabric, check out their selection of prints, and go from there. Based on what I found at the store, I decided to do a strip quilt with coordinating solids interspersed between the Star Wars panels. Once I finished the strip quilt section, I realized the quilt was going to be too narrow (no surprise I erred in my math calculations…math and me, we’re not good friends) and that’s when my husband gave me the idea to add the side sections to make a border around the quilt. The quilt finished up around 60″x80″ -a nice throw size blanket.

star wars quilt

Of course, I can’t just complete a project and give it to the person on time. No that would be too simple and planning way too far in advance. I was actually proud of myself that I was doing such a great job on finishing a project on time, when a little over halfway through the quilting, I ran out of thread- the afternoon of the party. Oops. My bad. I ended up finishing the quilt right before Christmas. Two months late but better late than never, right? 😉 Considering my last quilt gift was finished on the one year anniversary of the occasion, I’d say I’m doing much better these days. LOL.

star wars quilt

I used Kona Navy for the backing with the addition of one of the leftover border stripes and bound the quilt in a navy blue store-bought binding (I know, I know, for shame). The quilting is my current go-to method- stippling. I promise I’ll try another method soon! All in all I am really happy with how this turned out and hope my brother is happy with his personalized quilt.

star wars quilt

Gifts for the Ladies: Pouches and Keychains

I woke up Christmas Eve with the perfect handmade gift idea…. some open-wide pouches and coordinating key chains. Now this is no rocket science idea; I’ve made open wide pouches before, but for some reason I hadn’t though about them in a while, and it hit me that this was the perfect little addition to my presents for the women in my life: my mom, sister, sister-in-law, and mother-in-law.

open wide pouch

My long-suffering husband rolled his eyes and watched the boys for me so I could get in this last minute sewing. I found some metallic (!!) fabric at Joann that I knew would be perfect and quickly put together 3 pouches (one not shown) and 3 keychains.

open wide pouch and keychain

Pouch is the free pattern (small version) from Anna at Noodlehead.  For some reason, the first one I made took a little while as I had to re-read all the instructions especially for the bottom gusset, but once the first one was finished, the other two came together super fast. I just love the boxy bottom of these pouches- perfect for my sister to fill with pencils or makeup and throw in her school bag. Fabric used: Metallic from Joann, Robert Kaufman Chambray, and Yarn Dyed Linen in Flax.

open wide pouch and keychain

Keychains are loosely based on the tutorial from Jessica at CINO. I interfaced both sides of the fabric with Craft Fuse 808 and then also fused a piece of Fusible Fleece in the middle. I’ve tried a few of these in a circle style but have decided I prefer the rectangle. Altogether a few quick and easy projects to keep in your back pocket when you need a last minute gift idea.

 keychain

Anniversary Negroni

I am SO PROUD of this shirt! I cannot believe I actually sewed a men’s button-down shirt and it hasn’t fallen apart yet! Several years ago I promised my hubs I would make him a button down shirt after seeing Rae’s version of the Negroni for her husband. But it wasn’t the top project on my list and kept getting bumped for other things. Every now and then, he would remind me about my promise, and I would make note of it and then completely forget about it. July 18th was our 5 year anniversary, and I really wanted to do something special for Ian since he has been such a huge help during and after this difficult pregnancy. I am well known for deciding such big things right before the occasion comes up and then never finishing said project. But this time I determined it would be different! And it was; I actually had a semi-finished shirt for Ian to try on for our anniversary day. The best thing was that this shirt was a complete surprise for him!

Negroni

Pattern: Negroni by Colette Patterns. 2 thumbs up for the pattern! The shirt came together so much easier than I had anticipated. Only hard part were the cuffs which I had to redo several times because I made some mistakes and didn’t understand directions. Also I put one of the cuff plackets on the wrong side so one placket is facing the inside of the sleeve and the other faces the outside but no one notices this so it’s not a big deal.

untitled-6

Material used: a shot cotton I picked up at a fabric sale for super cheap a while back. This was my “wearable muslin.” This fabric works great for the pattern and I’m already planning on making another one in a dark green shot cotton. However, I must tell you, just like my Ruby Top, I ironed the shirt before our photo shoot and it’s still wrinkled. Ian doesn’t mind the wrinkled look, but if your husband is picky about that you may want to consider using a different fabric.

untitled-5

Other notes: I used one of Ian’s dress shirts as a size guide, and he happens to be a perfect medium! The shirt fit great with no needed alterations. Next time I think I will try to install a traditional collar rather than the camp style collar but every thing else I will keep the same. I found some tutorials on the traditional collar insertion so I will read up on those before I attempt it.

Birthday Chair

A quick little project to share with you today…a rocking chair I recovered for my grandma’s birthday present. My mom owned the chair, and it had really old ratty fabric on the cushions. She asked me to re-do the chair for my grandma’s birthday because my grandma loves this rocking chair. I’ve already recovered two rocking chairs so this was pretty straight forward- take apart the old cushion fabric and use as a pattern for the new cushion covers (made from a twill fabric). The only change I would make is use a thicker fabric next time because the twill wasn’t quite as thick as we had anticipated and therefore didn’t turn out quite as professional-looking

rocking chair recover2

Once it was done, it needed a little something extra so I used some Ikea fabric in my stash to make a quick envelope backed pillow. That gave it the perfect pop and I think it’s super cute. Thankfully Grandma does too!

rocking chair recover

How to Make a Guest Book Wedding Quilt: Part 3 and Finished!

First of all, the giveway continues on through tomorrow night so head over and leave a comment if you haven’t yet to get your name in the hat. I’ve really enjoyed all the comments and new followers I have met this week!

Part 1 of the tutorial: here

Part 2 of the tutorial: here

Final Part: Backing and Quilting

  • I just did a basic strip piecing for the backing- cutting varying widths of fabrics and sewing them together until it was long enough for a backing
  • Because this turned out so big (King Size!) I spray basted the quilt and then just did an all-over stipple on my sewing machine.
  • I traced out the initials and the date with my fabric marker and then hand-embroidered through all layers with perle cotton using a basic embroidery stitch
  • Binding is machine sewn
  • And done! Yay! 🙂

Oh I wish you could see the happy dance that I am doing right now! I am so very, very happy to have this quilt finished. Part of me thought I could never get it done, but I was wrong- due in main part to the amazingness of my new Bernina. I never could have quilted this thing on my old Singer.

I have had the backing and top finished for a while and have been putting off quilting it because I was not sure how I was going to get the king-size quilt through a regular sewing machine. I am not going to say it was the easiest thing in the world but it was possible. I have a list of projects that need to be completed before baby comes and this was number one on the list so I just determined that this week would be the week that I finished it.

guestbook quilt

Monday, I spray basted the quilt (quite a job with a quilt this big!) and then added a few pins to give a little additional support. I spent Tuesday and Wednesday quilting both during nap time and at night. I think it took me a total of about 5 hours to machine quilt. I decided to stipple the quilt because I liked how it turned out on the last quilt I did, and, for me, it’s a lot faster than any other method. I’m not gonna lie- those middle sections of the quilt were tough! All that extra material bunched up in the harp space was a bit of a pain. However, all things considered, it was easier than I had anticipated it being. Then I did some hand quilting in the very middle of the quilt with the initials of the married couple and their wedding date. (Yeah notice how it’s almost exactly a year ago…lol).

guestbook quilt

Today it was binding time. I was way too tired at this point to even think about making 12 yards of bias tape myself. Thankfully, my local Hobby Lobby had exactly the amount I needed in a gray color almost perfectly matching the Kona gray in the quilt. I also decided to machine stitch the binding on for time and energy reasons. I used my walking foot for the first time and really like how it keeps the bias tape nice and even!

guestbook quilt

And now the grand ta-da…all finished at last! I really like how the finished project turned out. The stipple quilting is the perfect accent without taking away from the signatures. I would totally recommend doing this for a great wedding keepsake- just do better math that I did and don’t make it quite so large (It is almost exactly the size of my 8×10 rug!)! Sorry for the lack of amazing pictures. If someone has any great ideas of how to photograph a king size quilt feel free to pass that info on to me! Plus I am just too exhausted at this point to attempt a cool photoshoot. If you need me this weekend, I will most likely have my 36 week preggers body on the couch recovering from my quilting marathon!

guestbook quilt


Current Projects

I have been very busy doing a little of this and a little of that…not enough to share an entire post about each thing so I thought I’d give a bit of a collage of all my random projects.

First off, I have ventured into girly world with my hoops and onesies. After completing a custom Etsy order for a special little girl’s room, I used some of the scraps to make some onesies for a friend’s baby shower. I am loving this look and I think you might see some more girly stuff in my Etsy shop from here on out…not changing who I am but expanding a bit so I don’t lose out on an audience I am not currently reaching.

Hoop Art

I also completed another figure 8 scarf as a birthday present for my aunt. I have tweaked this pattern so that it is now super easy and such a fun little present! Really must make one of these for myself soon! This one was made in a cotton/linen blend fabric and I really love the weight and feel of it.

Figure 8 Scarf

I tried out Anna’s new pattern– the divided basket- to see if I want to sell these in the future… It ended up being the perfect container for the balls and books we purchased for a friend’s little man’s first birthday party. I need a few more practice rounds with this pattern to work out some kinks, but I’m thinking it’s a go. I’ll keep you posted on my progress.

Diaper Caddy

A custom quilt order has begun taking shape. The client gave me a color range of whites, dark purples, and apple greens and allowed me free range in fabric choices. I love projects like this because I don’t have to stress about what the client wants and can just have fun putting things together.


twin quilt-001

Last, but not least, I have completed the quilt back for the guestbook quilt! Woo Hoo! This is a huge weight on my mind right now and I am so happy that I have made progress on it. Next step, get some 505 spray and attempt quilting… you will definitely be updated on how that monumental step goes!