Anniversary Negroni

I am SO PROUD of this shirt! I cannot believe I actually sewed a men’s button-down shirt and it hasn’t fallen apart yet! Several years ago I promised my hubs I would make him a button down shirt after seeing Rae’s version of the Negroni for her husband. But it wasn’t the top project on my list and kept getting bumped for other things. Every now and then, he would remind me about my promise, and I would make note of it and then completely forget about it. July 18th was our 5 year anniversary, and I really wanted to do something special for Ian since he has been such a huge help during and after this difficult pregnancy. I am well known for deciding such big things right before the occasion comes up and then never finishing said project. But this time I determined it would be different! And it was; I actually had a semi-finished shirt for Ian to try on for our anniversary day. The best thing was that this shirt was a complete surprise for him!

Negroni

Pattern: Negroni by Colette Patterns. 2 thumbs up for the pattern! The shirt came together so much easier than I had anticipated. Only hard part were the cuffs which I had to redo several times because I made some mistakes and didn’t understand directions. Also I put one of the cuff plackets on the wrong side so one placket is facing the inside of the sleeve and the other faces the outside but no one notices this so it’s not a big deal.

untitled-6

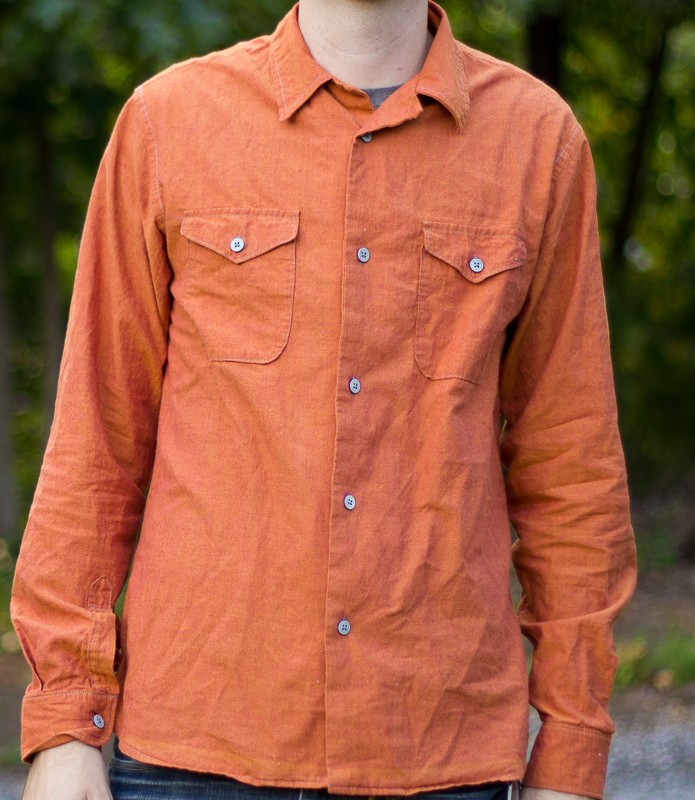
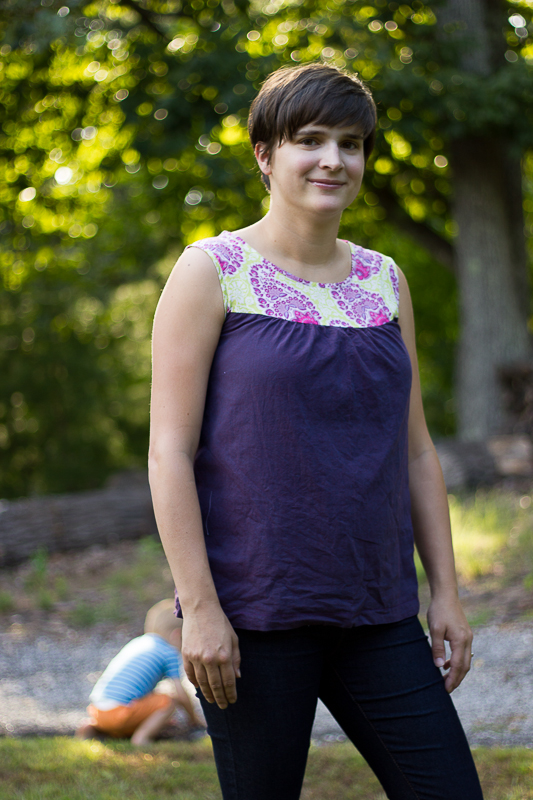
Material used: a shot cotton I picked up at a fabric sale for super cheap a while back. This was my “wearable muslin.” This fabric works great for the pattern and I’m already planning on making another one in a dark green shot cotton. However, I must tell you, just like my Ruby Top, I ironed the shirt before our photo shoot and it’s still wrinkled. Ian doesn’t mind the wrinkled look, but if your husband is picky about that you may want to consider using a different fabric.

untitled-5

Other notes: I used one of Ian’s dress shirts as a size guide, and he happens to be a perfect medium! The shirt fit great with no needed alterations. Next time I think I will try to install a traditional collar rather than the camp style collar but every thing else I will keep the same. I found some tutorials on the traditional collar insertion so I will read up on those before I attempt it.

Advertisement

Ruby Top

ruby top

I recently had the opportunity to test a pattern for the amazing Rae from Made-By-Rae. I made the dress version for testing but chopped it off into the top later. Dresses are just not practical for this nursing mama right now.

ruby top

I love how this top turned out! In fact I’ve been wearing it and my Tiny Pocket Tank almost non-stop this last week. I really need to make a few more of these tops. I chose the size M, even though my bust measurements indicated I was a L. Because of this, it’s a teensy bit small across the bust/shoulders area- you can see a bit of the pulling in the pictures. However, in my current stage of life I like to make things a little small so that they will continue to fit as my body shrinks back to its normal size.

I have it on good authority the pattern will be released any day now and I highly recommend you try it out! It’s the perfect pattern for the beginner seamstress because it is not complicated and results in a super cute garment. Rae is well-known for her well-written patterns, and this one does not disappoint!

ruby top

I love seeing everyone’s different combinations of fabrics in the Flickr group and already have several ideas in mind for my next one! I used a voile for the top and shot cotton for the bottom. One note about the shot cotton- I actually ironed this shirt for the photo shoot (my mother would faint at this news 🙂 ), and it still looks wrinkled, but I’m ok with that since I’m a wrinkle embracer myself. 🙂

ruby top

Washi Dress

Washi #2 is complete! Have I mentioned how much I love this pattern? This Washi dress was made out of some shot cotton that I picked up while at Purl Soho. I love the lightweight feel of the shot cotton but it is quite sheer. I had a removable lining from another dress that I wore under it, but since that lining is blue you can see it under the dress a little bit. No worries, I will still wear the dress all the time. 🙂 Once Rae puts up a lining video, I will re-do the top and add a lining to the dress

Changes I made to the patterm:

  • Shortened the bodice a bit since I am short-waisted. I ended up not liking it as much this way, so from now on, I will leave the pattern as is.
  • Also after looking at all the pictures from the Washi flickr pool, I realized I was sewing my pleats wrong. (oops!) I say that I will fix them, but let’s be realistic. Most likely I will just wear the dress as-is and hope no one notices. 🙂
  • Added some length to the dress because I wasn’t sure how long it would come out, and I wanted to be able to add a deep hem to help pull the shot cotton down. My next dress (yes I already have the fabric for it) is going to be quilting cotton so I won’t need the deep hem and will use the original pattern length.
  • Raised the neckline about 2 inches so that I could have the u cutout but not feel I needed to wear a tank under it to be modest. Very happy with how this came out!

Overall consensus: I love the feel and weight of the shot cotton, but the fabric feels so fragile that I am not convinced of the longevity of this dress. I will have to be very careful in my washing of the dress. However, this is seriously the most comfortable dress I own! And I am so happy to have a purple dress! It may be a bit nerdy to admit this, but purple is my favorite color and it makes me happy to sew clothing for myself in purple.

With each dress/ tunic, I feel that I am learning more about how to sew clothing for myself so even if they are not perfect, they are all helpful lessons.   If you want to try this out for yourself the Washi pattern is available here. FYI these pictures were all taken last weekend on our family vacation to Hilton Head Island. It was a great place for a photo shoot with all the beautiful scenery!

Couldn’t resist a picture with my little buddy since we are both in handmades…check out his treasure pocket shorts.