Sidewalk Knits Showcase

Long time, no see, huh? Wow…didn’t realize it had been quite that long until I went to write this post. I did have a baby shortly after my last posting and life has been a little crazy since then! I’m slowly getting back into sewing and hopefully will pop in here more often as I’ve missed sharing my things here! I really like the record this blog provides of my sewing adventures…and my kids. 🙂

sidewalk-knit-showcase-8-of-12
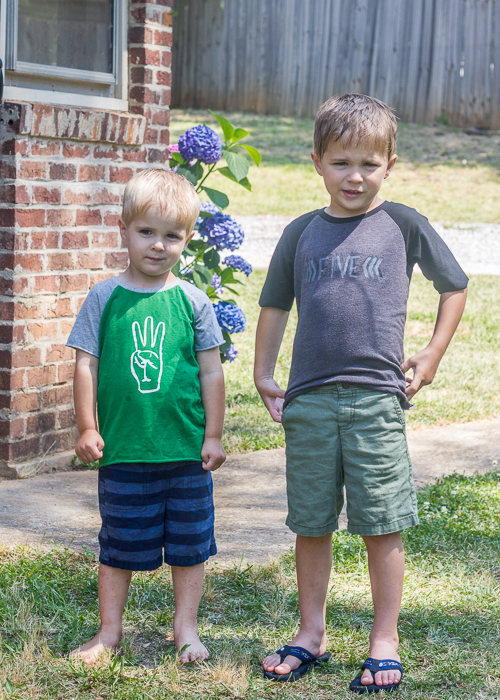
Enough about me…on to the cuteness that is this fabric and these boys! Y’all know that I’m a big fan girl of Rae from Made by Rae and she’s got some awesome new fabric lines out. I love so much that she designs fabric lines that can be used for both boys and girls! Cool boy fabric is really hard to find. Rae and Cloud 9 fabrics were so kind to send me two yards of the art class print in green from her new knit line- Sidewalk– to play around with.

sidewalk-knit-showcase-2-of-12Y’all, you can make a lot from 2 yards of knit fabric! This stuff is 55″ wide and made from some really nice interlock. I tend to be more of a jersey knit girl because I find a lot of interlocks to be too stiff, but this Cloud 9 interlock is super soft and perfectly stretchy- but with the extra stability you get with the interlock substrate. Highly recommend!

sidewalk-knit-showcase-7-of-12

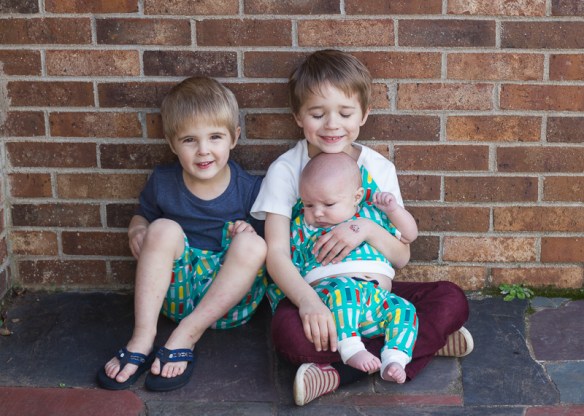
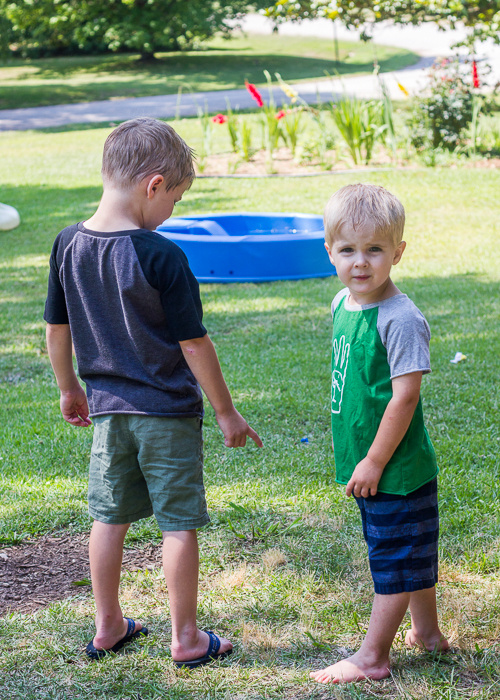
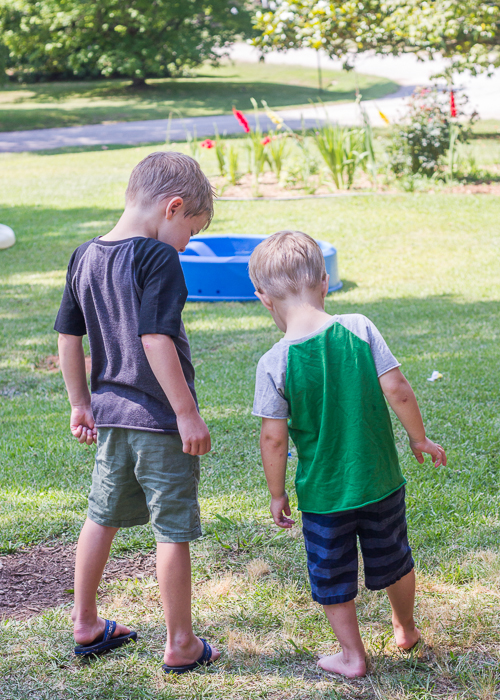
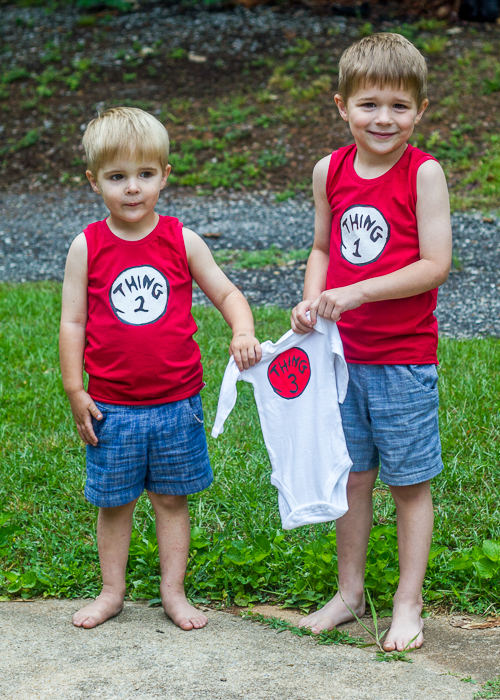
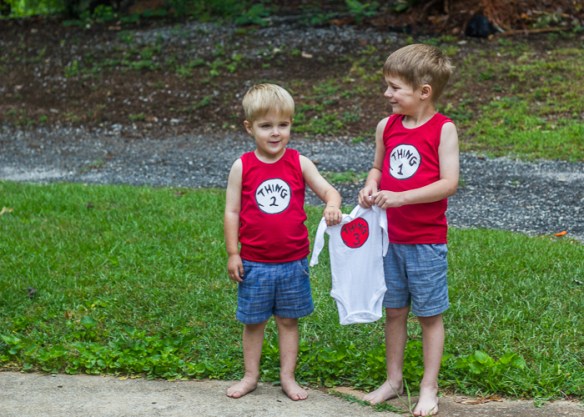
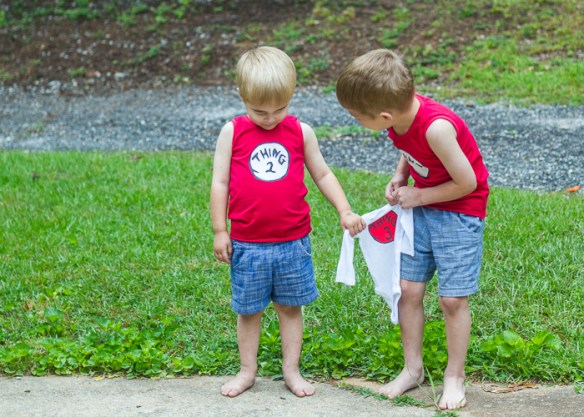
I promised myself I wouldn’t sew matching outfits for all 3 boys but here I am, unable to resist the pull. They’re not strictly matching- everyone’s got a little something different going on, but all 3 boys are sporting something from this fabric.

sidewalk-knit-showcase-11-of-12

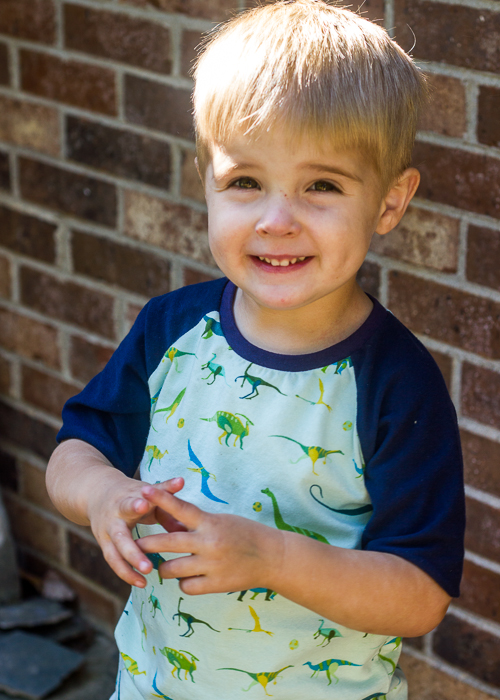
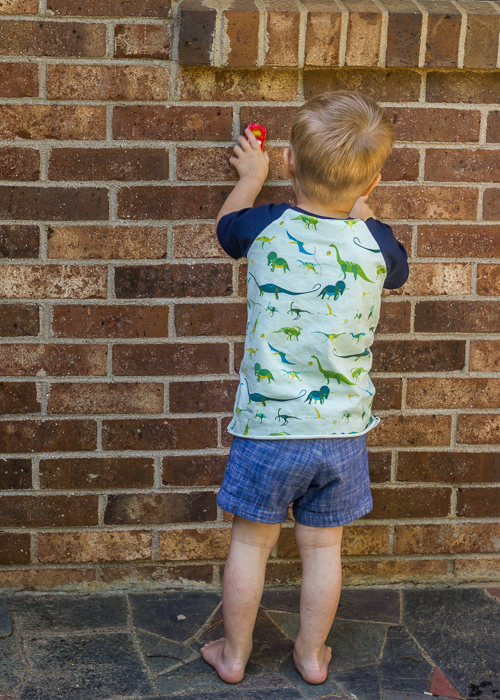
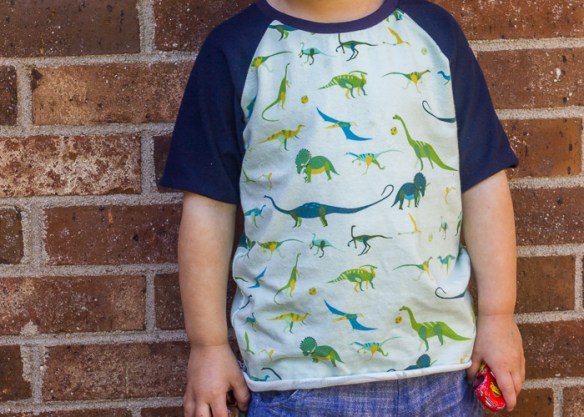
Let’s start oldest to youngest, shall we? I made Oliver a safari raglan in the size 6. I used the coordinating solid Cloud 9 interlock in snow for the sleeves. Just a basic tee but I took the extra time and actually hemmed his up, so it looks nice and professional.

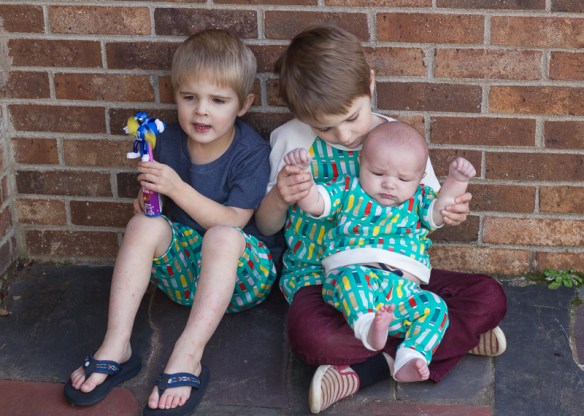
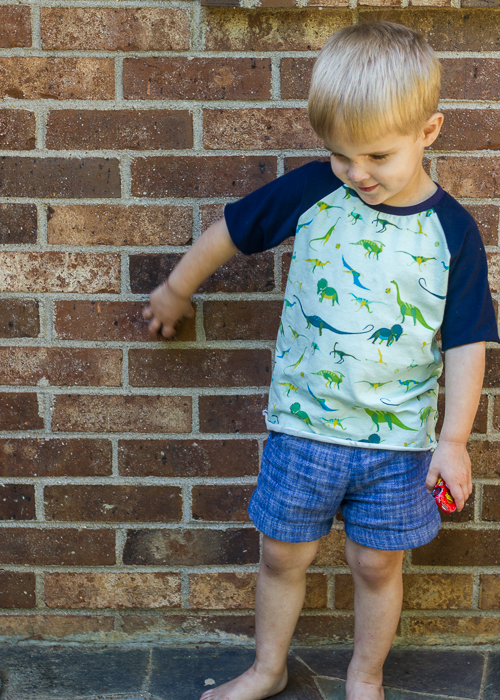
For Eliot, I really wanted to make some knit shorts and love the look of the mini hudsons so I started with that pattern as my base, cut it off at his knee, and hemmed them up instead of using cuffs. Since the pants pattern is made to have a baggier thigh and thinner calf, I smoothed out the curve of the leg piece as I was cutting it out to make it a little more straight legged, but I think it still needs a little more work to be perfect.sidewalk-knit-showcase-3-of-12

The pockets and waistband look so cute though so I’m still considering it a win. And he loves “comfy pants” so I know they’ll get a lot of wear. His shirt is just a flashback skinny tee in a size 4 with a chest pocket. The blue knit is an unknown sourced jersey knit from my stash.

sidewalk-knit-showcase-10-of-12

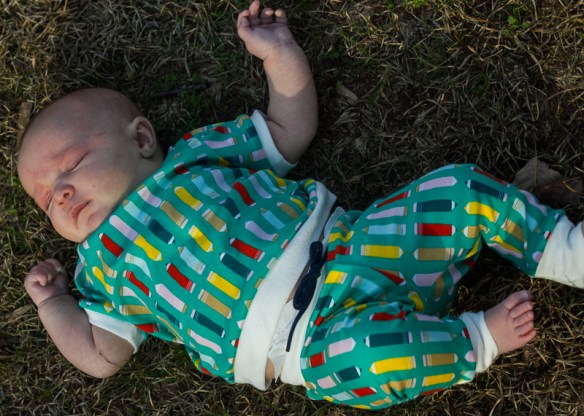
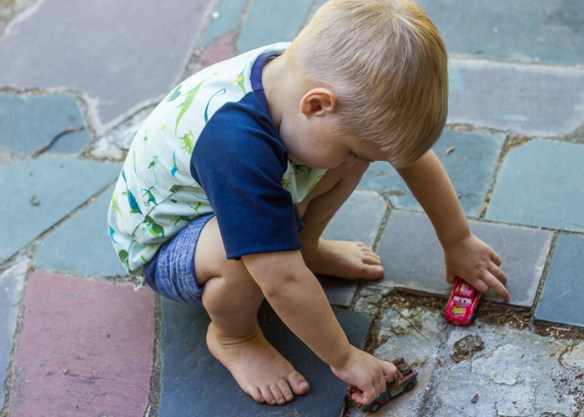
And then we have Charlie- (um yeah, welcome to the blog Charlie!- I’ll try to do a legit introduction post sometime soon, but for now, here’s my adorable 3rd baby boy- Charlie Edmund. 🙂 ) Charlie’s outfit is from Brindille and Twig- a fairly new pattern company to me but I’m liking what I’ve sewn from them! His shirt is their new Ringer Tee (free pattern!) in a 3-6 months size. And his leggings are the drawstring leggings (also 3-6 months). Love both of these patterns and I see myself making a lot more of each of them.


I really enjoyed getting to sew again. I’ve missed it. Thanks to Cloud 9 and Rae for providing me with the fabric. I’m a huge fan and will totally be picking up some more to use for more fun boy sewing. sidewalk-knit-showcase-4-of-12

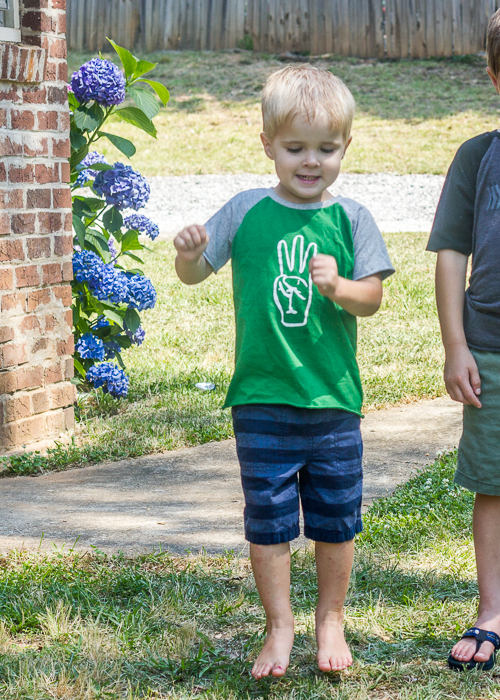
And if anyone has tips for getting decent pictures of 3 kids together, please pass them on! We had to settle for least worst when choosing pics for this post. It’s been too long since I took blog pics and my older two have forgotten how to act for the camera! Goobers. This last picture is kinda my fave though…so much personality coming through! sidewalk-knit-showcase-9-of-12


Advertisement

Halloween 2016: Ninja Turtles

ninja-turtle-costumes-1-of-10

There was a lot of back and forth this fall before I finally got the boys to settle on their Halloween costumes. For a while, I thought they were going to be superheroes again but then they finally settled on Teenage Mutant Ninja Turtles.

ninja-turtle-costumes-2-of-10

I was pretty excited because this seemed like a fairly straightforward costume. I would start with the same base as last year and then add the accessories. It ended being a little more of a brain-bender than I had anticipated figuring out how to make everything, but in the end I’m super happy with the results!

ninja-turtle-costumes-9-of-10
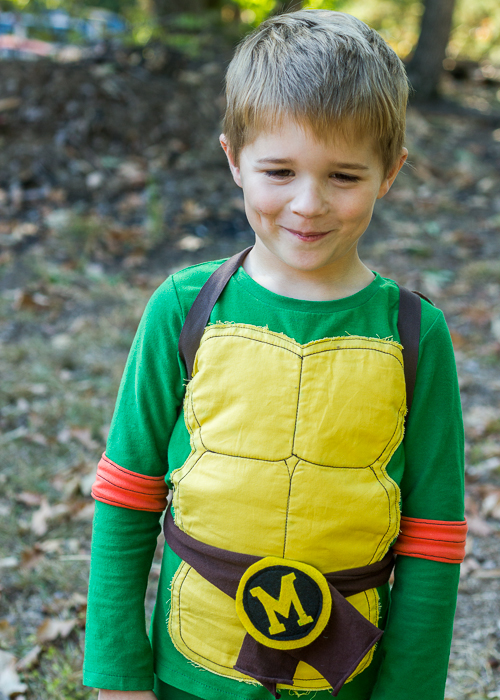
My one qualification with handmade costumes is that if I’m going to spend a ton of time on them, I want them to be wearable the remainder of the year. Last year’s costumes got worn as pjs all year long, and I was hoping for the same results this time….meaning everything needs to be washable!

ninja-turtle-costumes-3-of-10

I started with a very basic outline: Flashback Tees for the tops (sized 4&5)and Fancy Pants leggings for the bottoms (sized 4&6). Eliot’s pants are a wee big but at the rate he’s growing hopefully that just means they’ll last a while longer! The green fabric is Laguna Jersey in Grass which Rachael at Imagine Gnats was so kind to stock for me when I contacted her to see if she had any of this green color I needed! Other than that green jersey, all fabrics are from my stash.

ninja-turtle-costumes-4-of-10

I used some more laguna jersey from my stash to make the elbow and knee bands. They are stitched on with some stretch thread so that the threads won’t break with movement!

ninja-turtle-costumes-7-of-10

The shells on the front of the tees are made with yellow Kona cotton and a layer of quilt batting in between the tee and the shell. I wanted something to add a little bulk but since it had to be washable, I didn’t want too much bulk. The quilt batting gave the perfect extra layer to the shell. I just free cut and stitched these based on some pictures I had of the cartoon ninja turtles.

ninja-turtle-costumes-5-of-10

The belts are made from some strips of brown laguna jersey: velcroed closed at the front and the felt initial circles are stitched on over the velcro.

ninja-turtle-costumes-6-of-10

The back shells are little backpacks made of felt. Not washable but not meant to be worn all the time either. I stitched a shell design on the green felt and then stuffed the backpacks with fiberfill stuffing and stitched them closed. I also added a piece of cardboard inside them against the back of the backpack to add some firmness to the shell.

ninja-turtle-costumes-10-of-10
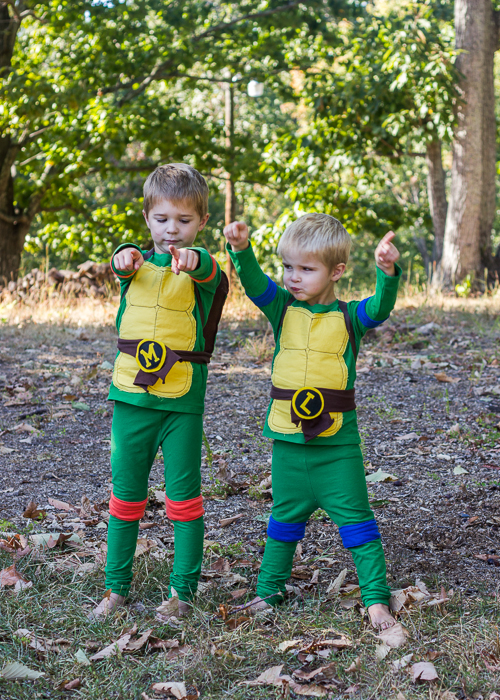
I made the boys some masks with more jersey scraps but they’re not sure they want to wear those. Eliot completely boycotted his and Oliver only wanted to wear one for a few pics. We shall see what happens at Halloween. Masks are always a bit iffy so I didn’t spend a lot of time on them .

ninja-turtle-costumes-8-of-10

These crazy boys and their photoshoots… I asked them to act like Ninja Turtles and these are the poses I get! But they really love their costumes, and I’m so happy I got them finished! I have plans for a full family set of Ninja Turtles for our Halloween costume party this coming Saturday but we shall see if this very pregnant lady can manage to get the adult versions done too! At least the kids are good to go now.

Striped Rowan Sweatshirts

I’ve got a post over on imagine gnats showing off the boys latest sweatshirts. I absolutely love this indigo striped knit by Robert Kaufman and had so much fun mixing and matching the details up to make them each a fun sweatshirt. I love that they coordinate but aren’t completely matching…

Head over here to see lots more pictures and get all the details! denim-knit-sweatshirts-2-of-11


A baby quilt for Chloe

So you know that I’m expecting this fall, but the other excited news is that I have two sisters-in-law also expecting! Both with baby girls- so yay for some baby girl sewing in my future! I’ve actually already had a bit of fun sewing for them both, but am waiting to share here until I can give the gifts to the expectant mothers.

chloe's baby quilt (2 of 6)We are on a nice long road trip this week to Wisconsin for a family wedding, and it just so happened that my brother’s house was the halfway point so we stopped there for the night and I was able to give baby Chloe’s quilt to her mommy and daddy!

chloe's baby quilt (4 of 6)I’ve had this charm pack sitting around for a  very long time and while deciding on a quilt for my upcoming niece, I realized that these charm squares were the same colors as the nursery theme- match made in heaven!

chloe's baby quilt (5 of 6)
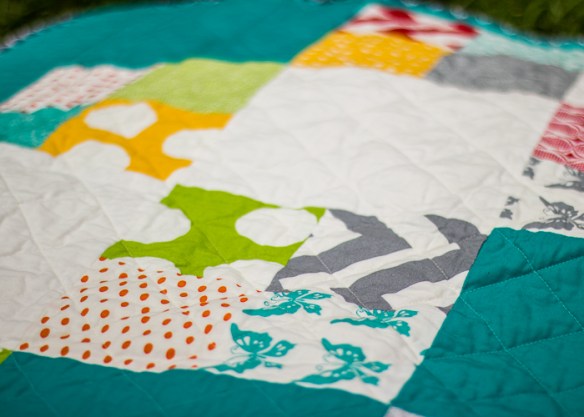
After some pinterest searching, I decided on the fast 4-patch quilt pattern. It was a super quick sew since I didn’t have to cut out the smaller squares! I alternated the 4-patch squares with white and teal solid Kona cotton blocks. The design was an evolving one, and I was thankful for my quilt layout board on the wall in my sewing room to hang the blocks up as I decided how exactly to arrange them. I super love the end result!

chloe's baby quilt (6 of 6)My sil loves teal and chevron so I used this chevron print from my stash and combined it with the grey solid and grey polka dots to make an easy backing. The quilt is bound in some dark grey metro dots from ancient days… Are you sensing a theme? My goal was to have all the fabrics come from my stash and I’m happy to say I was successful!

chloe's baby quilt (3 of 6)I quilted it with a crosshatch pattern and love the crinkle it gives to the finished quilt. I’m normally really bad about labels but I wanted baby Chloe to have this quilt as a keepsake so I hand embroidered a little note for her on the back of the quilt.

chloe's baby quilt (1 of 6)

Baby Chloe is due mid-September and I am so excited to have a niece! Hopefully she likes to play and snuggle atop her her baby quilt!

Tooth Fairy Pillow DIY

tooth fairy pillow (6 of 8)
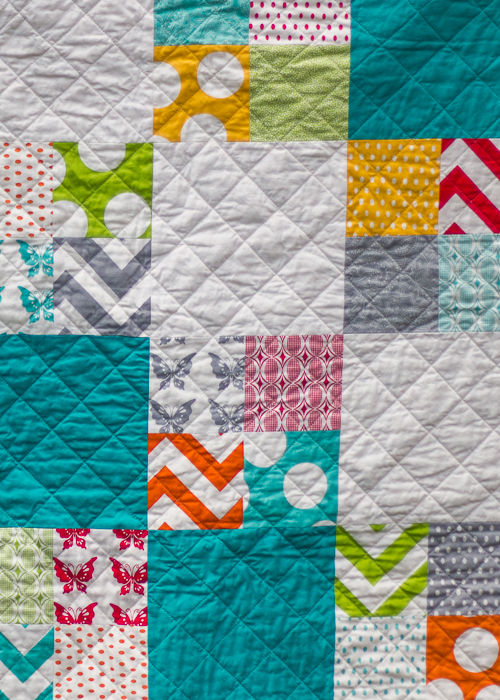
We had our first loose tooth experience this weekend! I can’t believe that this season is upon us already… he’s only 5! But apparently 5 is not too young so there you have it.

We were out shopping this weekend and saw a tooth fairy pillow, and Oliver asked if I could make him one. What can I say to a request like that? We made one together the very next day!

tooth fairy pillow (1 of 8)

After looking up lots of tooth fairy pillow ideas online, we settled on a teepee version. Oliver picked out the all the fabrics… I think he did a great job matching them up! The background is a print from the Lorax Dr. Seuss line (Truffula Tree Tufts- sold out now) and the pockets are fussy cut from the Celebrate Seuss Tossed Characters print (still available here).

tooth fairy pillow (4 of 8)

I thought I’d explain how I made the pillow in case anyone else would like to make one too.  I made an equilateral triangle template- 10″ wide at the base and 10″ tall- and used that to cut out two triangle pieces from my fabric. Before I sewed the triangles together I made two little pockets and sewed one to each triangle piece…about 1.25″ from the bottom.

tooth fairy pillow (8 of 8)

After I had the pockets sewn on, I sewed the triangle pieces right sides together- leaving a 2″ unsewn section at the bottom. I clipped all the corners and flipped the pillow right side out through the unsewn bottom section. Then Oliver helped me stuff the pillow with polyfill, and he even helped me handsew the bottom section closed!

tooth fairy pillow (3 of 8)

Easy, peasy! Finished pillow size is 9″ high x 9″ base. The whole operation took less than an hour from start to finish! And when we were finished, Oliver told me that it turned out exactly how he had wanted it…fist pumps all around. 🙂 Nothing better than a satisfied customer and it was fun to have him so involved in the whole process.

tooth fairy pillow (5 of 8)

Notice there are two pockets-  we decided that one side was for the tooth lost and the other for the forthcoming money to be left by the tooth fairy. 😉 He hasn’t lost that first tooth yet, but it’s getting looser by the day so I anticipate this pillow getting used very soon!

tooth fairy pillow (2 of 8)

Birthday Raglan Tees

birthday raglans (6 of 6)

I haven’t had a chance to show either of the boys’ birthday shirts yet so I thought I’d just take pictures of both at once to show you. I started this tradition of birthday number tees back for Oliver’s first birthday and although I’m almost always sewing them the night before, I have yet to miss a year!

birthday raglans (2 of 6)

This year I used the safari raglan pattern for both boys. In the past I have done more intricate designs (see last year’s superhero stormtrooper), but with all that’s going on this year, I needed something quick and easy.

birthday raglans (1 of 6)

I finally realized that there was a short sleeve option on the safari pattern (duh!) so I printed that off and used that to make the short sleeves. I can’t quite remember now, but I think they are wearing a size 3 and 5. And as you can see, they are completely unhemmed…birthday tees are meant to be fun and casual. Who needs a hem on that?

birthday raglans (3 of 6)

Both boys’ tees are made from Laguna  jersey from the Imagine Gnats shop... I’m telling ya, it pays to keep a variety of colors in stock for last minute tee-making needs!

birthday raglans (4 of 6)

Oliver’s stencil turned out a little harder to read than I had anticipated…I started out with a black stencil but you couldn’t see that at all so I mixed white and black to reach a nice gray shade and repainted it. But on that dark gray tee, it ended up a little more subtle than I had planned. It does have kind of a nice echo effect with the black paint behind the gray though.

birthday raglans (5 of 6)

Eliot’s stencil is the result of me searching pinterest for 3rd birthday shirt ideas. I saw several variations of the three fingers tee and thought it was perfect for him as he loves to hold up his fingers and tell everyone how old he is. Unexpected side effect: I made the shirt green as that’s his favorite color and now he calls it his Yoda shirt because Yoda is green, therefore anything green belongs to Yoda. 🙂 Kids and their logic.

And that’s a wrap on birthday tees for another year! I don’t know how long they’ll want me to keep making these but I’m going to keep going as long as I can. 🙂


Thing 1 & Thing 2 Tanks…and a Thing 3

things 1 and 2 tanks (7 of 9)

Soooo, there’s a reason my sewing has been sporadic lately. Which you may not have noticed but I have felt the lack of quite sorely. There’s another Crook baby coming late November 2016. Yay…and yikes. 🙂

things 1 and 2 tanks (2 of 9)

We are all very excited, and I am very excited to be exiting first trimester next week. Time to get some energy back around here! Obviously a new baby means some reveal sewing was in order! I have wanted to make the boys Thing 1 and Thing 2 shirts forever and this seemed like the perfect opportunity to do that…and throw a little thing 3 in the mix. 🙂

things 1 and 2 tanks (6 of 9)

I used the Twisted Tank pattern from Titchy Threads- non twisted version obviously. Love this pattern for perfect summer tanks! Eliot’s is a size 3 and Oliver’s is a 4 with a 1/2″ added in length and a little extra width as well (I didn’t have the 5 traced and couldn’t find my pattern pieces to trace it out so we improvised).

things 1 and 2 tanks (3 of 9)

I found a template online for the logos and did some freezer paper stenciling to make them. I haven’t perfected doing two different paint colors on a stencil yet, but these turned out pretty good overall. I had to remind myself no one will see all the little imperfections in the paint.things 1 and 2 tanks (1 of 9)

Tank fabric is Laguna knit in red (what else did you expect? 🙂 )from Rachael’s shop– currently on vacation but will re-open the end of the month.

The baby onesie is also freezer paper stenciled…onesie is courtesy of carters. Hehe, I don’t sew everything!

things 1 and 2 tanks (5 of 9)

Boys shorts are also handmade Sunny Day shorts from last summer…so glad they still fit because I just love how cute they are.

things 1 and 2 tanks (8 of 9)

And for inquiring minds, yes I will find out what it is! Who knows whether there will be girl sewing in my future or not… Oliver is convinced it’s a girl but we will be happy either way. I mean, I’ve got the boy sewing thing going for me already so I’m ok with another cute boy. 🙂 And if it is a girl, I’ll be needing all the girl sewing patterns you can throw my way! things 1 and 2 tanks (4 of 9)


Art Museum Shorts and some Bow-ties

art museum shorts  (6 of 10)

If you follow me on Instagram, you probably noticed that my sister got married this weekend. As my two boys are her only nephews, she wanted to have them be the ringbearers in her wedding. These two adore their auntie and are so sad that she is moving away- but the lego sets she got them as a reward for walking successfully down the aisle are soothing their wounds. 😉

art museum shorts  (1 of 10)

FYI all these photos were taken with my iPhone as quick wedding snaps…And sorry about the overload of pictures. I just need a place to show off all of this cuteness!

art museum shorts  (4 of 10)

My sister wanted a traditional Southern look for the boys’ outfits- seersucker, bowties, suspenders (which I picked up on amazon btw), boat shoes…basically the southern prep that is so not my typical style. But on a 2 and 5 year old anything can be cute so I was up for whatever she wanted.

art museum shorts  (2 of 10)

I gave her several pattern options for the shorts and she picked out the Oliver+S Art Museum Trousers. I made a pair for Oliver for Easter last year and they are still plenty big in the waist so I stuck with the size 3 for him. I actually made Eliot a size 3 also. He’s still in a diaper and so has some extra chunk around the middle. It was super nice not to have to trace another size with all those pattern pieces involved!

art museum shorts  (9 of 10)
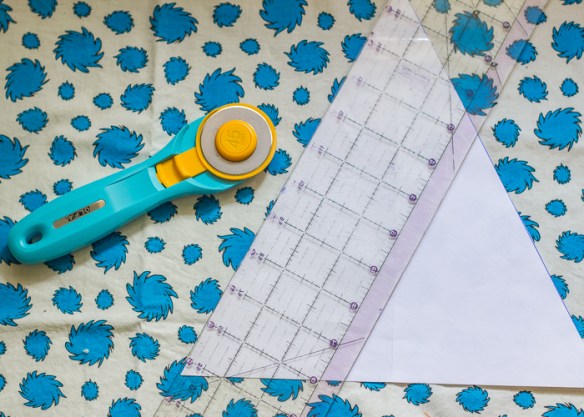
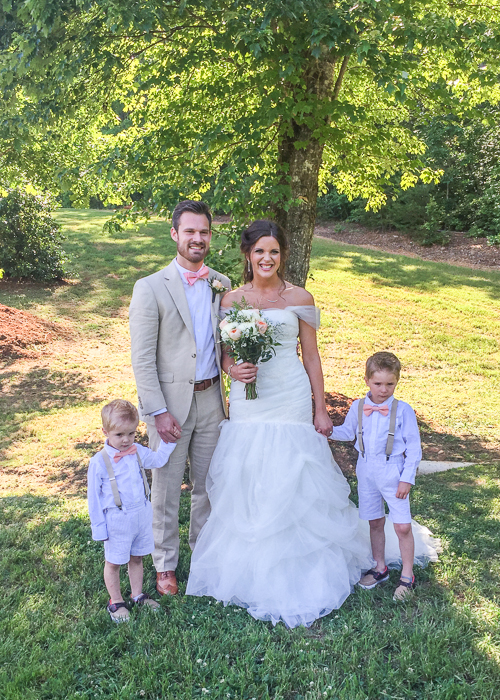
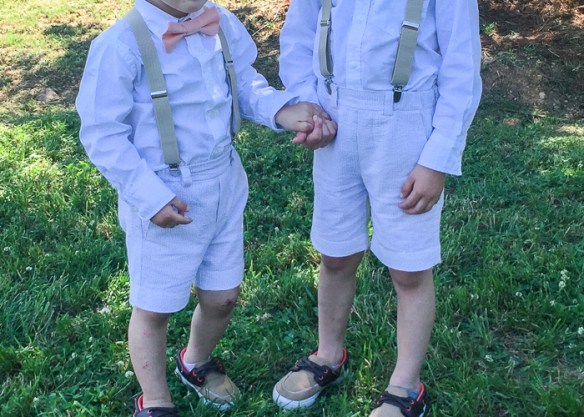
In order to make the trousers into shorts, I just cut off the pants about 6 inches from the hem when I was cutting them out and then tried them on the boys once they were sewn together to measure for the exact hem length.art museum shorts  (3 of 10)
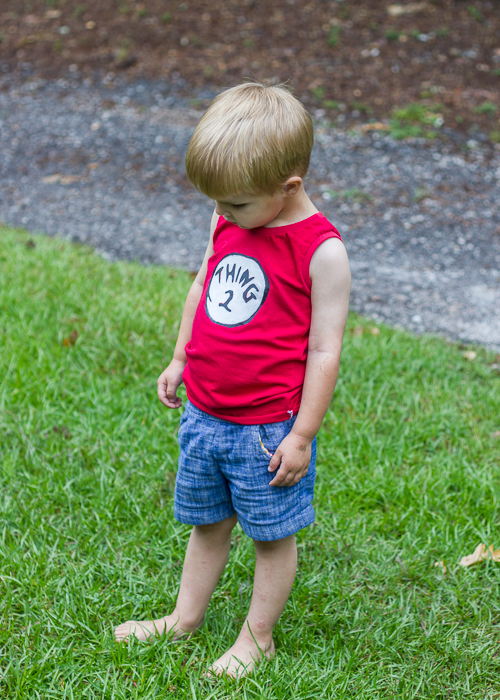
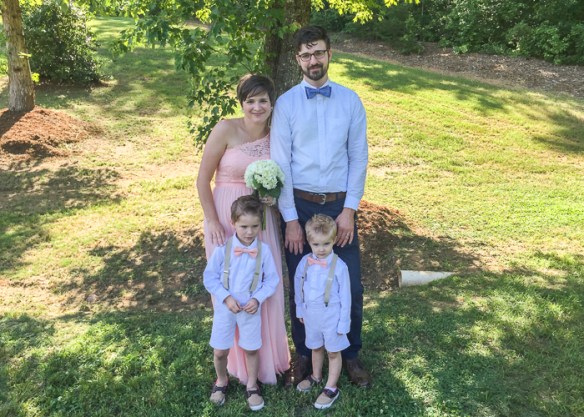
I must admit to not being a huge welt pocket fan…I mean they look nice and all but they’re a lot of work for a little boy’s outfit. I made Oliver’s shorts with the actual welts, but Eliot’s shorts are fake pockets…and I don’t regret that move one bit! Now if I hadn’t made him his front pockets, he might have been rebelling on me. 🙂 See below picture for proof of his love of pockets.

art museum shorts  (8 of 10)

The seersucker is a tan/white blend that I picked up at Five-Eighths Seams on a trip to Charleston last fall. If you ever are in need of seersucker, they’ve got it in almost every color combination possible! I was pretty relieved to find it in person so I knew it was the color I was looking for.

art museum shorts  (7 of 10)
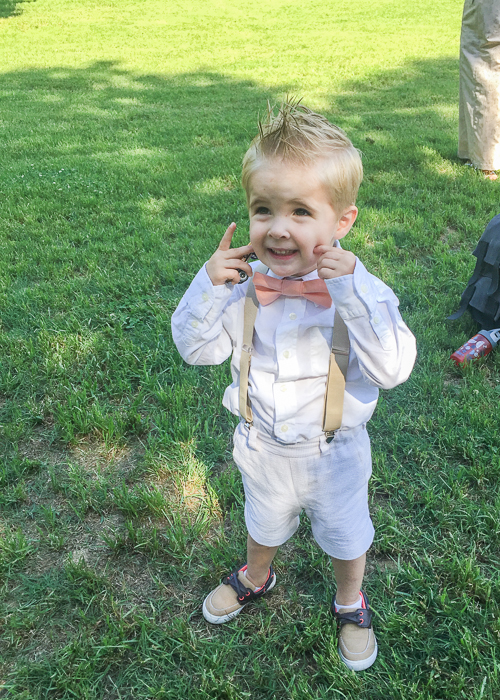
Now on to the bow ties… I made some bow ties a long time ago when Oliver was in his Aunt Katie’s wedding. But I made legit tying bow ties that time and they were such a pain to keep tied on little boys. I remembered that I had seen Jane post a bow tie she made for Henry that looked about right so I went searching on her blog and found it here… with a link to the tutorial here

art museum shorts  (5 of 10)

The only change I made to the bow tie tutorial was to use some SF 101 in place of felt or fleece. I am super happy with how well these turned out! The bow was the exact stiffness that I wanted and the velcro closure in the back made it easy to get on and off the boys! The fabric is Kona peach which I ordered from fabric.com and it happened to match the bridesmaids peach dresses exactly. Woot woot!

art museum shorts  (10 of 10)

The boys did an awesome job walking down the aisle and quite stole the show with their cuteness!! I just love how great these outfits turned out and hope they will get some more use out of them as church clothes this summer.

Safari Raglan- Dinosaur Style

dinosaur safari raglan (5 of 7)

Ok, so I may be overusing this safari raglan pattern but it’s just such a quick and easy sewing project that I can’t resist! I’ve been in the middle of a sewing slump- mainly because I have some projects I HAVE to get done for my sister’s upcoming wedding and have been putting them off… Yeah I’m so bad about finishing those kind of things. It’s the welt pockets, y’all. Gotta make a pair of welt pocket shorts and I’m just not feeling the love right now!

dinosaur safari raglan (4 of 7)

This past weekend, I wanted to push through the slump by sewing some thing completely for fun. I got this Lizzy House dinosaur knit from Rachael a few months ago- I think I bought the very last bit that she had in stock! I knew the boys would love this fabric but hadn’t decided exactly what to do with it yet.

dinosaur safari raglan (2 of 7)

A raglan tee seemed like the perfect way to show off this print. I paired the dinos with some laguna jersey in navy. (you know me and my laguna love. 😉 ) Like I mentioned, I used the safari raglan by titchy threads. I used the same mods as I did for the swamp rabbit raglans I made for the boys this winter- sewing up the size 2 but moving the center fold over 1/8″ to add a little width and adding 1/2″ in length to the bottom. One of these days, I’ll just go ahead and trace out the 3 and stop being lazy!

dinosaur safari raglan (6 of 7)

I wanted these to be short sleeved and I didn’t have the short sleeve option for the pattern printed out, so I just eyed it and chopped the sleeve off around where I thought it should be. They turned out more elbow length than short sleeve, but I kinda love the elbow length so I think I’m going to leave them as-is.

dinosaur safari raglan (3 of 7)

I had planned to hem the sleeves and bottom hem but decided I was too lazy and just left them to roll up. They look so cute all rolled up naturally so I’m calling it a  design feature.

Oh and those shorts are some I made for Oliver waaayyy long time ago. They’re a little short for Eliot now and I love seeing his little knobby toddler knees hanging out of them. No way am I letting that hem out and getting rid of that cuteness.

dinosaur safari raglan (1 of 7)

I did make a tee for Oliver too. I was going to make his a little different than Eliot’s but he liked Eliot’s so much that we just did an exact copy. Hey, he asked for it! Gotta encourage the matching while it lasts. 😉

12917784_1719345668339948_556771109_n
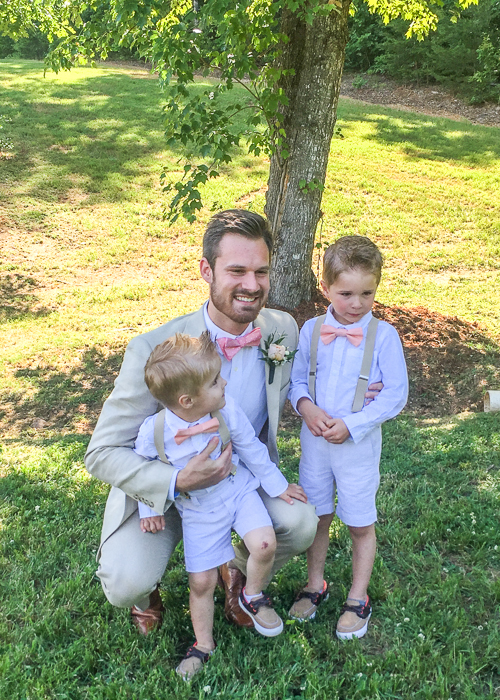
Oliver didn’t end up in the pictures because he’s not feeling well today but here the IG picture from the other day so you can see his. FYI he requested to take the picture in front of the quilt ladder because “it would look all colorful.” Love getting his input now. It’s so cute.

Swamp Rabbit Raglans

swamp rabbit raglans (3 of 5)

A few weeks ago we took the boys to our little downtown outdoor ice skating rink that opens every holiday season. It just so happened to be the night that the local hockey team had some players there to skate with the crowd and the boys charmed the manager into giving them some hockey tees. Of course the only size the guy had with him were men’s Larges but he thought the boys might like the tees anyway… Lucky for them, this mama knows how to sew. 😉

swamp rabbit raglans (1 of 5)

I used the safari raglan pattern and centered the pattern pieces over the graphic print. I was a little worried that the print would be too big to fit on Eliot’s shirt but thank goodness, it fit just perfectly! I’ve sewed this pattern so many times, I didn’t even need to look at the instructions while I was making the shirts- just used the pattern pieces and whipped them up. I do so love a quick and easy project like this!

swamp rabbit raglans (2 of 5)

I used some laguna jersey in my stash to accent the tees- navy for Eliot and brown for Oliver. The tees are sizes 2&4 with a few mods…I moved over the center fold about 1/8″ to give a little more width and also added 1/2″ to the shirt hem and 1/4″ to the sleeve hems. I wanted these to be big enough to wear next year too but not too overly big right now. I think they turned out just about right. Oliver’s sleeves are a teeny bit short but I’m just going to add a cuff to them and they will be fine…especially easy to do since i was super lazy and didn’t hem the sleeves or shirt hem. 🙂

swamp rabbit raglans (4 of 5)
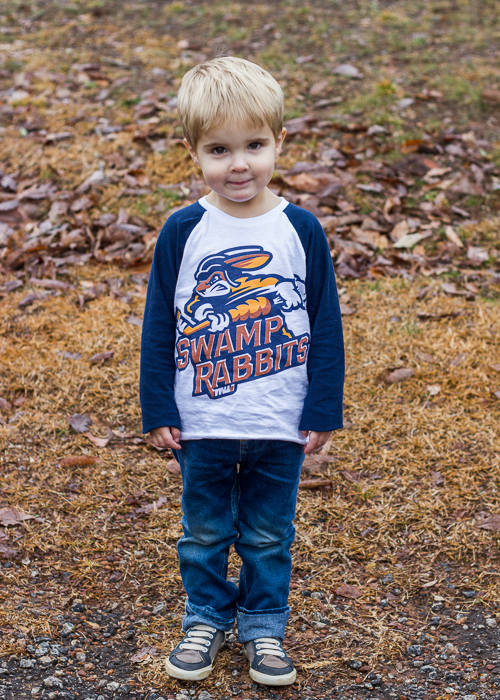
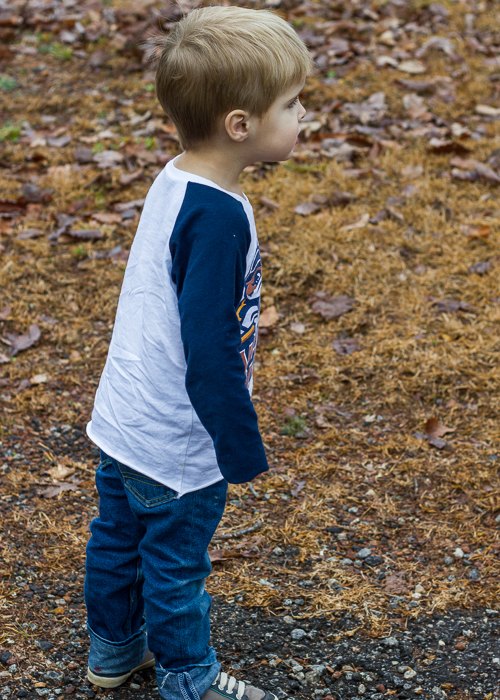
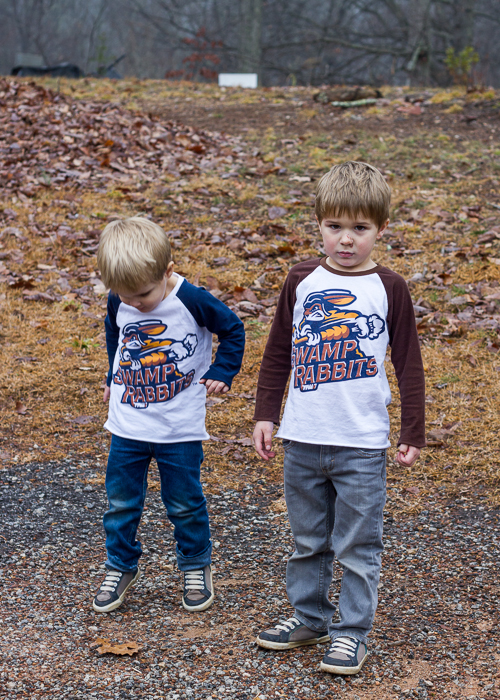
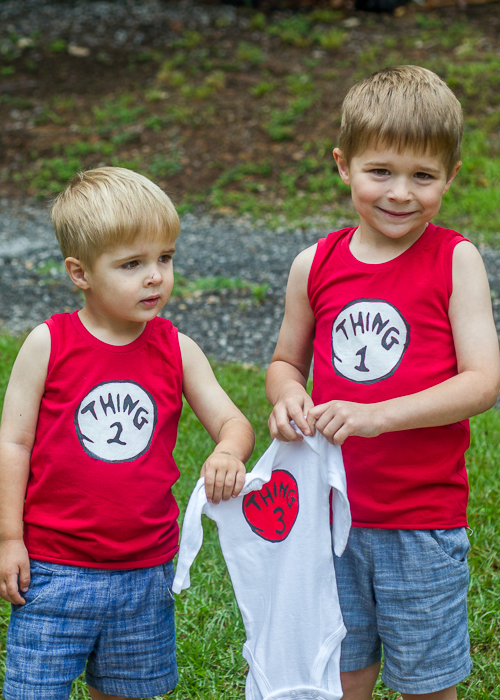
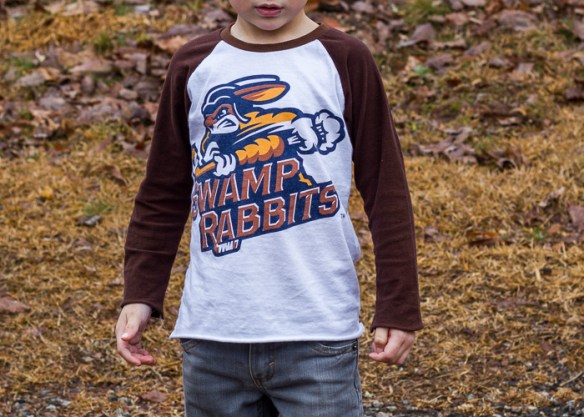
The boys were so super excited to wear their new shirts and have worn them several times since I finished them last week. I love being able to give them little custom things like this…part of what makes sewing so fun. And we may have never been to a hockey game, but the boys can represent our local team with pride now in their new shirts. 😉 Also Oliver is going through a difficult photography stage- ugh. He’s really in love with his shirt but did not want to smile for the camera…goober. Oh well. Guess I’ll have to work on my photo bribery skills for next time!

swamp rabbit raglans (5 of 5)