Safari Raglan- Dinosaur Style

dinosaur safari raglan (5 of 7)

Ok, so I may be overusing this safari raglan pattern but it’s just such a quick and easy sewing project that I can’t resist! I’ve been in the middle of a sewing slump- mainly because I have some projects I HAVE to get done for my sister’s upcoming wedding and have been putting them off… Yeah I’m so bad about finishing those kind of things. It’s the welt pockets, y’all. Gotta make a pair of welt pocket shorts and I’m just not feeling the love right now!

dinosaur safari raglan (4 of 7)

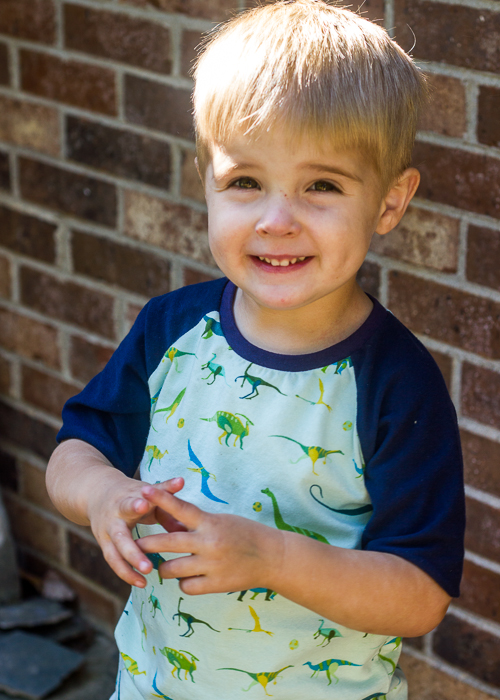
This past weekend, I wanted to push through the slump by sewing some thing completely for fun. I got this Lizzy House dinosaur knit from Rachael a few months ago- I think I bought the very last bit that she had in stock! I knew the boys would love this fabric but hadn’t decided exactly what to do with it yet.

dinosaur safari raglan (2 of 7)

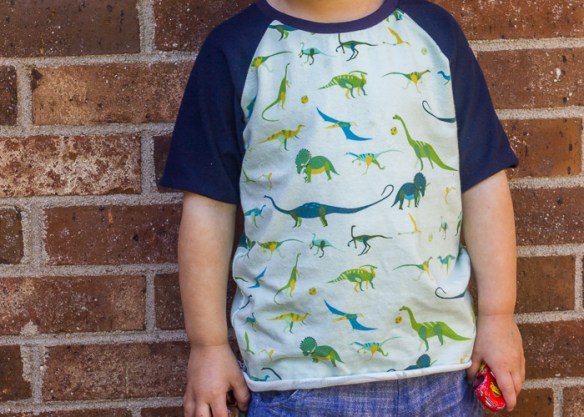
A raglan tee seemed like the perfect way to show off this print. I paired the dinos with some laguna jersey in navy. (you know me and my laguna love. 😉 ) Like I mentioned, I used the safari raglan by titchy threads. I used the same mods as I did for the swamp rabbit raglans I made for the boys this winter- sewing up the size 2 but moving the center fold over 1/8″ to add a little width and adding 1/2″ in length to the bottom. One of these days, I’ll just go ahead and trace out the 3 and stop being lazy!

dinosaur safari raglan (6 of 7)

I wanted these to be short sleeved and I didn’t have the short sleeve option for the pattern printed out, so I just eyed it and chopped the sleeve off around where I thought it should be. They turned out more elbow length than short sleeve, but I kinda love the elbow length so I think I’m going to leave them as-is.

dinosaur safari raglan (3 of 7)

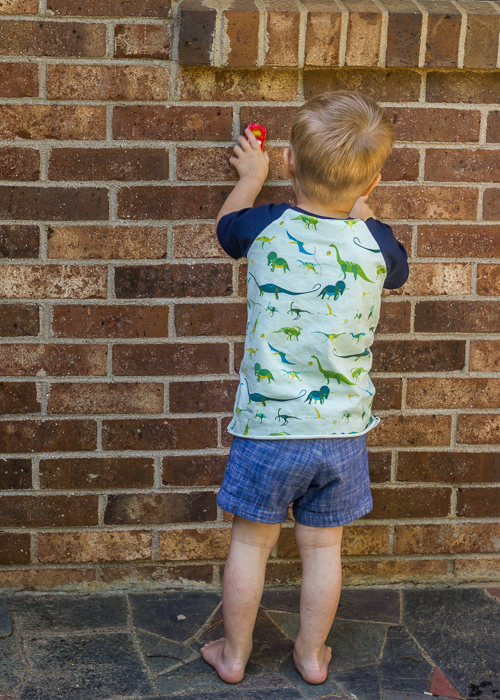
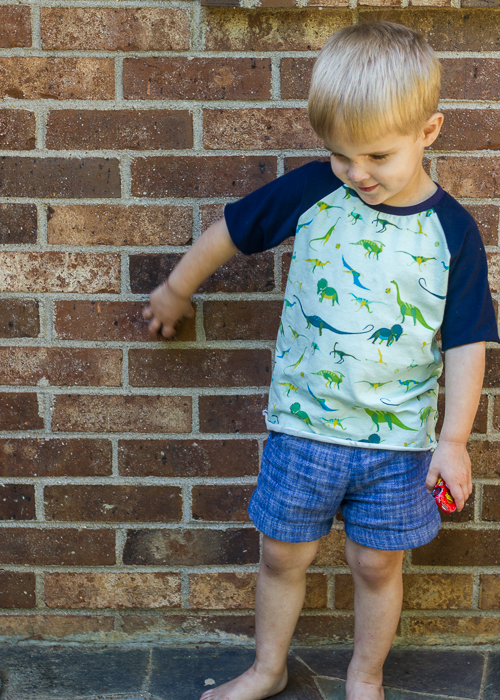
I had planned to hem the sleeves and bottom hem but decided I was too lazy and just left them to roll up. They look so cute all rolled up naturally so I’m calling it a  design feature.

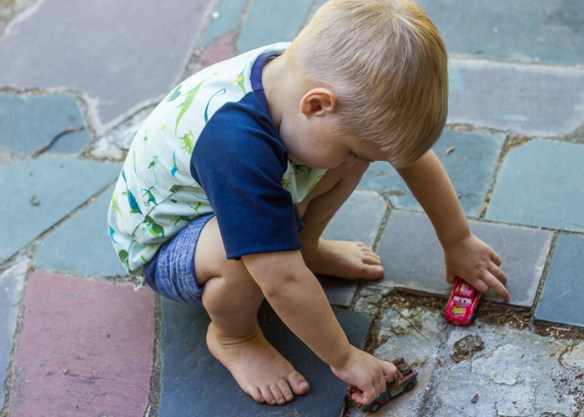
Oh and those shorts are some I made for Oliver waaayyy long time ago. They’re a little short for Eliot now and I love seeing his little knobby toddler knees hanging out of them. No way am I letting that hem out and getting rid of that cuteness.

dinosaur safari raglan (1 of 7)

I did make a tee for Oliver too. I was going to make his a little different than Eliot’s but he liked Eliot’s so much that we just did an exact copy. Hey, he asked for it! Gotta encourage the matching while it lasts. 😉

12917784_1719345668339948_556771109_nOliver didn’t end up in the pictures because he’s not feeling well today but here the IG picture from the other day so you can see his. FYI he requested to take the picture in front of the quilt ladder because “it would look all colorful.” Love getting his input now. It’s so cute.

Advertisement

Custom Quilt Top

Ian’s cousin approached me a while back and asked if I would be willing to make them a custom twin-sized quilt to be used for their little girl’s bed. Although I don’t normally do quilt commissions, I thought this one would be fun to do because she was giving me free reign with the fabrics. We agreed on a color scheme of apple green, purple and white in a simple patchwork pattern. I decided to make the squares 5.5″ to mimic the look of charm squares. The finished quilt top measures around 70×90.

Beth's Quilt

Purple is my favorite color so I enjoyed pulling fabrics together for this quilt!  This is the first time I have used my design wall for a large scale quilting project and it was so nice to be able to use it to hold my pieces and not have to crawl around on the floor!  Thankfully, they have also given me plenty of time to finish this quilt- knowing that I have lots of projects running concurrently. I finished the quilt top last week and have been waiting for a nice day to photograph it. I thought today would finally be the day, but when I went outside, the wind was blowing quite hard and kept throwing my quilt around! Oh well, I ended up with a few fairly decent pictures and have no patience to wait for a less-windy day. 🙂

IMG_8849 IMG_8853

I need to go out and get some more fabric for the backing, and then I will begin quilting. Hopefully it will get finished in the next few weeks!

Diaper Caddy Take 2

In my wrap up post a few weeks back, I briefly mentioned that I made a divided basket using Anna from Noodlehead’s new pattern. I liked the main idea but wasn’t super happy with my results so I wanted to try a few more out to see if I could tweak some things and end up with a better result- hopefully to offer for sale in my new booth (Squee!)

Diaper Caddy

Set up for the new space was this morning, and I stayed up way too late last night finishing this basket and accessories for it so that I would have it ready for today. So glad I did though because I love this! Aren’t the owls just adorable?!

Changes from last time:

  • Did not pre-wash fabric
  • Only used one layer of interfacing- Craft Fuse 808 instead of SF 101 and Fusible Fleece

Diaper Caddy

Only a few changes, but they made a huge difference. You see, I am not super comfortable using interfacing because I don’t have much experience with it, and the type where you have to wet the rag, press until dry, and then continually re-wet rag and repeat the process to adhere all interfacing to fabric is somewhat tedious in my book! Doing it for two layers of interfacing took me way too long. Then last time, I was too impatient to let the fabric dry after this process and sewed it together while wet- stretching out my outer fabric to be bigger than the lining. In contrast, the craft fuse 808 just needs a quick iron-on to adhere to your fabric…soo much faster and easier! I am also quite happy with the stability it gave to my basket. Not pre-washing the fabric kept it stiffer as well. FYI the outer fabric is duck cloth and the inner fabric is Kona cotton.

I love this pattern even more the second time around. Anna does a great job with making her instructions clear and easy to understand. My problems the first time were all user-error not pattern error. 🙂

Diaper Caddy

I wanted to make this diaper caddy part of a gift set so that someone can buy it for a baby gift and not need anything else to complete it, so I also whipped up some handmade burp cloths for the inside. I matched up some terry cloth with cute cotton prints from my stash. The burp cloths ended up around 8×13 in size… I love this result and made up a few bundles of burp and wash cloths to sell separately in the shop as well. This is a great project to do assembly line style! Not pictured is the newborn diapers and wipes I picked up on my way to the shop this morning to complete the caddy. I already have boy fabric picked out to make more of these and can’t wait to get on it! Hopefully others like these as much as I do! Oh and for those of you non-locals, I will be updating the etsy shop with some baskets and burp/wash cloth sets very shortly!

Burp Cloths


Shop booth set up went quite well this morning and we are headed back after Little Man wakes up from his afternoon nap to show the family my new space and take some pictures for the blog. 🙂 Now to keep myself from running down there every other day to see if I’ve sold anything. 😉

Washi Tunic

Are you aware of the Washi week happening over at Made by Rae? I have been stalking her for a month anxiously awaiting the release of this pattern. And this weekend, it finally was available! Although I had several other projects in the works, I quickly brushed them aside to begin on my own Washi clothing. I was going to begin with the dress but didn’t have enough of this Lizzy House print for a dress so settled for the tunic. I cannot begin to tell you how much I love this tunic The pattern is so quick and easy to follow, even for a fairly new clothing seamstress like myself. Who doesn’t love a shirt with no closures? So proud of myself for successfully mastering shirring in this tunic! 🙂

It is a PDF pattern so you print it out and tape together before tracing it onto some sort of pattern tracing paper. That is the most tedious part in my opinion, but I did it while watching a movie which that made it more enjoyable. I traced my pattern onto some quilter’s grid tracing paper that I have. Rae recommends Swedish tracing paper and I have that on my list to buy as soon as I can because I think that would be better and easier to use than the quilter’s grid.

Per the pattern’s instructions, I made a muslin for the upper bust and when I did, the Medium was a bit tight even though my measurements were right on for the Medium size. Because of this I decided to sew 1/4 inch seams on the shoulders and sides instead of 1/2 inch- to give myself a little extra wiggle room. However, after I finished the tunic, I had to go back and add that extra 1/4 inch seam allowance back into the tunic because it was too big! Who knows what happened with the muslin?

I found some purple shot cotton from my Purl Soho visit that is enough for a dress version of this pattern and am already anxiously planning out some time to work on it! I will make a few changes on the dress version. First off, I will add the optional sleeves. Second, Rae suggested I could take a few inches off the bodice because I have a short torso and I think I will try that with the dress. Lastly, the U cutout on the front bodice was a bit lower than I wanted so I will raise the neckline a bit in order to feel that I can wear the dress without a tank under it and still be modest. 🙂

If you are looking for a versatile tunic/dress pattern, this is it! Check out all the versions Rae has made on her site! She even has a maxi version that she has promised to post a tutorial for (as a pattern add-on) soon! Also she has had quite a few pattern testers of varying shapes and sizes who have tried out her pattern and I think the dress looks fabulous on all of them! Hats off to Rae for an amazing job on this pattern. I can’t wait to see Washis begin popping up all over the blogosphere!

P.S. Pink Castle Fabrics is having a huge $5/ yard fabric sale and I scooped up some flea market fancy yardage perfect for another Washi dress!