Sidewalk Knits Showcase

Long time, no see, huh? Wow…didn’t realize it had been quite that long until I went to write this post. I did have a baby shortly after my last posting and life has been a little crazy since then! I’m slowly getting back into sewing and hopefully will pop in here more often as I’ve missed sharing my things here! I really like the record this blog provides of my sewing adventures…and my kids. 🙂

sidewalk-knit-showcase-8-of-12
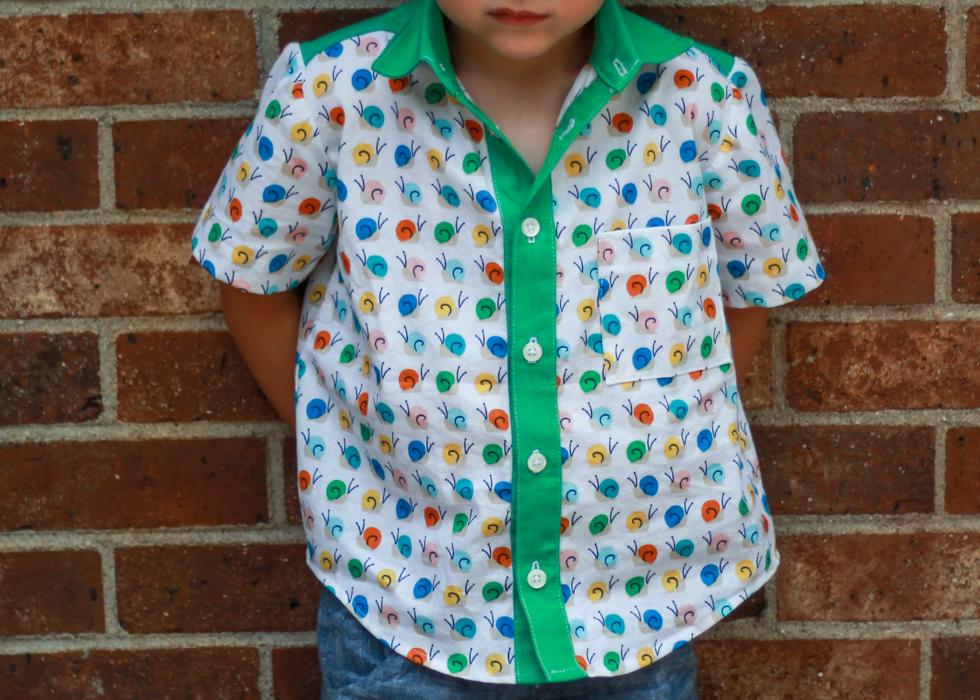
Enough about me…on to the cuteness that is this fabric and these boys! Y’all know that I’m a big fan girl of Rae from Made by Rae and she’s got some awesome new fabric lines out. I love so much that she designs fabric lines that can be used for both boys and girls! Cool boy fabric is really hard to find. Rae and Cloud 9 fabrics were so kind to send me two yards of the art class print in green from her new knit line- Sidewalk– to play around with.

sidewalk-knit-showcase-2-of-12Y’all, you can make a lot from 2 yards of knit fabric! This stuff is 55″ wide and made from some really nice interlock. I tend to be more of a jersey knit girl because I find a lot of interlocks to be too stiff, but this Cloud 9 interlock is super soft and perfectly stretchy- but with the extra stability you get with the interlock substrate. Highly recommend!

sidewalk-knit-showcase-7-of-12

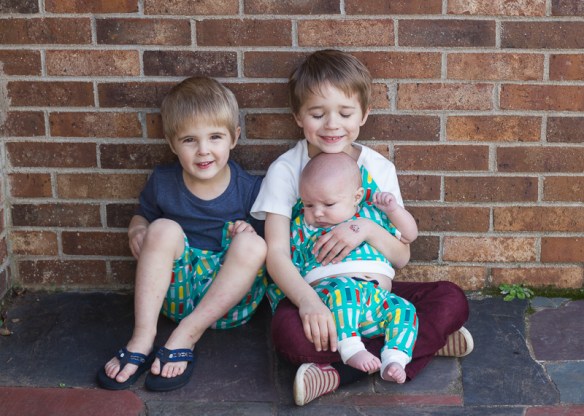
I promised myself I wouldn’t sew matching outfits for all 3 boys but here I am, unable to resist the pull. They’re not strictly matching- everyone’s got a little something different going on, but all 3 boys are sporting something from this fabric.

sidewalk-knit-showcase-11-of-12

Let’s start oldest to youngest, shall we? I made Oliver a safari raglan in the size 6. I used the coordinating solid Cloud 9 interlock in snow for the sleeves. Just a basic tee but I took the extra time and actually hemmed his up, so it looks nice and professional.

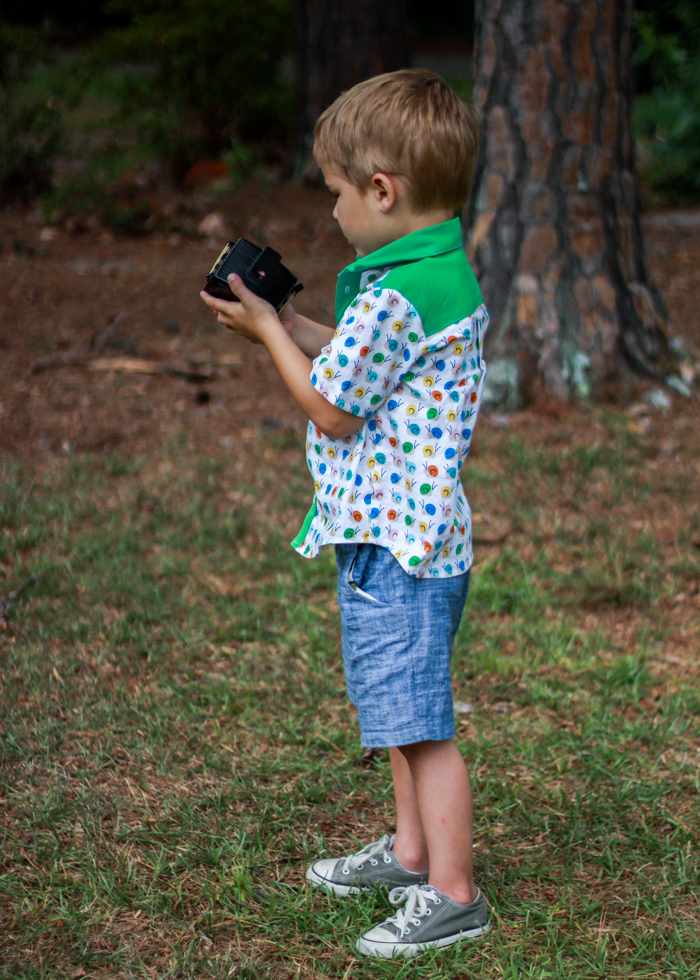
For Eliot, I really wanted to make some knit shorts and love the look of the mini hudsons so I started with that pattern as my base, cut it off at his knee, and hemmed them up instead of using cuffs. Since the pants pattern is made to have a baggier thigh and thinner calf, I smoothed out the curve of the leg piece as I was cutting it out to make it a little more straight legged, but I think it still needs a little more work to be perfect.sidewalk-knit-showcase-3-of-12

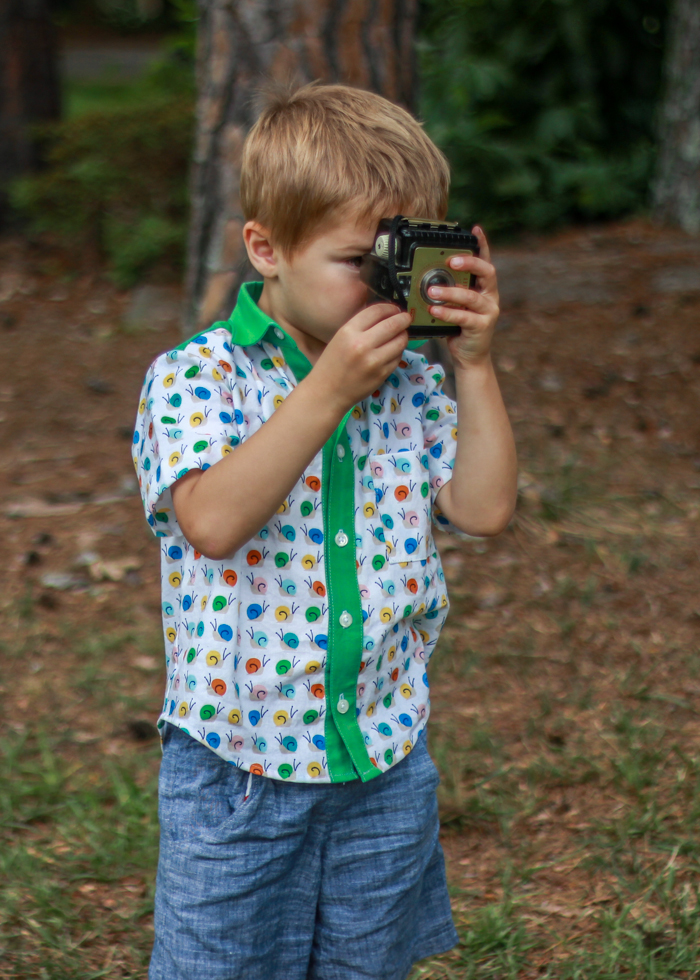
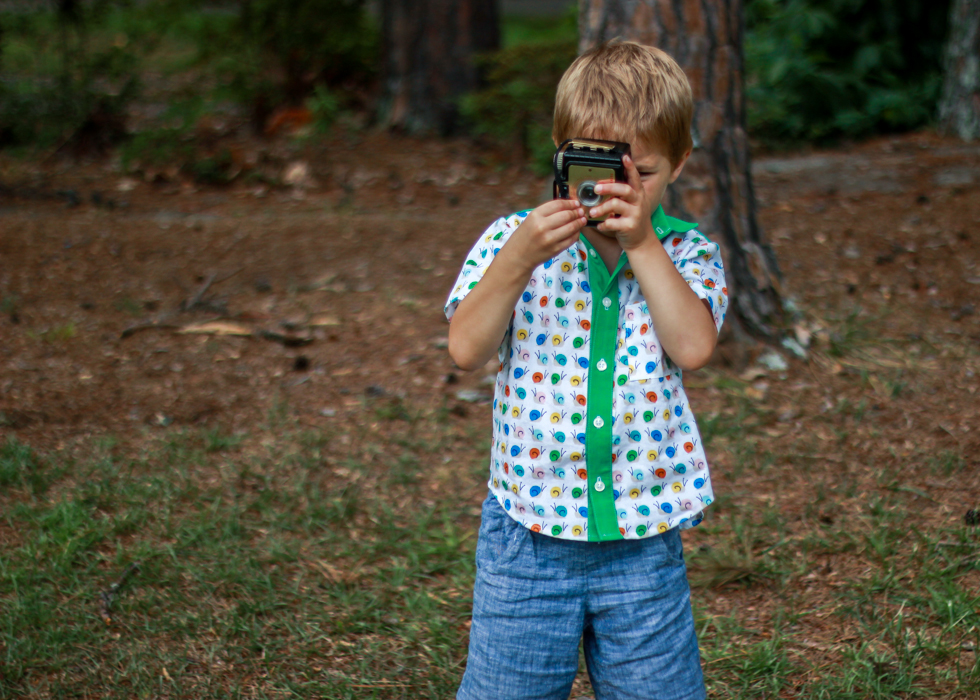
The pockets and waistband look so cute though so I’m still considering it a win. And he loves “comfy pants” so I know they’ll get a lot of wear. His shirt is just a flashback skinny tee in a size 4 with a chest pocket. The blue knit is an unknown sourced jersey knit from my stash.

sidewalk-knit-showcase-10-of-12

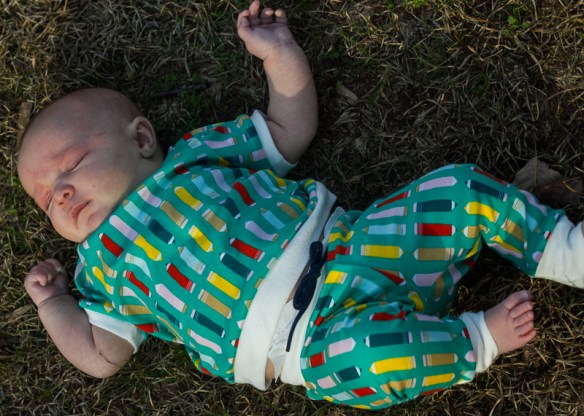
And then we have Charlie- (um yeah, welcome to the blog Charlie!- I’ll try to do a legit introduction post sometime soon, but for now, here’s my adorable 3rd baby boy- Charlie Edmund. 🙂 ) Charlie’s outfit is from Brindille and Twig- a fairly new pattern company to me but I’m liking what I’ve sewn from them! His shirt is their new Ringer Tee (free pattern!) in a 3-6 months size. And his leggings are the drawstring leggings (also 3-6 months). Love both of these patterns and I see myself making a lot more of each of them.


I really enjoyed getting to sew again. I’ve missed it. Thanks to Cloud 9 and Rae for providing me with the fabric. I’m a huge fan and will totally be picking up some more to use for more fun boy sewing. sidewalk-knit-showcase-4-of-12

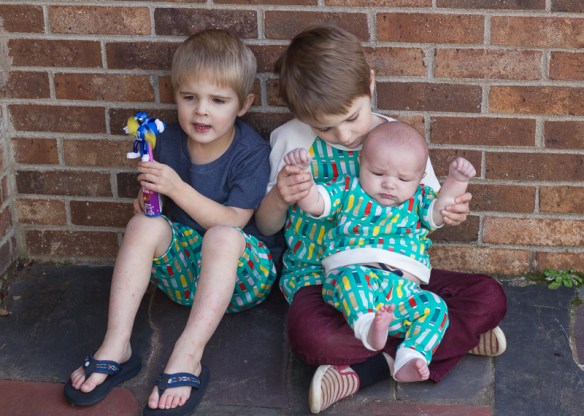
And if anyone has tips for getting decent pictures of 3 kids together, please pass them on! We had to settle for least worst when choosing pics for this post. It’s been too long since I took blog pics and my older two have forgotten how to act for the camera! Goobers. This last picture is kinda my fave though…so much personality coming through! sidewalk-knit-showcase-9-of-12


Advertisement

Snail Sketchbook Shirt Take 2

oliver snails (1 of 7)I’m back with another Lotus Pond shirt for you today. Previous one blogged here. This time it’s the multicolored snails (still available here). Funny story- I had a yard of each of the snail fabrics and asked the boys which one they wanted for their shirts. Eliot immediately grabbed the yellow snails and Oliver grabbed this version. Whew! No fighting for once. So nice when it works out that way- it doesn’t always in case you wondered. 😉

oliver snails (7 of 7)I wanted the boys’ shirts to be a little different from each other, so for Oliver’s version, I accented the snails with this artisan cotton in green-blue from imagine gnats store (it’s similar in weight to shot cotton or chambray). I used the accent fabric on the button band, the collar, and the yoke. This artisan cotton is the perfect contrast to the snails as it has both blue and green threads in it.

oliver snails (6 of 7)Oliver is wearing a size 4 of the sketchbook shirt and has plenty of room in the waist for his skinny little body. I think if I made him a long-sleeve version, I would slim the sides down a bit for a more slim-cut version, but I like this boxier look for a short-sleeve shirt. oliver snails (5 of 7)We were struggling with our photo shoot so I had idea to give him one of our old cameras we have and he had so much fun “taking pictures” of everything. Which led to an interesting discussion of film versus digital cameras as he couldn’t understand why he couldn’t see his pictures on my laptop. oliver snails (2 of 7)FYI his shorts are the sunny day shorts I blogged here. These are his favorite shorts to wear since he found out they match with everything! The drawstring got lost along the way because he kept playing with it and pulled it out so that part is a bit of wasted effort. Such is life, I guess.oliver snails (3 of 7)And now I’ve got to move on to another sewing project that’s easier on the eyes. I’ve about gone cross-eyed taking and editing pictures of these snails! At this point, my eyes are so fuzzy I can’t tell which pictures are in focus and which ones aren’t so I’ll apologize for any weirdness you see. I’m moving on to some selfish sewing now and will have something pretty fun to share with you on Friday- if I can finish up the sewing for it that is!! oliver snails (4 of 7)

Washi Dress #2

Are you sick of washi’s yet? Well obviously I’m not because I have another one to show you. 🙂 When Pink Castle Fabrics was having their huge $5/yard sale a few weeks back, I immediately thought that would be a good opportunity to pick up some yardage for another washi dress. I have loved Flea Market Fancy for a long time and never had a reason to buy any so I picked some out for my dress. I la, la, love the way this fabric looks as a dress! Now I wish I had bought more fabric during the sale because I really want to make another tunic. Alas, my fabric budget is way overspent and I must embrace some self-control. Boo! Plus, I do have quite a few other projects lingering on the back burners while I have been having so much washi fun.

Without further ado, here is my dress. I decided to forgo the u cutout on this one to give it some variety from my other ones. I also raised the neckline 1/2 inch so that I wouldn’t have to worry about it being too low. I think I could have left it the way it was, but I didn’t want to have to worry about wearing a tank under it.  I also took the sides in an additional 1/4 inch because it was a trifle big.

The only problem I have is the gapping in the front bodice. If I stand straight and pull the shoulders out, it lays nice and flat. As soon as I move around, though, it starts to gap a bit. You can see it in the pictures. I would like to figure out why that happened but it’s not enough of a problem to keep me from enjoying the dress. I thought the shot cotton was comfy. This is even comfier!! Seriously folks, I may start putting shirring in all my clothes because it makes the most amazing fit! I love that this dress gives me the opportunity to wear my red shoes. 🙂 I am also excited about being able to wear this dress all throughout the fall with my red cardigan and some leggings!

I have learned so much from making these Washis. With this third one, I feel that I have finally hit my stride. It is the most professional-looking garment that I have made, and I am very proud of it. Who knew making your own clothing could feel so rewarding? One word of advice I would give is to make sure you buy quality fabric. I can tell the difference in good quality fabric just as you can when you buy good quality clothing. I have now become a fabric snob and would rather save up for the better quality than buy cheapo quality and have it fall apart on me! I am looking forward to expanding my skills into other garments and would like some suggestions for clothing patterns you have used and liked.  Now to find someone to donate the money for the fabric all these clothes require. 😉

Reminder: Washi Dress and Tunic Pattern can be bought here.


Washi Dress

Washi #2 is complete! Have I mentioned how much I love this pattern? This Washi dress was made out of some shot cotton that I picked up while at Purl Soho. I love the lightweight feel of the shot cotton but it is quite sheer. I had a removable lining from another dress that I wore under it, but since that lining is blue you can see it under the dress a little bit. No worries, I will still wear the dress all the time. 🙂 Once Rae puts up a lining video, I will re-do the top and add a lining to the dress

Changes I made to the patterm:

  • Shortened the bodice a bit since I am short-waisted. I ended up not liking it as much this way, so from now on, I will leave the pattern as is.
  • Also after looking at all the pictures from the Washi flickr pool, I realized I was sewing my pleats wrong. (oops!) I say that I will fix them, but let’s be realistic. Most likely I will just wear the dress as-is and hope no one notices. 🙂
  • Added some length to the dress because I wasn’t sure how long it would come out, and I wanted to be able to add a deep hem to help pull the shot cotton down. My next dress (yes I already have the fabric for it) is going to be quilting cotton so I won’t need the deep hem and will use the original pattern length.
  • Raised the neckline about 2 inches so that I could have the u cutout but not feel I needed to wear a tank under it to be modest. Very happy with how this came out!

Overall consensus: I love the feel and weight of the shot cotton, but the fabric feels so fragile that I am not convinced of the longevity of this dress. I will have to be very careful in my washing of the dress. However, this is seriously the most comfortable dress I own! And I am so happy to have a purple dress! It may be a bit nerdy to admit this, but purple is my favorite color and it makes me happy to sew clothing for myself in purple.

With each dress/ tunic, I feel that I am learning more about how to sew clothing for myself so even if they are not perfect, they are all helpful lessons.   If you want to try this out for yourself the Washi pattern is available here. FYI these pictures were all taken last weekend on our family vacation to Hilton Head Island. It was a great place for a photo shoot with all the beautiful scenery!

Couldn’t resist a picture with my little buddy since we are both in handmades…check out his treasure pocket shorts.

Washi Tunic

Are you aware of the Washi week happening over at Made by Rae? I have been stalking her for a month anxiously awaiting the release of this pattern. And this weekend, it finally was available! Although I had several other projects in the works, I quickly brushed them aside to begin on my own Washi clothing. I was going to begin with the dress but didn’t have enough of this Lizzy House print for a dress so settled for the tunic. I cannot begin to tell you how much I love this tunic The pattern is so quick and easy to follow, even for a fairly new clothing seamstress like myself. Who doesn’t love a shirt with no closures? So proud of myself for successfully mastering shirring in this tunic! 🙂

It is a PDF pattern so you print it out and tape together before tracing it onto some sort of pattern tracing paper. That is the most tedious part in my opinion, but I did it while watching a movie which that made it more enjoyable. I traced my pattern onto some quilter’s grid tracing paper that I have. Rae recommends Swedish tracing paper and I have that on my list to buy as soon as I can because I think that would be better and easier to use than the quilter’s grid.

Per the pattern’s instructions, I made a muslin for the upper bust and when I did, the Medium was a bit tight even though my measurements were right on for the Medium size. Because of this I decided to sew 1/4 inch seams on the shoulders and sides instead of 1/2 inch- to give myself a little extra wiggle room. However, after I finished the tunic, I had to go back and add that extra 1/4 inch seam allowance back into the tunic because it was too big! Who knows what happened with the muslin?

I found some purple shot cotton from my Purl Soho visit that is enough for a dress version of this pattern and am already anxiously planning out some time to work on it! I will make a few changes on the dress version. First off, I will add the optional sleeves. Second, Rae suggested I could take a few inches off the bodice because I have a short torso and I think I will try that with the dress. Lastly, the U cutout on the front bodice was a bit lower than I wanted so I will raise the neckline a bit in order to feel that I can wear the dress without a tank under it and still be modest. 🙂

If you are looking for a versatile tunic/dress pattern, this is it! Check out all the versions Rae has made on her site! She even has a maxi version that she has promised to post a tutorial for (as a pattern add-on) soon! Also she has had quite a few pattern testers of varying shapes and sizes who have tried out her pattern and I think the dress looks fabulous on all of them! Hats off to Rae for an amazing job on this pattern. I can’t wait to see Washis begin popping up all over the blogosphere!

P.S. Pink Castle Fabrics is having a huge $5/ yard fabric sale and I scooped up some flea market fancy yardage perfect for another Washi dress!