
 We had our first loose tooth experience this weekend! I can’t believe that this season is upon us already… he’s only 5! But apparently 5 is not too young so there you have it.
We were out shopping this weekend and saw a tooth fairy pillow, and Oliver asked if I could make him one. What can I say to a request like that? We made one together the very next day!

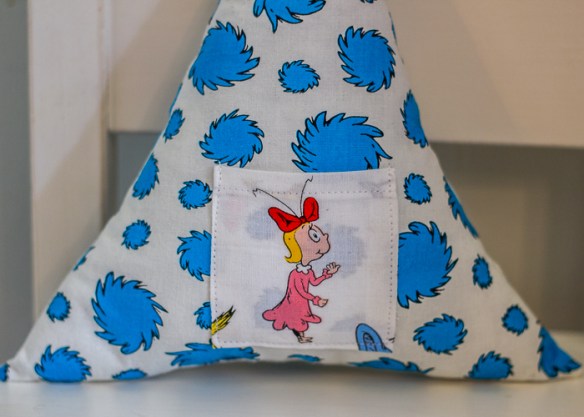
After looking up lots of tooth fairy pillow ideas online, we settled on a teepee version. Oliver picked out the all the fabrics… I think he did a great job matching them up! The background is a print from the Lorax Dr. Seuss line (Truffula Tree Tufts- sold out now) and the pockets are fussy cut from the Celebrate Seuss Tossed Characters print (still available here).
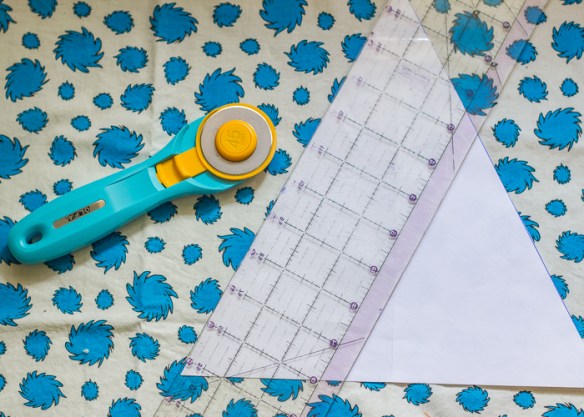
I thought I’d explain how I made the pillow in case anyone else would like to make one too. I made an equilateral triangle template- 10″ wide at the base and 10″ tall- and used that to cut out two triangle pieces from my fabric. Before I sewed the triangles together I made two little pockets and sewed one to each triangle piece…about 1.25″ from the bottom.
After I had the pockets sewn on, I sewed the triangle pieces right sides together- leaving a 2″ unsewn section at the bottom. I clipped all the corners and flipped the pillow right side out through the unsewn bottom section. Then Oliver helped me stuff the pillow with polyfill, and he even helped me handsew the bottom section closed!

Easy, peasy! Finished pillow size is 9″ high x 9″ base. The whole operation took less than an hour from start to finish! And when we were finished, Oliver told me that it turned out exactly how he had wanted it…fist pumps all around. 🙂 Nothing better than a satisfied customer and it was fun to have him so involved in the whole process.

Notice there are two pockets- we decided that one side was for the tooth lost and the other for the forthcoming money to be left by the tooth fairy. 😉 He hasn’t lost that first tooth yet, but it’s getting looser by the day so I anticipate this pillow getting used very soon!

