About oliver's fancy

I am wife to a patient husband named Ian and stay-at-home mom to a busy little boy named Oliver. When not running around after him, I enjoy dabbling in all sorts of craftiness. I am a self-proclaimed fabric-aholic and proud of it! I have started this blog to document my journey of bettering my sewing/ crafting skills and show off occasional pictures of my little man and superb culinary creations:).

Halloween 2015 Part 2: Wonder Woman and Superman

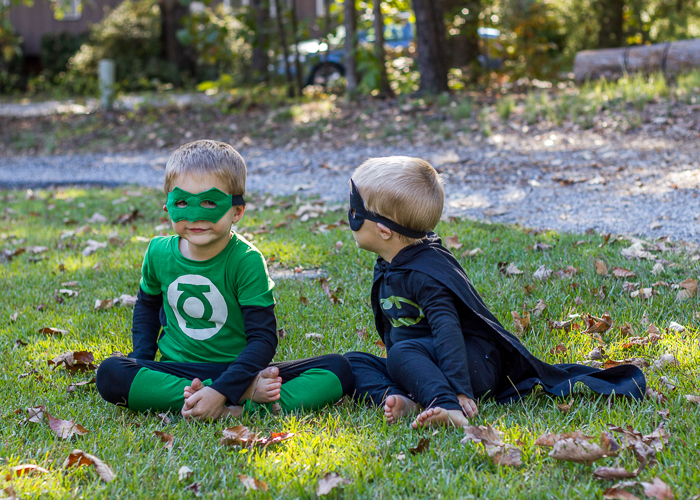
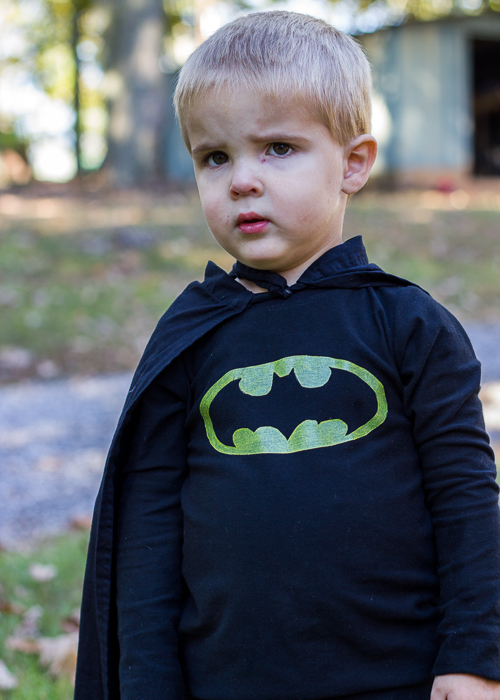
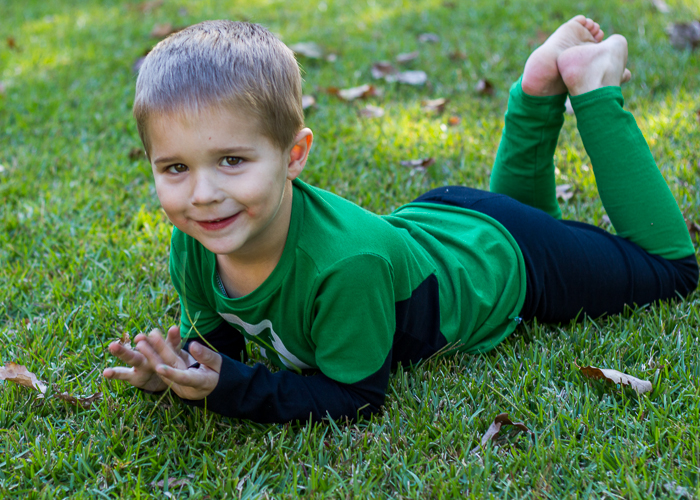
Notice a theme with our family costumes this year? Yep we all got to be super heroes. 🙂 I was so happy we had a party to attend this year, and so I finally had an excuse to get us all in costume. The boys got to pick their characters first and then Ian and I picked from the rest of the Justice League options…with Ian as Superman and me as Wonder Woman. Now this was a family friendly party so no crazy costume for me… 😉 So I did a lot of research on how to keep the WW vibe without showing off a ton of skin. I don’t have any great pictures of the adult costumes from our party but here’s a few Instagram and iPhone pics for ya.

IMG_3380
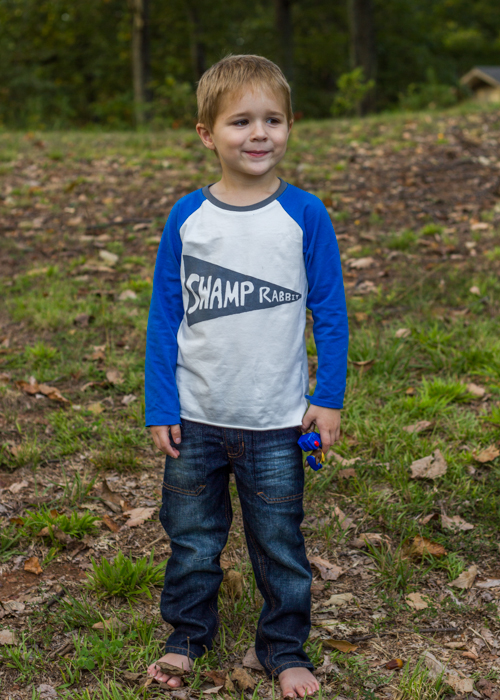
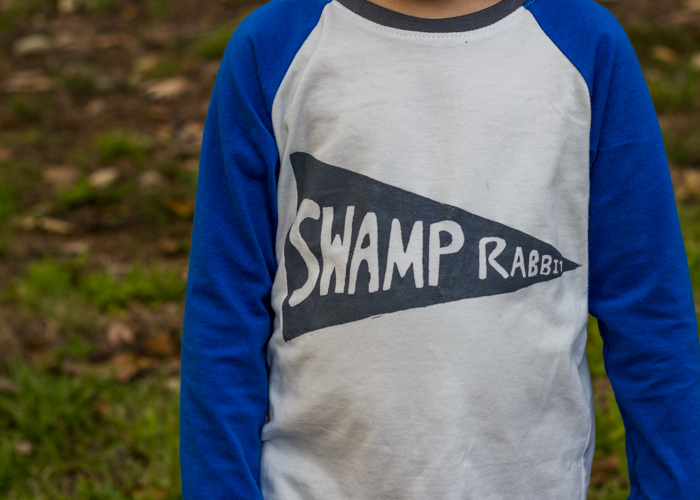
Ian’s shirt is the Oliver+S metro tee. I bought the metro tee bundle a while back but hadn’t gotten around to sewing it yet. So this was my first time making it, and I was very happy with the great fit. I used the size S and added about 1/2″ to the shirt and sleeve length. I printed off a superman template and then freezer paper stenciled the logo to the shirt. I had planned to make him a cape and some other costume additions but ran out of time and he was happier with just the t-shirt so I called it good there. IMG_4700My shirt is the Union St Tee from Hey June Handmade- size M in the v neck and long sleeve option. I raised the neckline about an inch and thinned out the neckline binding by 3/8″. This shirt has lots of freezer paper stenciling! I don’t know if that was the best way to go about it but it seemed the easiest so I went with it. Once I was done with it, I kinda wished I had just made a separate belt and then a little skirt to go with the outfit because I loved the tee with just the sparkly gold W and I think I would have gotten a lot more after-Halloween wear out of it that way…but live and learn. And these Union St Tees are pretty easy to make so I can always make another one with just the WW logo if I want to. Oh and both tees are made with Laguna Jersey knits- what else did you expect? lol.IMG_3275I found these great socks on Amazon– with little capes on them and Primed them right to myself on Thursday night! Seriously, way too cute. I finished off my costume with a felt tiara (printable here). Oliver was really disappointed that I didn’t have the arm bands and the lasso but one only has so much time to invest in costumes and this was as much as I had time to get done. I’m pretty happy with how it all turned out and we had a lot of fun being a superhero family for the night. IMG_0897

Advertisement

Dr Seuss Halloween Quilt

spooktacular dr seuss quilt (4 of 7)

Here’s the second project I made with the Spooktacular Seuss fabric. You can see the first project here. I wanted to make something that we could enjoy for longer than one season so a quilt seemed like the logical choice. I don’t quilt very often but it is fun to have holiday themed quilts. I actually made a Grinch one last year that I never blogged so I’ll try to get pics of that this season! You will notice, I’m not an intricate piecer. My sewing time is so limited and Halloween was coming so quickly that in order to get this finished, I needed to do something quick and easy. While fancy quilts are nice, in my house they never get completed!

spooktacular dr seuss quilt (5 of 7)

I decided to have fun with the Suess theme and go with stripes of various widths and colors- pulling from the colors in the main fabric. I found all of these Kona cottons as my local Hobby Lobby. They don’t have a huge selection but they are close by my house so I was happy to see that they had exactly the colors I needed. I got a half yard of each fabric and cut a few different widths to get the length I wanted for the quilt. I used the entire width of the fabric to make the quilt as wide as possible. It ends up being a great lap quilt size about 41×62″.

spooktacular dr seuss quilt (1 of 7)Once I had the front pieced, I used up all the remaining Konas for a random striping back. I didn’t even lay the colors out beforehand- just picked up the next one in line and sewed them all up. I love how fun the back turned out! I had a few little Seuss people left from the boys’ applique shirts so I appliquéd them to the back of the quilt to give the boys something fun to look for and give the back a little more interest. I can’t decide if I’m 100% sold on whether they add to or take away from the quilt, but the boys really like them so that fulfilled my main purpose.spooktacular dr seuss quilt (7 of 7)

I used a curvy stitch on my machine to quilt lines at random widths across the quilt. That meant I didn’t have to stress about how even my lines were, plus the waviness adds to the Seuss effect. The binding is pieced from random leftover bits I had on hand- aqua, purple and orange. It’s the first time I’ve done a pieced binding and I kinda love it!

spooktacular dr seuss quilt (2 of 7)This was pieced over the weekend and then quilted and bound yesterday. Super crazy fast for me, but I’ve learned to push through and finish something like this while I’m in the mood or it will languish undone forever. I’m pretty excited to have a fun Halloween quilt to pull out every season and put on my quilt ladder! Though if I’m being honest, this will probably stay out until Thanksgiving so we can really have time to enjoy it. The boys (and I 🙂 ) love snuggling under quilts- especially ones with Horton and the Grinch. I wish I could say that in Eliot’s Grinch voice for you. It’s the most adorable thing. He quotes lines from the Grinch movie in his mean Grinchy voice and I just die. We are kinda Dr. Seuss fans over here, can you tell? 😉 spooktacular dr seuss quilt (3 of 7)

Halloween 2015: the Justice League Costumes

justice league costumes (1 of 10)So I would like to point out that it’s friday, the week before Halloween, and I’m done with the boys’ costumes!! Woot for early finishes! Now part of that is because there’s a party this weekend they want to attend with their costumes but hey, I’ll take credit for this early finish however I can.

justice league costumes (7 of 10)

I started asking the boys about a month ago what they wanted to be for Halloween this year. At first I was kind of hoping for another star wars run, but that seemed almost cliche with the movie coming out in December. And they both wanted to be superheroes this year. There was a bit of argument over who got to be Batman, but Eliot won that when Oliver landed on Green Lantern as his persona. Which is kinda funny because I know nothing of Green Lantern. A few months ago, I picked up a superhero board book for the boys and it’s kind of a dictionary of each of the Justice League members and what they do…that was our first introduction to Green Lantern. Oliver decided he wanted to be him so that he could have the ring- whatever works, I guess.

justice league costumes (4 of 10)You won’t see a ring in these pics because I actually forgot to have him put it on (oops) but after lots of searching for a ring, we found one at Aldi in the Halloween section- it lights up and everything. So perfect and he’s so pumped.

justice league costumes (10 of 10)

Both of the boys are wearing Flashback Tees. Oliver’s tee is a 4 and Eliot’s a 3. I used Laguna jersey in Onyx and Grass. Eliot’s was a super simple all-black outfit with a freezer paper stenciled logo. Oliver’s required a bit more thought. I did a lot of google searching Green Lantern costumes and they all had this side inset of black along with the angled black lower sleeve. The triangle shirt insets took me a little more brain power than I’d like to admit, and I’m not sure they were 100% succesful- they should have been a bit bigger. But Oliver loves it so that’s really all that matters. FYI I mixed glow in the dark paint into the mix for both logos so both shirts actually glow in the dark- pretty awesome. And that will be super fun on Halloween night.

justice league costumes (5 of 10)

The pants I’m super in love with. I used the Fancy Pants leggings pattern in a size 2 and 4. I just love how their little legs look in fitted leggings- especially Eliot’s leg rolls… all the heart eyes. Though FYI Eliot is wearing a cloth diaper in these pics so he’s got a little more bulk down there than you would see with a disposable. I don’t like to make costumes for just one night so I’m glad these ended up super comfy so that they can be pjs once Halloween is over. Or regular clothes too… you never really know how they will end up in rotation. As long as they’re worn, I don’t care!

justice league costumes (2 of 10)The masks are made from two layers of felt cut out with a layer of craft fuse in between for durability. It’s my first mask-making experience so they’re not perfect, but the boys actually wanted to keep them on for most of the photo shoot so I consider that a win. Maybe they’ll actually be worn for trick or treating. Plus it just makes this outfit tie in so well with the Kid’s Clothes Week disguise theme. Eliot’s mask is a template that I got here. Oliver’s I just winged from some pics I found.

justice league costumes (9 of 10)

I totally cheated when I realized Eliot could just use Oliver’s Darth Vader cape from last year (blogged here) Score for not needing to make another cape!! I know this is a picture heavy post but I just couldn’t resist all of these shots… Sometimes I find them too cute. And this last one, yeah Oliver lay down and posed all by himself. I could not resist taking a picture as I died laughing.

justice league costumes (6 of 10)

Hope your Kid’s Clothes Week and Halloween sewing is going well! I am actually making costumes for both me and the husband this year so I’ve got to get busy on them now…Cannot wait to show them all to you! I’m so excited we have a Halloween party to attend this year so I can finally justify family costumes. We’re gonna be adorable. 😉 and cheesy.

Spooktacular Dr. Seuss Raglan Tees

halloween safari raglan (4 of 7)So I’m on a total raglan kick right now…mostly because I’ve got the pattern out on my cutting table so it’s super convenient to just grab it and cut! I picked up a yard of this Dr. Seuss Halloween fabric on while tagging along on my husband’s business trip to Charleston this week. I like to stop by Five Eighth’s Seams if I get a chance because they always have some good eye-candy. I didn’t even know there was a Dr. Seuss Halloween line but I just could not pass this fabric up. I’m not normally a huge Halloween decor person but seriously, Horton and the Grinch dressed up…I just couldn’t resist. And since I still have most of the yardage left, I think I might make a quilt with the rest of it. That way we have something that we can pull out every fall to celebrate the new season.

halloween safari raglan (1 of 7)But Oliver really wanted a shirt made from the fabric too so we did the quick and easy appliqué option. I seriously googled for shirt ideas for way too long this afternoon- making this decision way harder than it needed to be. I felt like a simple appliqué was too expected and not very exciting but when I thought about adding the raglan option to the tee, that made it a little more interesting. And just reading this, y’all are thinking “wow she way overthinks things…” yeah it’s true. I just can’t help it and it drives my husband crazy. and probably all the friends I text for decision advice. lol.

halloween safari raglan (2 of 7)halloween safari raglan (3 of 7)

These shirts were both made with Laguna Jersey. The black is from the imagine gnats shop and the orange is scraps from this shirt (wow, how long ago was that?!). I was going to change up the colors for Oliver’s tee but he insisted on matching exactly with his brother so there you have it…two twinsies.

halloween safari raglan (5 of 7)Oliver’s is a 4 and Eliot’s is a size 2. Pattern is the Safari Raglan once again…I added a 1/4″ of length to Oliver’s to help it fit my lanky boy a little longer. Neither shirt is hemmed because I’m lazy like that. I did secure all my serger seams so the shirts won’t start unravelling..ahem. Because that has happened on occasion when I’m extra lazy. halloween safari raglan (7 of 7)

I know that it might have been silly to make them shirts when Halloween is so close so they’re only going to wear them a few times before the season is over but I’m glad I made them. I think it’s fun to have something a little special just because… it’s one of the reasons I am glad I sew. And now I can get a little glee out of seeing them in their little twinsies outfits. Yep, little boys sure are cute. Even when they aren’t huge fans of making nice faces for your camera. 😉halloween safari raglan (6 of 7)

Swamp Rabbit Raglan Tee

safari raglan- swamp rabbit (3 of 6)

I have been so busy the last month with various assignments that I haven’t had any time for just-for-fun sewing. Don’t get me wrong- I’ve enjoyed all the things I signed up for but sometimes you want to do something just because. I finally had time this week to have some fun. I picked a quick and easy project- a raglan tee for Oliver. I love how easy it is to make kid tees…seriously it took us longer to pick out the fabric than it did to sew. Oliver is really into arts and crafts right now and he was actually a big help in the process. He helped me tape together the pattern, picked out the fabrics, chattered to me while I was sewing, and then painted the stencil on. It was fun to have him along for the ride.safari raglan- swamp rabbit (2 of 6)

used the safari raglan pattern from Titchy Threads. I have long needed a good raglan pattern and Laura has filled the void. I’m a huge fan of her patterns. The fit and construction are always spot on. I sewed Oliver a size 4 and it fits perfectly now. If I want him to have room to grow, I might sew him a 5 but I’m pleased with how good this looks on him now. 

safari raglan- swamp rabbit (6 of 6)We have this trail in our town called the Swamp Rabbit Trail and it’s a 13+ (wikipedia says 28.6 miles round trip) mile walking/biking trail that follows the bed of a former railroad nicknamed after the swamp rabbit. It’s a huge local attraction that now has shops and cafes along the sides of it. We are big fans and I run on it several times a week as well as bike with the boys at least once per week. Oliver is so familiar with it that he can tell you where the different attractions are along the route.  So when I wanted to incorporate something local into this tee, I thought what better than to use our favorite trail?

safari raglan- swamp rabbit (4 of 6)

I drew the pennant stencil and letters on freezer paper- after some trial and error with the letter sizing and then had fun (lol) cutting out all those tiny letters. I don’t have any gray fabric paint so I mixed white and black together until Oliver and I were satisfied with the shade and Oliver painted it on for me.

safari raglan- swamp rabbit (5 of 6)

I think we are both pretty happy with how it turned out, and I am hoping it gets lots of wear this fall! The fabric is my favorite tee go-to: laguna jersey in royal and white/pdf from the Imagine Gnats shopsafari raglan- swamp rabbit (1 of 6)

Evergreen Jacket in Purple French Terry

I just realized I never shared the evergreen jacket I made for my September contributor post over at Imagine Gnats. This purple french terry from Rachael is so amazingly awesome and my husband got some pretty great pictures of me on his bike so make sure to go check it out if you haven’t yet! I won’t typically wear it zipped up like this, but I kinda love this picture so I had to share it with you. 🙂 Purple lovers unite! evergreen jacket (7 of 7)

Carolyn Pajamas with Houses

Last month I got an email from Art Gallery Fabrics asking if I would like to sew up something as a part of their September celebration of National Sewing Month. Um, yeah, didn’t have to think twice about that one. The thing that took me forever was deciding what to sew and what fabrics to use! I’ve been dying to sew up some pajamas ever since Kelli at True Bias made these Lion pjs and after much thought I decided this would be the perfect chance to sew with some fun fabrics and make my pajamas.

happy home carolyn pjs (2 of 6)The fabric I chose was Block Party from the Happy Home collection. I don’t normally sew clothes for me with quilting cotton but the Art Gallery fabrics are a lighter weight than normal quilting cotton and work out pretty perfectly for pajamas. I also enjoyed using a fun print that I wouldn’t normally get to use! Not having any little girls, I don’t get to use all the fun prints out there very often so this was a treat for me.

happy home carolyn pjs (4 of 6)

I used the Carolyn Pajama pattern– view C from Closet Case files. I’m usually a tank top and shorts pj person but I thought it would be nice to have some dressier pjs for when we have company or I just feel like wearing them all day. ;). Based on my measurements, I sewed up a size 8 and that’s pretty spot on. I like how it’s a comfy fit but not so boxy that it’s unflattering.

happy home carolyn pjs (6 of 6)This pattern is labeled as intermediate and I would definitely concur with that label. I actually found these a bit more complicated than I had assumed they would be. Mostly due to the amount of piping involved. I used some piping cord and Art Gallery pure elements in snow to make my own piping. I have never tried the continuous bias tape method but Heather’s tutorial was great and my bias tape turned out awesome! It is time consuming though- not going to lie about that…took way more time than I really had available. I had to rush thru the sewing part to get these finished on time. I also want to say that I am lucky enough to have a piping foot for my machine and while I don’t use it often, in cases like this, I am so thankful for it! I really aids the sewing process.

happy home carolyn pjs (5 of 6)

There were a few times that I had to really use my brain to figure out the instructions. Nothing too horrible but I think a beginner sewist would struggle through the shirt construction. Once I got it all sewn up though, I’m super happy with how well the shirt fits and how comfy it is!

happy home carolyn pjs (3 of 6)My one beef with this pattern is the shorts’ inseam. My cuff fits kinda funky- it rides up on the inseam and hangs lower on the outseam. And not in a cute way- it looks a little awkward. I even checked the pattern pieces to make sure I hadn’t sewn them backwards but I did sew them correctly. I must have made some sort of mistake though because I’ve searched other bloggers who made these shorts and none have mentioned this problem. I’m also really sensistive when it comes to seams touching my skin and I feel like the inseam is a little bulky and bothers me. I’ve had this problem when I’ve made the maritime shorts in a heavier fabric so it must just be me. The fit across the bum and hips is pretty perfect though so next time I make them, I think I just need to grade more of the seam allowance out of the inseam and stitch it down to keep it from bothering me. I’m trying to decide if I need to lengthen the crotch just a bit too. I will also raise the waistband just a teeny bit as I like my shorts to sit just a bit higher on my waist- after two babies, I’m not such a fan of low riders. lol.

happy home carolyn pjs (1 of 6)

But considering I didn’t make a muslin, this is a pretty successful finish. Just a few tweaks to make next time and I’ll have perfectly fitting pajamas. And these will still get plenty of wear. In fact, I’m still wearing them today. 🙂 Who wants to change into real clothes when you have cute pajamas?

Disclaimer: Art Gallery Fabrics provided the fabric for this post as part of their September AGF Sewing Month but I purchased the pattern and all opinions are, as always, my own. 🙂

Cotton+Steel Tiny Pocket Tank

double gauze tiny pocket tank (6 of 6)I’ve made a few tiny pocket tanks (this chambray+art gallery one from last year is one of my faves) and wanted to make another one for this summer. I picked up this cotton+steel double gauze for a steal at pink castle fabrics (looks like they’re sold out of this one now, sorry) when they were running a 40% off apparel fabrics sale earlier this year. I knew this would be the perfect fabric for a summer tank as it breathes so nicely!

double gauze tiny pocket tank (1 of 6)I made the tank (pattern- tiny pocket tank) in a size 8 but angled the back pattern piece over the fold about 1/2″ at the top- gradually angled down to nothing mid-way down the back- because I remembered that I’ve had shoulder gaping with this pattern in the past. I ended up taking out too much width as it’s a bit tight across my shoulders, but still wearable- especially after I  wore it a few times and stretched out the double gauze a bit.

double gauze tiny pocket tank (4 of 6)Another mod I always make to this pattern is to raise the neckline by about 1.5″ so that I don’t have to wear a tank under it. Otherwise, it ends up too low for me. I didn’t do a super good job hemming it as you can see in some of these pics, it flips up pretty badly. But if I give it a good ironing, it will stay down better. Ha, who am I kidding that I’m ever going to iron this, though? 😉

double gauze tiny pocket tank (5 of 6)
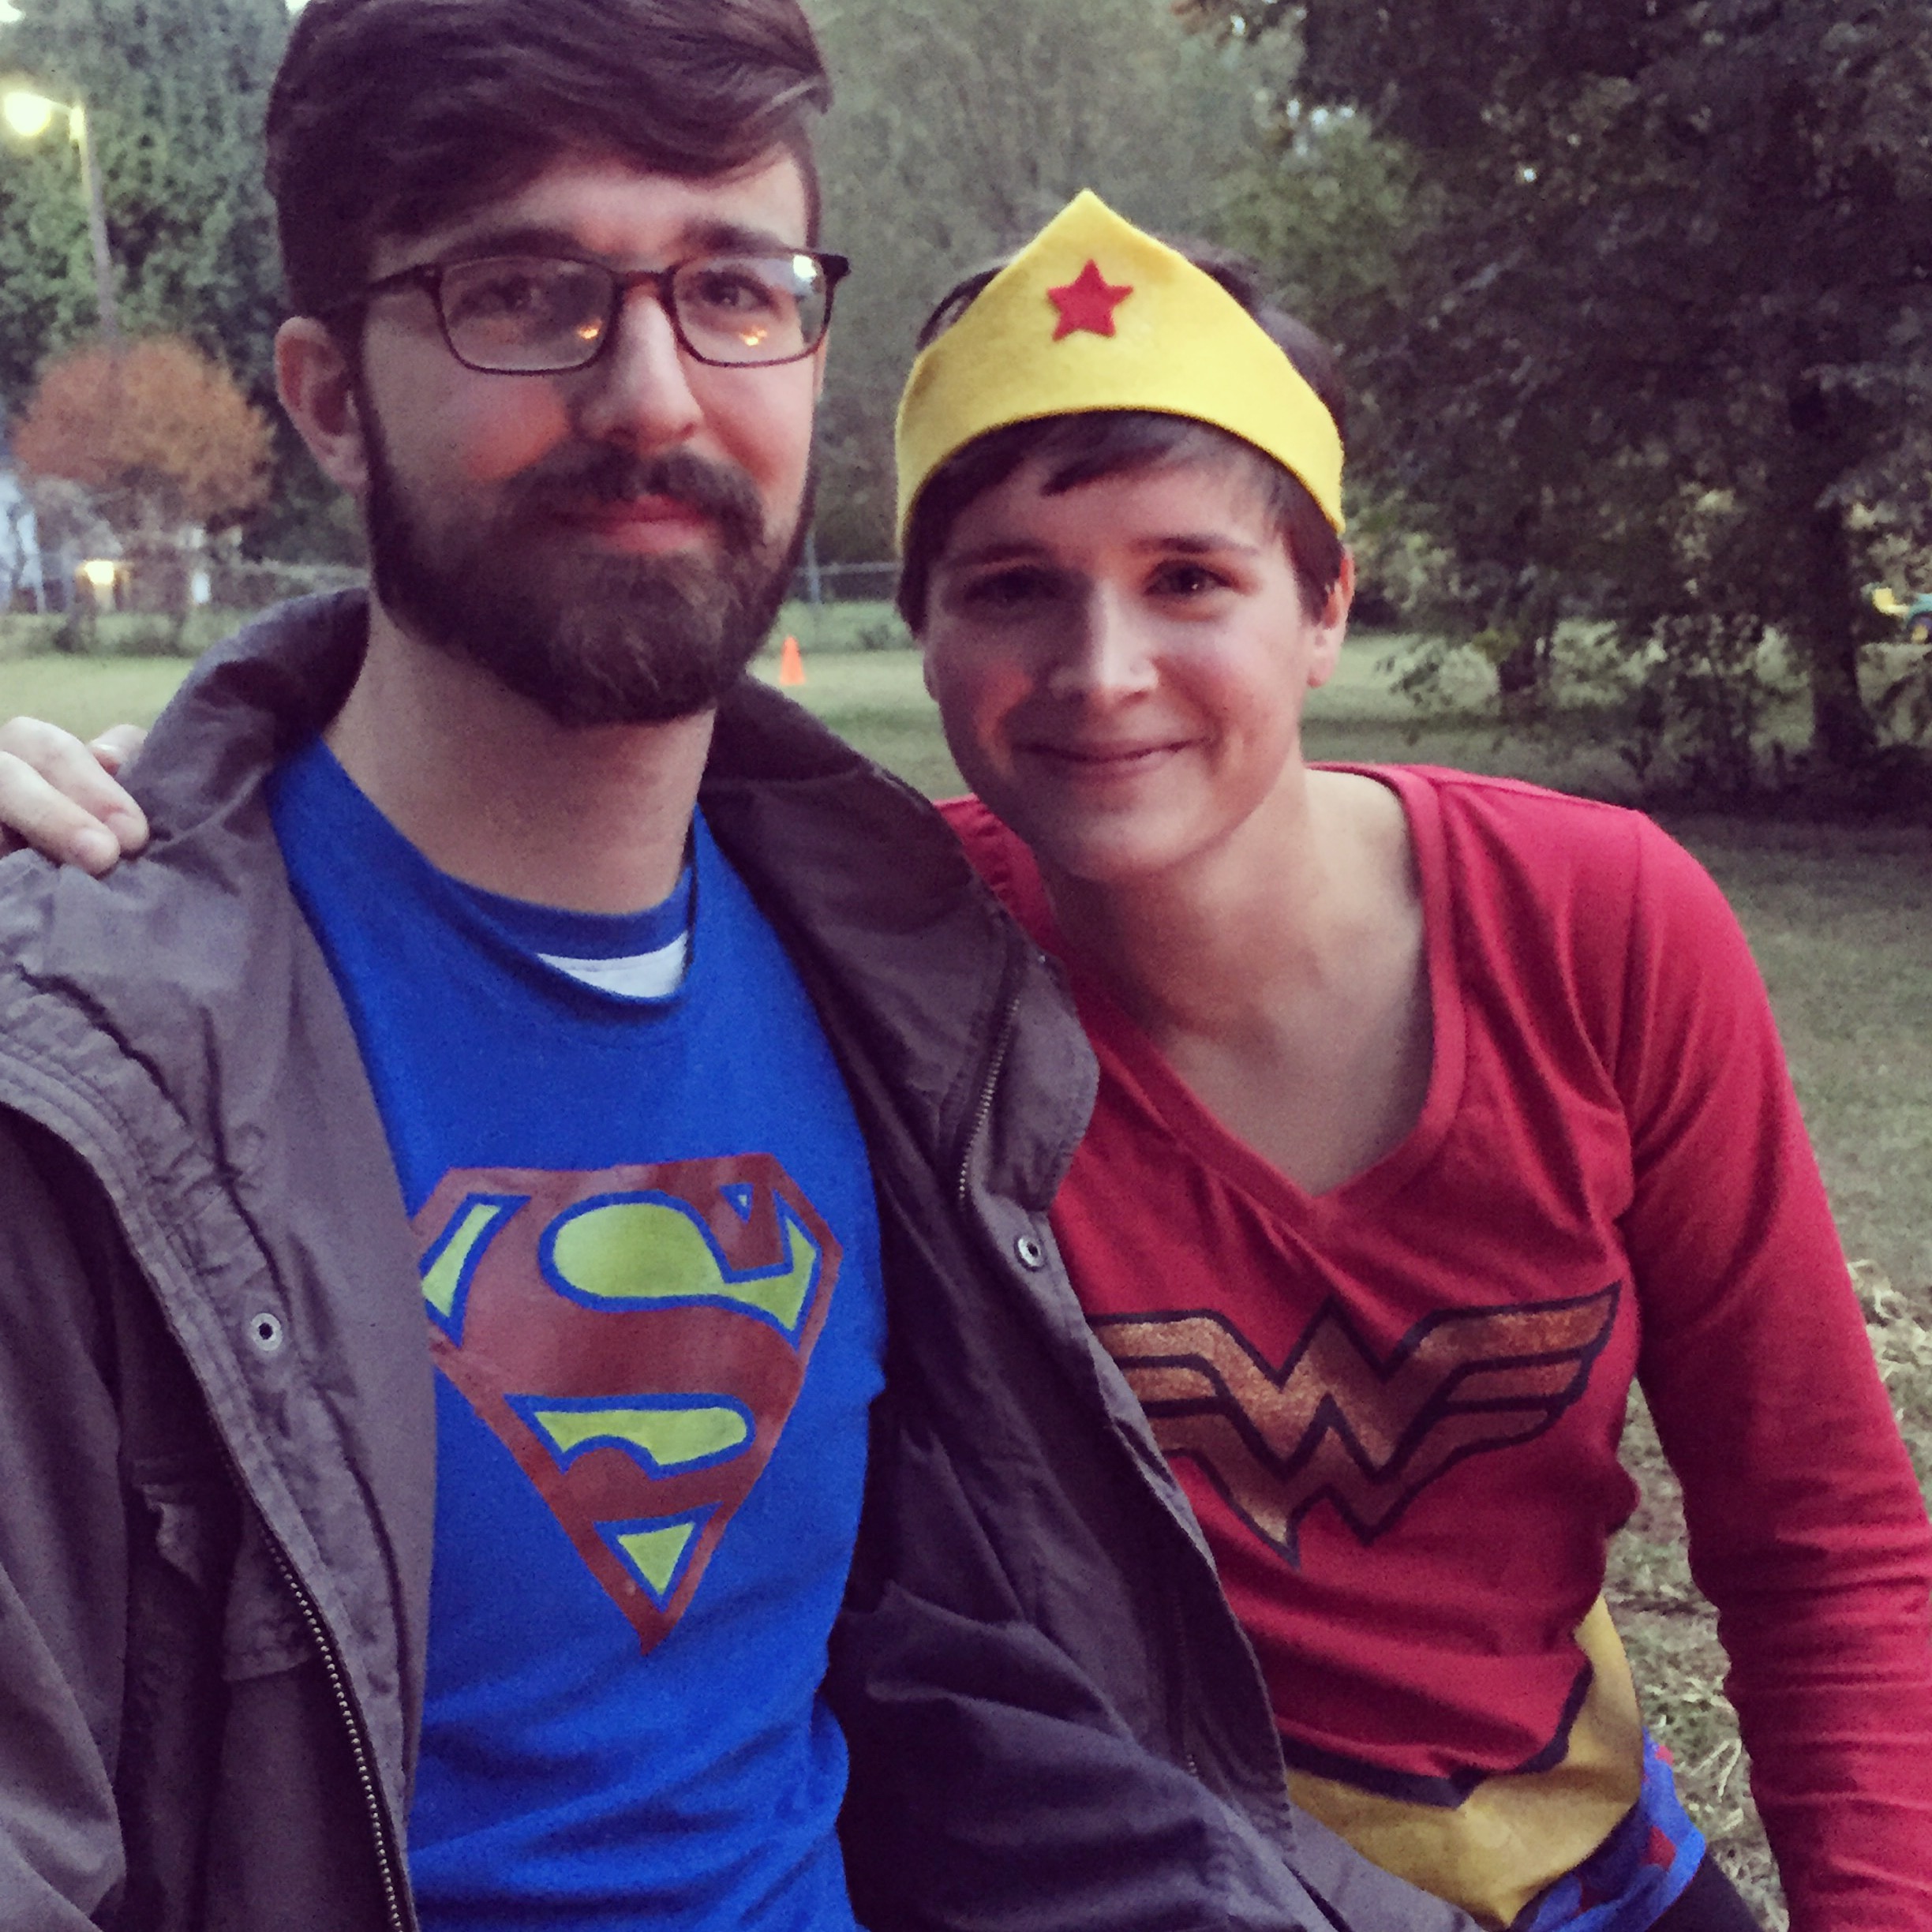
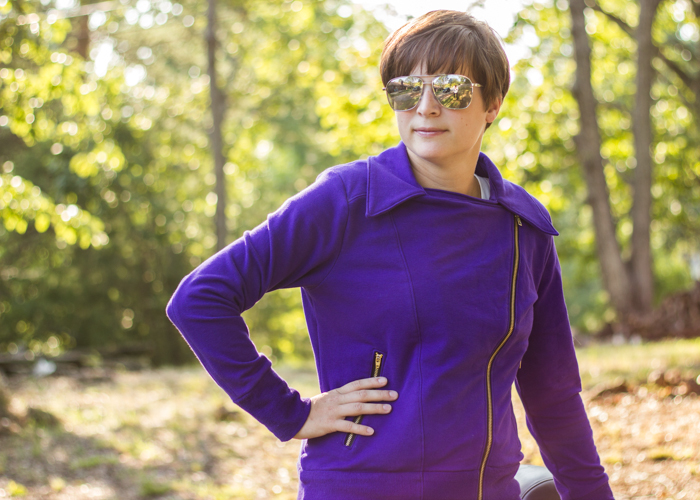
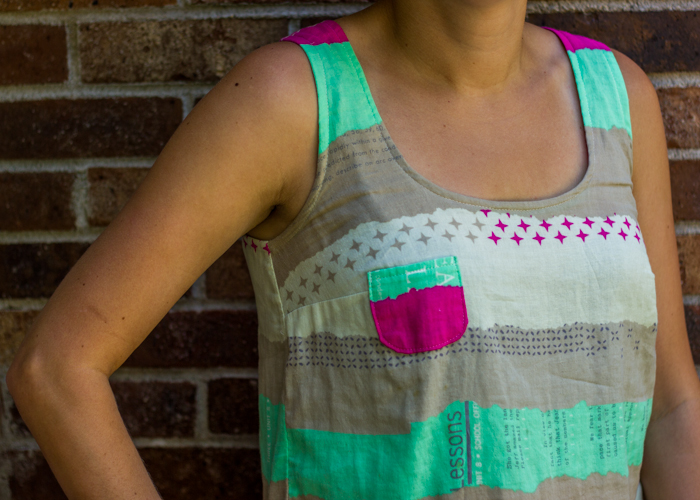
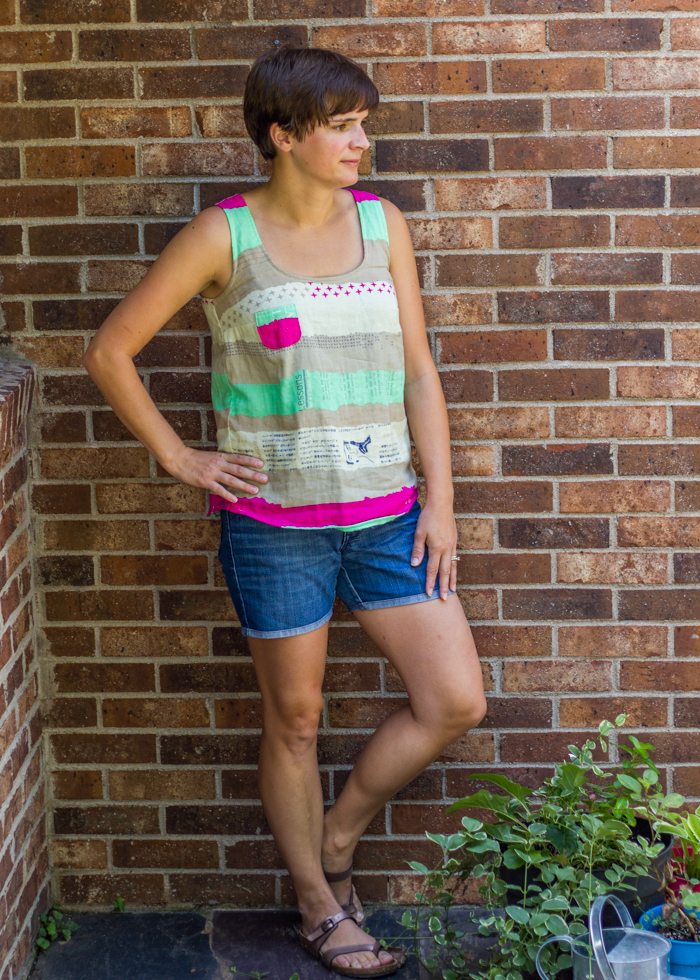
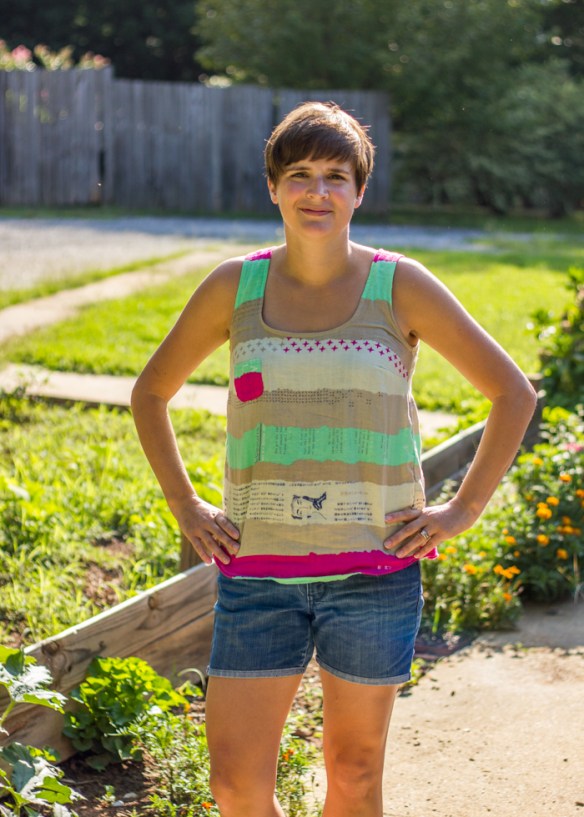
I actually made this tank at the beginning of the summer and just now got around to taking pics of it. I do so love how cool and breezy it is. I’m never 100% sure that these types of flowy shirts are flattering on me because I feel like the billowing around the waist makes me look bigger than I am, but I still like to wear them because they are so comfy. I did end up taking the sides in about 3/8″ starting right below the bust to the hem to take a bit of the width off. Basically I have an 8 in the top and grade it down to between a 4/6 in the hips. double gauze tiny pocket tank (2 of 6)I just can’t get enough of all the cotton+steel lines and I love that they are producing fabrics in so many different substrates. Makes it so fun to try more and more garment sewing.

Basic but Practical: Union St. Tee in White

Quick weekend post to show you one of the simplest articles of clothing I have made to date and yet one of the ones I am the most proud of- a white tee shirt! I don’t know about y’all but I have a really hard time finding tees that I like. I have needed a basic white tee for ages and finally just decided to make myself one. And so this doesn’t go the way of many of my other handmades that never get photographed and blogged, I had my husband snap some quick pics on my iPhone while we were downtown this morning. white v-neck union tee (5 of 4)

The pattern I used is the Union St. Tee from Hey June. I made the v-neck version of the tee in a size M and it fits perfectly. The v-neck takes some time to construct if you want to do it properly but the end result is very professional. I don’t think anyone can tell it’s not store-bought. Also it feels like a check off the sewing techniques list to learn how to make a proper v-neck binding. Now that  I know the pattern fits me well, I have plans to make several more in some fun fabrics!

white v-neck union tee (3 of 4)The fabric is Robert Kaufman Laguna jersey knit in white/pdf from Imagine Gnats. You can find the fabric here. I have sung the praises of this laguna jersey before and I say it again, I love to keep this on hand for basic knit needs. The fabric is a great weight and has really good recovery. Also one of the best things about this pattern is it can be made with just 1 yard of fabric- making this tee very economical! I doubt I could find a nice white tee for less than $10 at the store.

white v-neck union tee (4 of 4)FYI notice, I’m wearing my double gauze shorts (blogged here). So happy to finally have a basic tee to wear with the shorts when I don’t feel like being all dressy with my fancy shirt that matches them. I was pretty pumped to be out in a completely handmade outfit today! Woot, woot! white v-neck union tee (6 of 4)

Southport Dress for Imagine Gnats

I’m over at Imagine Gnats today with this awesome Southport dress….Head over here to see more pics and read all about my new-found love of rayon challis- after overcoming a complete fear of it. Yep, I’m still a scaredy cat sometimes when it comes to sewing with new substrates. And I wouldn’t normally choose a print quite this bright and bold but I’m actually loving it in this dress.

rayon challis southport (4 of 5)