Kid’s Clothes Week Wrap-Up

Day 4

Flashback tee- birthday

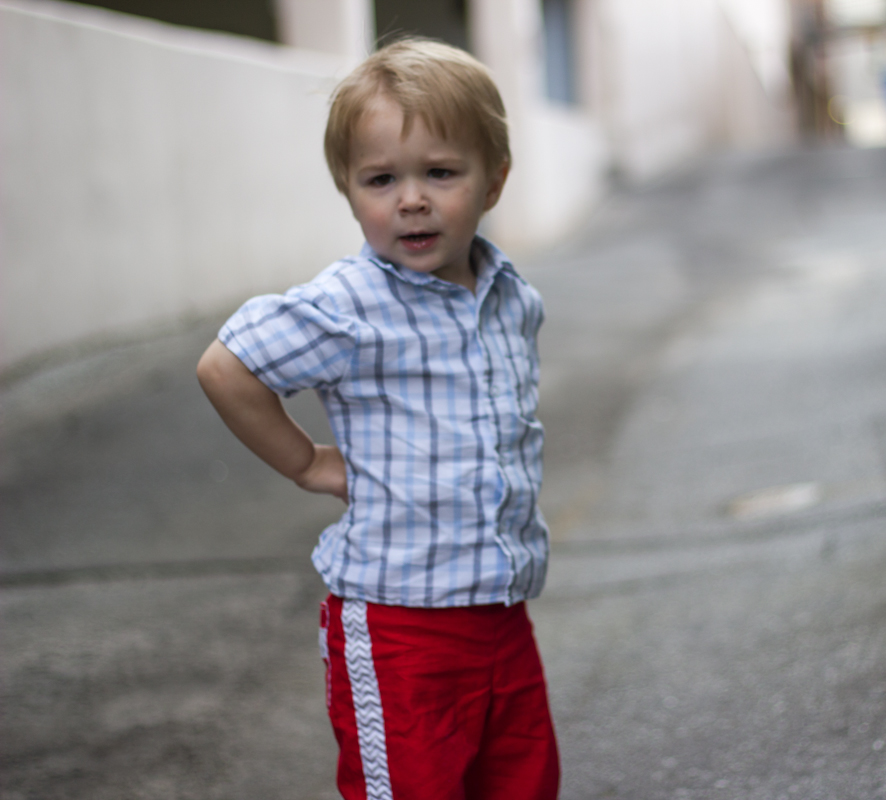
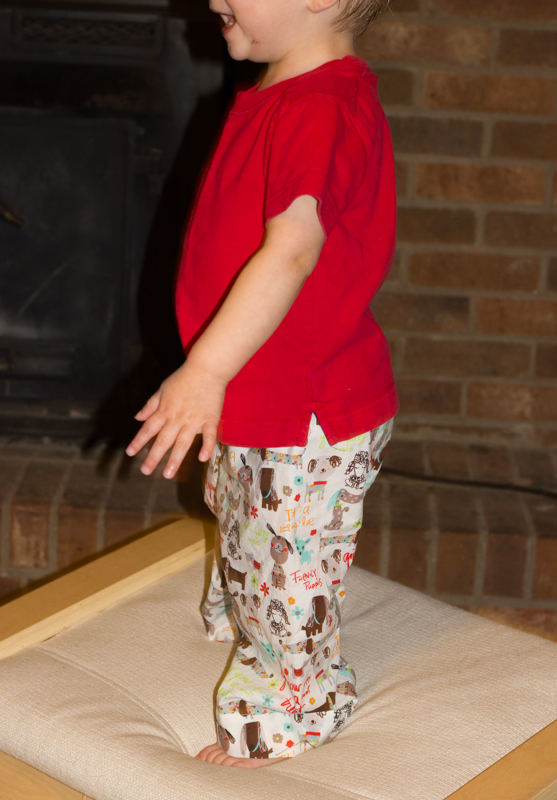
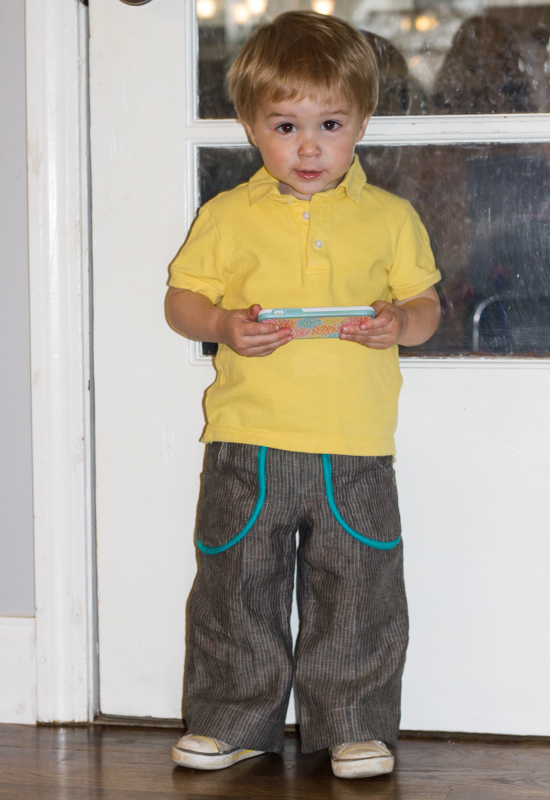
At least one part of his body always seems to be in motion!

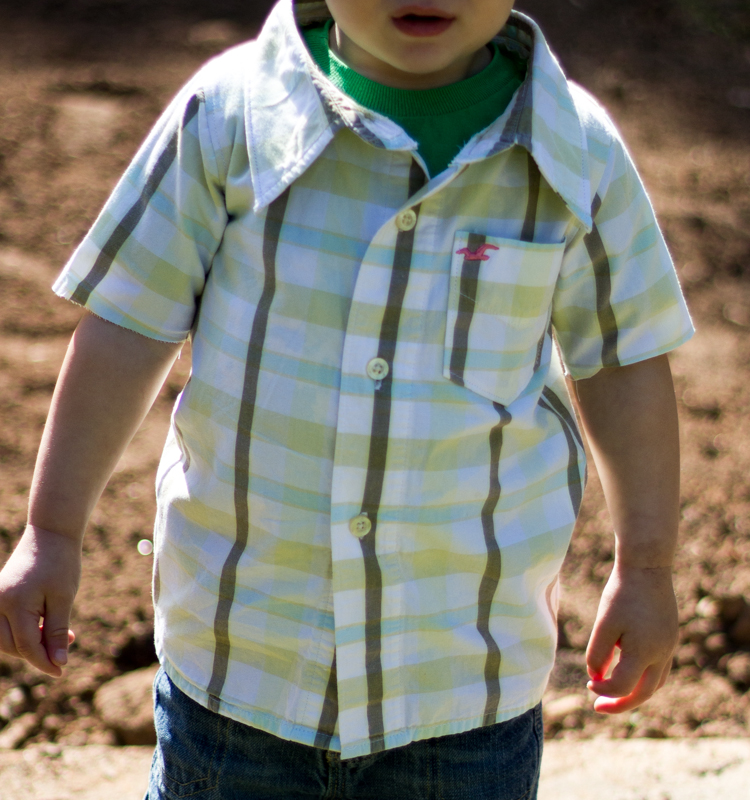
As I was debating what tee to make Thursday, I realized that Oliver “needed” a birthday shirt for his 2nd birthday on Friday. I had a super soft brown thrifted women’s XL shirt that I was saving for an appliqued tee and decided to use that for my shirt base. Once again, I used the trusty flashback skinny tee pattern. Since this was my 4th flashback tee, it came together super fast. I am really interested to notice how the different knit fabrics look different with the same size pattern- because this was really stretchy and soft material, it fits quite a bit bigger than his other shirts.

Flashback tee- birthday

I spent forever trying to decide what kind of birthday applique I wanted to use. In the end, I spelled out TWO on his shirt because now it’s a shirt he can wear the entire year, not just on his birthday. It would have been easier if I had found a font I liked and traced the letters, but I can never do things the easy way so I free-handed the letters and took quite a while getting them just right. I used heat n bond lite to applique the letters to the tee and sewed around them for added security. I really like how this turned out! Of course Oliver did not cooperate super well for our mini-photoshoot but I have a few useable shots for you.

Flashback tee- birthday

enjoying his yummy birthday cake πŸ™‚

Day 5: Oliver’s birthday. I had planned to do a little sewing during his nap but after making his cake and playing with him all morning, I was too wiped out to sew and ended up napping myself. Oh well. We had a really fun day together and doesn’t that cake look good!? My car loving little man thought it was great.

Day 6-7: Had a reaction to something I ate on Friday night and had horrific indigestion/heartburn for 2 straight days….meaning no sewing or anything else for that matter. 😦 Getting ready to get this little brother out into the world so my body can go back to normal- only 5.5 more weeks!

Day 8:

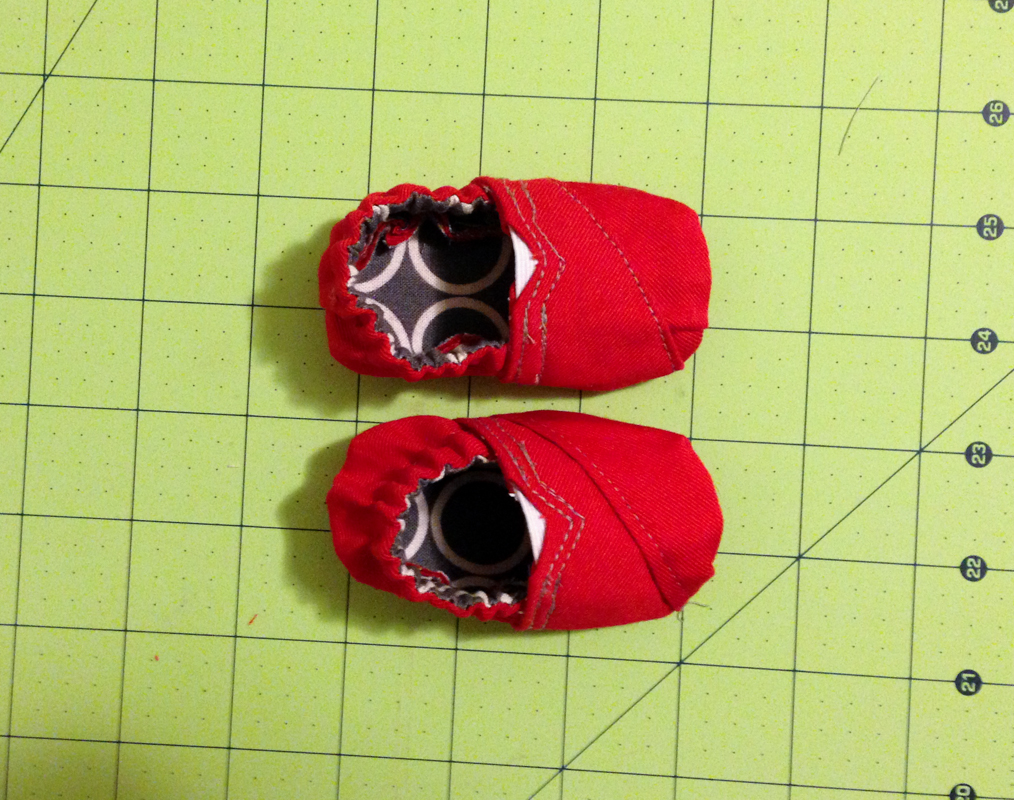
I really wanted to complete a pair of shoes for the baby during KCW so I decided it could last one more day in order for me to meet my goal. I was going to use the shoe pattern from Handmade Beginnings, but found this adorable tutorial for TOMS and decided I must try it out using my leftover red denim from the boys’ pants. These took forever! I enlarged the pattern to where it should have been a size 6-9 months, but they ended up so tiny I don’t know if they’ll even fit a newborn. Fingers crossed this baby doesn’t have the gargantuan feet his older brother has! I know I’m a bit slow now with my pregnancy brain, but I really did not like this tutorial. I found it hard to follow, and she left out some details that would have been helpful. I also don’t like how it ends up with exposed seams in the inside of the shoe. Seems uncomfortable for a baby. I had to do lots of seam ripping with these shoes because I made so many mistakes, and in the end, I still ended up with 2 left feet. Oh well. Hopefully they’ll fit the little man for a few days at least so I can get some cute pictures. And maybe, I’m just super slow these days and the rest of y’all will have no problems following this tutorial! Let me know if you do try it!

And that wraps up another KCW… Total of 4 tees, 1 dress shirt, 1 pair of quick change trousers, and 1 pair of baby toms. Not too bad of a list in my opinion.

baby toms

Kid’s Clothes Week Day 3: Another Flashback Tee


Day 3:

  • Finished Dress Shirt from Day 2: hemmed sleeves and finished off all side seams
  • Blue Stripe Flashback Tee completed

FST Blue Stripe

Sure hope you are not tired of seeing these flashback skinny tees because I am most definitely not tired of making them. πŸ™‚ We have been so blessed to have quite a few clothes passed down to us from various people, but as I was going through Oliver’s summer wardrobe, he really does need some dressier tees and dress shirts so that’s what I am focusing on this KCW.

FST Blue Stripe

This blue stripe tee is one of my faves so far. It’s from an old tank top that I picked up at a thrift store a while back in order to have practice knits. It’s a nice thick jersey material but super stretchy, so it definitely was the hardest knit I’ve worked with yet. I had barely enough fabric to make this tee…had to do some creative layout and cutting to get my shirt.

FST Blue Stripe

Thankfully I was able to use the existing hem for the bottom of the shirt and only had to hem the sleeves. Also because this is super stretchy, I could use the fabric itself for the neck binding, and it fits over Oliver’s head! I was debating on adding a pocket to the tee but as I was cutting the pocket out, nap time ended so I decided that was my sign to be done with the tee. πŸ™‚ Tomorrow my goal is to attempt a polo refashion. Wish me luck!

FST Blue Stripe

FST Blue Stripe

Kid’s Clothes Week: Days 1&2- Flashback Skinny Tees and Quick Change Trousers


Day 1:

ashback Skinny Tee- Yellow

I got so much done today and am quite proud of myself! I could not believe how quickly the flashback skinny tee whipped up! It helped that in my last sewing machine mastery class (for my amazing Bernina! πŸ™‚ ) they taught us how to sew with knits- which stitches to use and how to adjust the presser foot tension. That made the tee an easy project. Based on Oliver’s measurements, I made him the 24 month size (adding 1 inch in length) to begin with, but I didn’t want to make any more until he tried it on for fit. I used the existing hem for the sleeve which made it an even quicker sew!

ashback Skinny Tee- Yellow ashback Skinny Tee- Yellow Flashback Skinny Tee- Yellow

Since that project went super fast, I still had time before nap time was over, and I sewed up a pair of quick change trousers for baby bro. The red side matches with Oliver’s tuxedo parsley pants, and I hope that I get a chance to have the boys wear the pants together because I think that would be super cute. πŸ™‚ The other side is just a fun multi-colored stripe that I have been eyeing as pants for Oliver but thought they might be a bit too crazy.Thankfully you can get away with a bit more on a little baby! I made the size 0-3 months, but I didn’t have quite enough red denim left so they are a bit short. I just won’t roll up the cuff and I think they’ll be fine.

The 24 month tee ended up *just* fitting Oliver (really too small for his head but we made it work) so I knew I would need to make the 2T size if I want the shirts to last more than just a few weeks. He got to bed pretty early last night, and I couldn’t stop thinking about finishing the shirts, so I went ahead and made the 2T size last night… this pattern is addicting! I figured out how to salvage and reuse the existing neck ribbing because I only have gray ribbing, and I have discovered that if I don’t use ribbing, the neck openings are too small to fit over Oliver’s head. Happy to report that the 2T fits great! And I can’t believe how professional this shirt looks! Yay me πŸ™‚ . Oh I must explain one thing, these are my hubby’s old shirts, and he loves them dearly. I find the green shirt to be a bit disturbing (especially on my 2 year old), but I needed something that I didn’t care about that much to check fit with and it makes hubby happy to give new life to his old shirts, so I guess everyone wins… just no one in blogosphere freak out that I’m encouraging my son to go after animals…he’s quite in love with animals actually. πŸ™‚

ashback Skinny Tee- Green ashback Skinny Tee- Green ashback Skinny Tee- Green

Day 2:

Upcycled Dress Shirt- FST

Oliver is in major need of some dressier shirts so I thought I would see about remixing the flashback tee into a button down shirt. I really had no idea what I was doing, but since I was using one of Ian’s old shirts, I figured I had nothing to lose. I also used Oliver’s short sleeve dress shirt as a general guide to how this shirt needed to come together. I added about 1.5″ to the shirt width on the 2T size FST. It was so cool to use the existing hem and button placket and see the shirt come together. I even seam-ripped the old pocket and cut it down to size.

Upcycled Dress Shirt- FST

The only tricky part of this shirt was the collar, and up until I did it, I really had no idea what I was going to do. I cut off the entire collar section from the old shirt, sewed it onto the new shirt, and then folded and sewed the actual collar down to make it a bit smaller. It works, but I kinda forgot that you can see the seams on the shirt inside when the collar isn’t buttoned and they are a bit messy there. I’ll have to figure out something else when I try this again. On a side note, all my other seams look great because I finished them off nicely! Oh and I thought the collar would be too big, but for some reason the toddler neck size was the same as the adult neck size…hmmm.

Upcycled Dress Shirt- FST

I waited to finish off the sleeve hem until he tried it on after naptime so you’re seeing the shirt without a sleeve hem but with everything else finished. We are doing really low-key photo shoots this week since most of my time will be spent sewing and I (hopefully) will have lots of finished projects to report to you. I was also pretty happy that this shirt only took me about 90 min from start to finish. I’m pretty sure I will be even faster the next time. Let me tell you, I breathed a huge sigh of relief when Oliver tried the shirt on and it fit! The shoulders are a teensy bit tight but everything else is perfect with a bit of room to grow! Now I’m on to scour through Ian’s clothes and see what else I can re-purpose. This gets addicting, I tell you. πŸ™‚

Upcycled Dress Shirt- FST

Parsley Pants Take 3: The Tuxedo Stripe

To kick off Kid’s Clothes Week, I am presenting the third (and my personal favorite) version I made of the parsley pants (Update: Pattern is now available!). This pair was made with some red bottomweight fabric (I think it’s denim) that I picked up a while back in mind for pants for Oliver. The third pair of parsley pants has one main modification from the other two- I took them in an inch on the tuxedo stripe line to make them more slim cut. I believe the final pattern version of this pant will be taken in 3/4 of an inch over the tester version- making them a little less straight cut than this version but not quite as baggy as the pj or linen pinstripe pants.

Parsley Pants- Red Tuxedo Stripe

I also added a chevron tuxedo stripe down the side and some patch pockets on the back. This look was inspired by Rae’s version here. The tuxedo stripe is an option given in the pattern itself, but I improvised the patch pockets. I just think these are the cutest things ever! And the fit is superb!! I have to tell you how excited I am that this pattern has a snug enough waist to stay up, but enough room in the seat to make it fit well with both cloth and disposable diapers! I did the flat front finish with elastic backing again, and I have decided that this is my favorite finish for a more professional-looking pair of pants. The full elastic waist is great for pajamas, but the flat front looks a bit more polished for everyday wear.

Parsley Pants- Red Tuxedo Stripe

um, seriously, what is this model pose, here?

um, seriously, what is this model pose, here?

Our photoshoot got rained out so I don’t have a ton of good pictures to share with you, but I did manage to get a few. However I have to pull up a phone picture to really show off the back of these pants…

Parsley Pants- Red Tuxedo Stripe

Parsley Pants- Red Tuxedo Stripe

FYI, we took these pics at the same time we took pics of my maternity shirt and Oliver was copying my pose in this picture…too funny how much they notice at this age!

Parsley Pants- Red Tuxedo Stripe

Now to get started on my KCW list! I bought the flashback skinny tee pattern this weekend and have a bunch of Ian’s old shirts set aside to make some tees for Oliver- hopefully some of them coordinate with his new pants! Here’s a somewhat loosely organized list of what I hope to accomplish this week… aiming high like always:)

Spring Top Sewalong- Boatneck Maternity Tee

Maternity Tee- StripedI actually finished another top for myself this week. Yay me. πŸ™‚ When I bought the gray and blue knit fabric, I picked up this blue and cream lace fabric as well. Because this fabric is super duper thin, I wanted to try out the gray shirt first for practice. That one turned out so well, I decided to go ahead and experiment again. This time I went for a boat neck look with a capped sleeve. The great thing about this shirt is that is is only 2 pieces- the front and the back…no sleeves to insert!

Maternity Tee- Striped

I used the same dimensions as my last shirt (except I made it a teeny bit bigger since this fabric is not as stretchy) and cut out a big rectangle, angling the rectangle out from the bottom of the sleeve area to the top of the shirt to allow for the capped sleeve look that I wanted. I did add some ruching to the sides but it’s barely noticeable because I tried to do less ruching this time and ended up doing too little. However, check out how well I did at matching up the stripes!! Pretty proud of myself for that I must say. πŸ™‚

Maternity Tee- Striped

See… stripes matched so well!

The hardest part of this shirt was figuring out what to do with the sleeve and neckline hem. Because the fabric is so thin, I didn’t want to mess it up, and I really have no idea what I’m doing with these knits! If I had the rolled hem foot for my Bernina, I would have used that because I just learned how to do that in my machine mastery classes. But, alas, I have yet to purchase that foot. I ended up folding the sleeves under 1/4″ and sewing a small hem, and adding a thin band to the neckline. Neither one turned out as great as I was hoping, but they’ll work. I left the bottom hem raw edge just like the other shirt.

Maternity Tee- Striped

I want to add that I also learned the stretch stitch at my machine mastery class this week so I used that for all the seams and hemming. Hopefully that aids in the durability of the seams. I decided not to add any embellishments to this shirt because the fabric is really so pretty by itself and I don’t want to detract from that. Oh and editing pictures of your hugely pregnant self is a bit of an awkward and humbling event… Am I really that big? Yikes! Can’t believe I’m putting these out on the blogosphere, but I’m trusting you’ll be gentle with the pregnant lady. πŸ™‚


Next up is the promised final rendition of parsley pants! I decided to wait to post those until Monday as my intro into Kid’s Clothes Week…Surely having a finished project to post from the very beginning will keep me motivated to get lots done! That wraps up Spring Top Sewalong for this year…. hopefully it won’t be an entire year before I do some more selfish sewing though!

Spring Top Sewalong: Maternity Tee

We interrupt the parade of pants to show off the 32.5 week pregnant belly. πŸ™‚ Rae has been hosting a spring top sewalong the past few weeks. Btw notice a lot of activity over there with Rae, huh? How does she keep up with it all? πŸ™‚ She hosts this spring top challenge every year, and I really enjoy it as it gives me a chance to do some selfish sewing. I also love all the inspiration I get from other ladies as I peruse the flickr group. I have been wanting to try to make a few maternity tees and picked up some knit fabric at Hobby Lobby in order to make some practice tees. I actually really like the knits that I found- the jersey is super soft and fairly thick. However, I will see how they wash and wear before I make a final decision on their quality.

Maternity Tee- Spring Top Sewalong

I completely winged this tee. I got a basic idea of the size that I needed from one of my maternity tees and then cut out two rectangles of the gray knit. I tried to copy my store-bought tee as far as the sleeve and neck placements. I used some 1/4″ elastic in the seam to add the side ruching.

Spring Top- Gray Maternity Tee

I am pretty proud of the chevron pocket. I knew the gray fabric would be too boring by itself so I had the idea to add the blue knit for the pocket and bias bindings. The chevron design just kind of came into being as I was playing around with the pocket. I definitely think it adds a cool touch to the tee.

Spring Top- Gray Maternity Tee

The only big mistake that I have to confess on this tee is that I sewed the sleeves in the wrong way which ended up with a huge flutter sleeve- not the look I was going for. Because I’m too lazy to seam rip and redo anything, I pinched up the excess fabric and created a seam down the top of the sleeve to make the it smaller. They could stand to be a bit smaller but I don’t think they are too bad.

Spring Top- Gray Maternity Tee

This is my first experience sewing with knits for myself. I have had a little practice making a few raglan tees for Oliver but not much else. I know that my final result is not perfect but I am fairly happy with the finished result and didn’t experience all the horror of knit sewing that I was anticipating. I did leave the hem raw-edged because it rolls up so nicely and noΒ  one willΒ  notice that it doesn’t have a hem. That made the finishing of this shirt pretty easy. I am excited that an idea in my head actually came into fruition with good success! That’s what I love about sewing- the ability to take pieces of cloth, cut, and sew them together to create a finished piece…sometimes it kinda feels like magic. πŸ™‚ Hopefully going to try out another tee this week and crossing my fingers to have luck again! It’s nice to have some new shirts to spruce up the tired maternity wardrobe. Also major props to the hubby for having mad photo skills and taking fairly decent shots of me… kinda hard to do when you are this preggers!

My photo shoot buddy giving his little brother a kiss...so sweet!

My photo shoot buddy giving his little brother a kiss…so sweet!

Parsley Pants Take 2: The Summer Church Pant

Back again today to share with you my second version of the parsley pants (UPDATE: Pattern is now available here). For this version, I used some linen pinstripe fabric that I bought quite a while back and have been saving for the perfect pants for Oliver. So glad to finally put it to good use!

Linen Parsely Pants

I promise the piping is the same length on both pockets. For some reason, they look lopsided in the picture, but I double checked them after taking this picture and they are even!

I wanted to try out the pintucks and pouch pocket variation of the pants this time. BUT I also thought it might be fun to add a little something extra this time around. During Celebrate the Boy, Rae showcased a lot of clothing with piping and I fell in love with that look. I have never made piping for clothing before, but thankfully she has an easy tutorial. I am pretty sure that the piping cord I used is a little thick for clothing, but it’s what I had on hand and I didn’t want to have to run to the store so I made it work (ala Tim Gunn πŸ™‚ ).

Linen Parsely Pants

The pintucks ended up being super subtle on the pinstriped fabric but I still love them! I also madeΒ  this version flat front to dress it up a bit. The pouch pockets took me quite a while to construct because I had to make the piping, baste it to the outer pocket fabric, sew the outer fabric to the lining, and then sew the completed pockets to the pants. Whew! It was worth it though because, in my opinion, the little details are what make these pants stand out. I used a Lotta Jansdotter print for the pocket lining and while you only see a peek of it around the pockets, it makes me happy that it’s there. πŸ™‚

Linen Parsely Pants

I think these make the perfect summer church pants because they are super lightweight yet dressy. In fact he wore them this past Sunday and got quite a few compliments on them. πŸ™‚ Linen Parsley Pants

Parsley Pants Take 1: the Pajama Version

UPDATE: Pattern is now available here!

Well after that sneak peek on Friday, I am back with more information on these great pants. I thought it would be fun to share them with you one at a time over the next few days. Wait, that means I made more than one pair of pants last week? Oh yes, peeps, I made a total of THREE pairs of pants for the little man! Is he spoiled or what? πŸ™‚ Not only did I want to do a good job as a pattern tester by trying out all the different variations of this pattern, but I must say that once I got started, I just couldn’t stop because I was having too much fun making cool pants!

Pre-hemming picture… we are really into driving cars all over the furniture right now.

As I mentioned last week, I got the opportunity to be a pattern tester for Rae’s new pants pattern: The Parsley Pants. I have been eying all the cool pants Rae has made recently (specifically during her Celebrate the Boy series), and anxiously awaiting the promised release of a basic pants pattern. So when she contacted me to see if I would be interested in testing the pattern for her, of course I jumped at the chance.

parsley pants- pajamas

This first pair that I made is just the basic, elastic waist pant version of the pant. I figured I would make Oliver some jammie pants, and that way, if the measurements were way off, I wouldn’t have wasted some of my nice fabric on the pants. Let me tell you, this version is FAST! I was taking more care than usual to be exact since I’m testing the pattern measurements and even with that, these just flew together. This pants pattern only has one piece for each leg, unlike many patterns that have two pieces for each leg. That makes the construction really quick and easy. Also let me throw in a word of praise for Rae’s instructions. She offers hints throughout the pattern to help you get through possible trouble spots.Β  I found that so helpful!

parsley pants- pajamas

parsley pants- pajamas

Oliver has just grown into size 2 (where this pattern begins in sizing), and he has a skinny backside so I wasn’t sure about the pants staying up. Happy to report that the waist measurements ended up being just fine- both with his cloth and disposable diapers. I did have to cut about 2 inches off the hem but considering that the size 2 runs from 33-36,” and he is only 33,” I kind of expected that. They still look a bit long in some of these pictures but that’s just because the photography model wouldn’t stop jumping and bouncing during the photo shoot. πŸ™‚

parsley pants- pajamas

Discussion is under way about taking an inch off the bottom of this size anyway because it is ending up a little long on several other tester versions. Another item under discussion is taking a bit of width off the pants because they are a bit baggy. I believe that the finished decision was to take .5″ off at the center of each pant leg to made them a bit slimmer, yet not have them be too slim for all of the options given. Whatever ends up happening, let me tell you that you will want to get this pattern as soon as it becomes available- which I believe will happen either this week or next week. I will be sure to let you know when it is available, and I will be back later to show you my other two versions…each one gets better so you won’t want to miss them. πŸ™‚

Couldn't resist this picture! He is in love with the doggies on his pants and wants to wear them all day! Makes this mama quite happy when her clothes are appreciated so much :)

Couldn’t resist this picture! He is in love with the doggies on his pants and wants to wear them all day! Makes this mama quite happy when her clothes are appreciated so much πŸ™‚

Parsley Pants Sneak Peek

Linen Parsely Pants

I am in the process of pattern testing an amazing pants pattern for Rae. I don’t want to share too much of this pattern yet before I’m done tweaking various things, but I wanted to enter this pair into this week’s Project Run and Play: It’s all in the details theme. I just think that these pants perfectly fit into that theme since they are full of fun, little details. Pants are made from a black pinstripe linen fabric that I have been saving for the perfect pants project.

Linen Parsely Pants

Special pant details:

  • Piping added to pouch pockets- made from Aqua Kona cotton fabric
  • Pouch pockets have some special Lotta Jansdotter fabric (Bella line) as the lining
  • Pintucks down the front and back legs
  • Linen Parsely Pants

I’ll be back early next week to show off more pictures and details of these pants as well as the other pairs I have made. (Two so far with another already in the works)

Patchwork Quilt

I am so happy to report that I have finished the patchwork quilt that I was commissioned to make back in January. You may remember me talking about it here. Thankfully, when I agreed to make this, I made sure my clients knew that it would take me a while to complete the quilt, and they were happy with that arrangement. BUT crunch time came, and I needed to knock this project off my to-do list so I can move on to other things. (The list is never empty is it?)

Ray's Patchwork quilt

I was able to use up most of my leftover fabric to piece the back- just had to get some more Kona green to make up the difference. This was my first attempt at spray basting and I’m pretty happy with it. The only thing I would not recommend is that we tried basting outside and that was a bit of a mess- with the wind blowing the dirt onto the quilt and such. The smell wasn’t as bad as I was anticipating, so I think that next time I will be fine to spray baste inside.

Ray's Patchwork quilt

Ray's Patchwork quilt

I decided to try out the free motion quilting on my machine mainly because I don’t know how to use my walking foot yet and didn’t want to do straight line quilting without that. I loved the free motion! It was so much faster than straight line and really quite a bit of fun. I just did a random stippling and while it is not perfect by any means, I am pretty happy with it. I promise the blocks aren’t as wonky as they appear in this picture…the wind was giving us a time this afternoon!

Ray's Patchwork quilt

The binding is the same Kona green I bought to finish off the backing. I ended up machine stitching the binding on instead of hand stitching. I did this both for durability (It’s going on a little girl’s bed) and for time’s sake. It was quite hard to photograph this quilt because of the huge contrast between the lights and darks, but I tried.

Ray's Patchwork quilt

Finished quilt size is around 68×88 inches- twin sized. This is my largest quilt to finish yet. I’m going to take a little break from quilting to get some other projects done this week and hoping to work on the king-size quilt next week.

Couldn’t resist throwing this picture in there…Oliver was trying to figure out why Daddy was playing “man behind the curtain.”

Ray's Patchwork quilt