If you follow me on Instagram, you probably noticed that my sister got married this weekend. As my two boys are her only nephews, she wanted to have them be the ringbearers in her wedding. These two adore their auntie and are so sad that she is moving away- but the lego sets she got them as a reward for walking successfully down the aisle are soothing their wounds. 😉

FYI all these photos were taken with my iPhone as quick wedding snaps…And sorry about the overload of pictures. I just need a place to show off all of this cuteness!
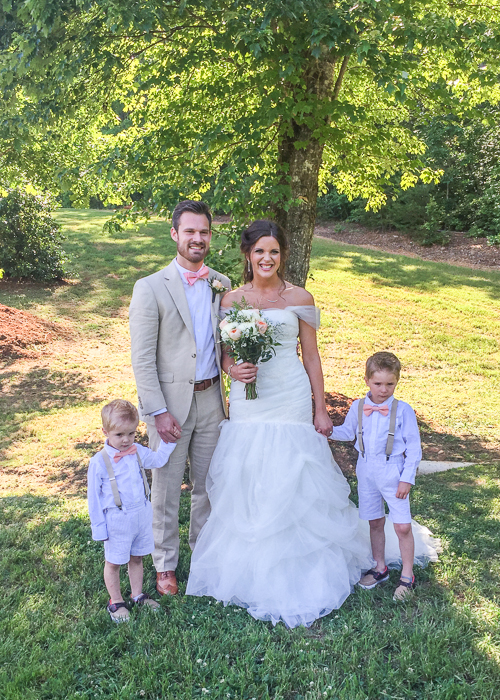
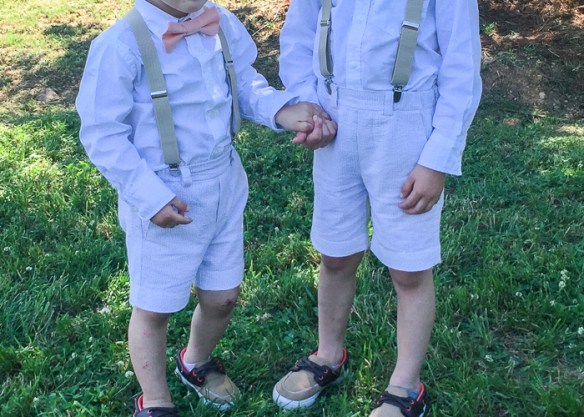
My sister wanted a traditional Southern look for the boys’ outfits- seersucker, bowties, suspenders (which I picked up on amazon btw), boat shoes…basically the southern prep that is so not my typical style. But on a 2 and 5 year old anything can be cute so I was up for whatever she wanted.

I gave her several pattern options for the shorts and she picked out the Oliver+S Art Museum Trousers. I made a pair for Oliver for Easter last year and they are still plenty big in the waist so I stuck with the size 3 for him. I actually made Eliot a size 3 also. He’s still in a diaper and so has some extra chunk around the middle. It was super nice not to have to trace another size with all those pattern pieces involved!
 In order to make the trousers into shorts, I just cut off the pants about 6 inches from the hem when I was cutting them out and then tried them on the boys once they were sewn together to measure for the exact hem length.
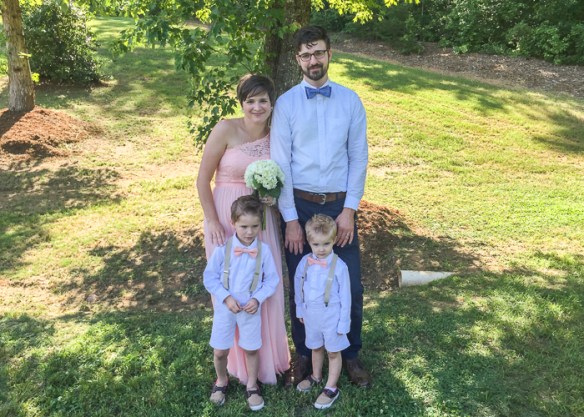 I must admit to not being a huge welt pocket fan…I mean they look nice and all but they’re a lot of work for a little boy’s outfit. I made Oliver’s shorts with the actual welts, but Eliot’s shorts are fake pockets…and I don’t regret that move one bit! Now if I hadn’t made him his front pockets, he might have been rebelling on me. 🙂 See below picture for proof of his love of pockets.

The seersucker is a tan/white blend that I picked up at Five-Eighths Seams on a trip to Charleston last fall. If you ever are in need of seersucker, they’ve got it in almost every color combination possible! I was pretty relieved to find it in person so I knew it was the color I was looking for.
 Now on to the bow ties… I made some bow ties a long time ago when Oliver was in his Aunt Katie’s wedding. But I made legit tying bow ties that time and they were such a pain to keep tied on little boys. I remembered that I had seen Jane post a bow tie she made for Henry that looked about right so I went searching on her blog and found it here… with a link to the tutorial here…

The only change I made to the bow tie tutorial was to use some SF 101 in place of felt or fleece. I am super happy with how well these turned out! The bow was the exact stiffness that I wanted and the velcro closure in the back made it easy to get on and off the boys! The fabric is Kona peach which I ordered from fabric.com and it happened to match the bridesmaids peach dresses exactly. Woot woot!

The boys did an awesome job walking down the aisle and quite stole the show with their cuteness!! I just love how great these outfits turned out and hope they will get some more use out of them as church clothes this summer.

 Oliver didn’t end up in the pictures because he’s not feeling well today but here the IG picture from the other day so you can see his. FYI he requested to take the picture in front of the quilt ladder because “it would look all colorful.” Love getting his input now. It’s so cute.
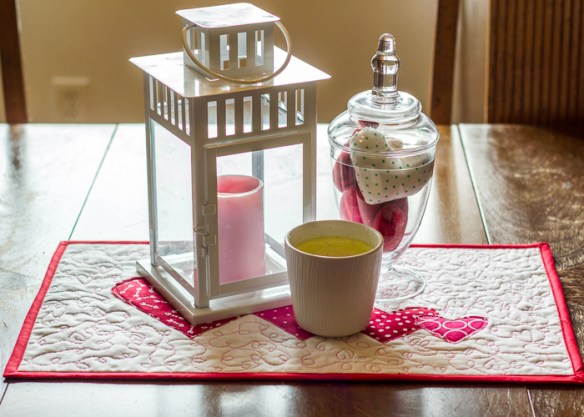 I’ve been struggling with my sew-jo the last few weeks and just have not had the drive to tackle all the projects spinning in my head. All last week I wanted to make some more valentines decor but just couldn’t decide what I wanted to do. Finally this week, I got a little inspiration and whipped up these two little mini quilts and I’m so happy with them!
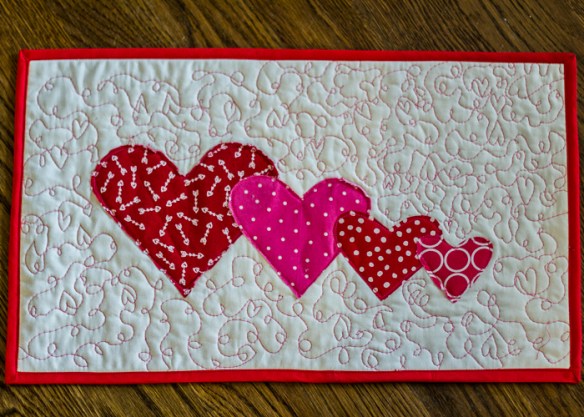 This first mini is a table runner for my dining room table. I had some leftover valentine-ish fabric from when I used to sell baby onesies and wanted to use it to make a heart runner. I just did not have the patience or brain space to figure out how to piece this to make a legit heart runner so I totally just appliquéd the hearts onto some white Kona. Easy peasy! Then I had some fun with the quilting and decided to try to free motion some hearts in my loop-de-loop. It’s definitely messy but I kinda love how it turned out! Lots of pink and white and red all meshed together…perfect for some cheerful decorations.
 I had a little bit of the arrow fabric left so I appliquéd two more hearts onto a smaller white square and ended up with this little mug rug. Since there’s less white space on this mini, I decided to stick with some straight line quilting in coordinating thread. I was afraid it would look too busy otherwise. I don’t have a lot of decorations out on my coffee and side tables in my living room because kids. (need I say more?), but I have started keeping some seasonal mug rugs out and I love how they brighten up the room and add a little something special. Plus I love to drink my tea so they are actually quite handy for my mugs!
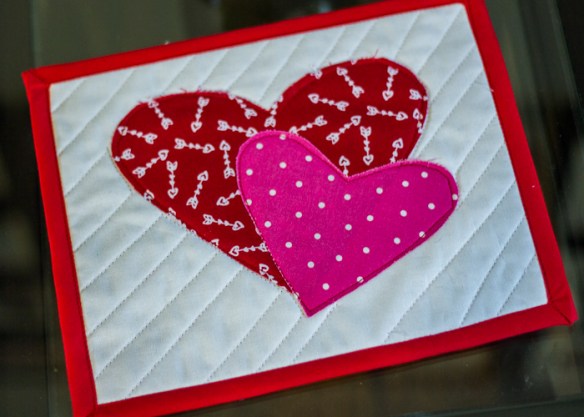 Now that I’ve got these sewn up so quickly, I’m wondering why I dragged my feet all last week on these projects! I know not everyone decorates for Valentine’s Day, but I can’t resist a chance to be cheesy and I do think hearts everywhere just brighten up a room! Plus Oliver is now used to my decorating and asked why we didn’t have Valentines stuff up last week…that kid is getting way too observant!
 This won’t get too much use this year as it’s so close to the actual holiday, but now I’ll have some stuff ready to put out next year when February rolls around! And I may just leave it up till the end of the month…just because I can. 🙂

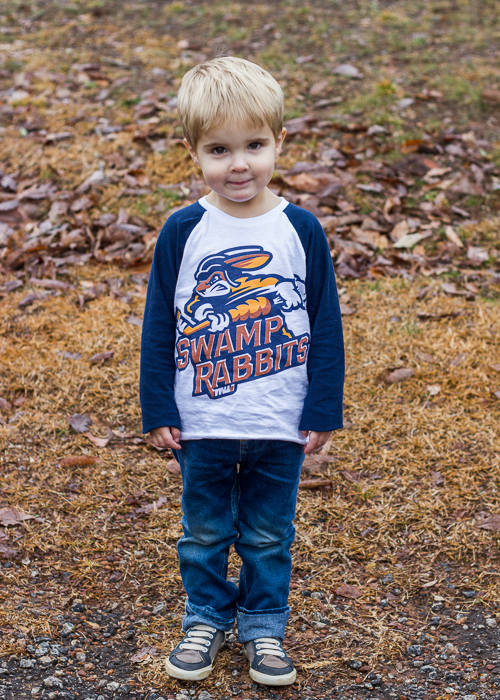
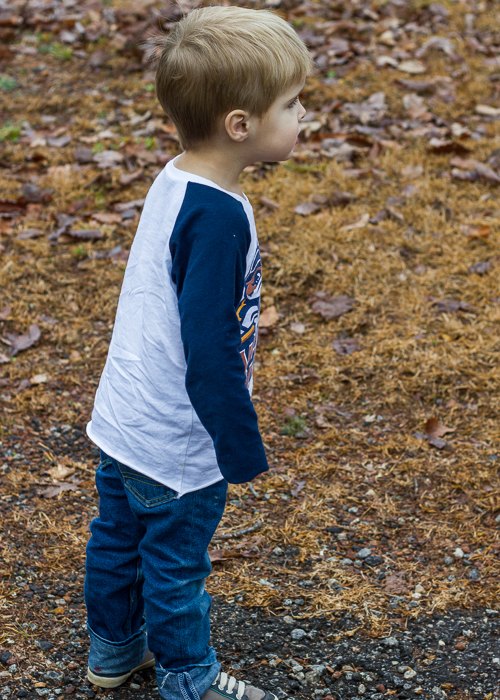
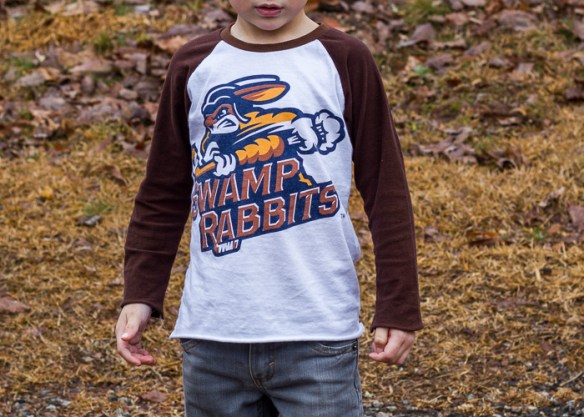 The boys were so super excited to wear their new shirts and have worn them several times since I finished them last week. I love being able to give them little custom things like this…part of what makes sewing so fun. And we may have never been to a hockey game, but the boys can represent our local team with pride now in their new shirts. 😉 Also Oliver is going through a difficult photography stage- ugh. He’s really in love with his shirt but did not want to smile for the camera…goober. Oh well. Guess I’ll have to work on my photo bribery skills for next time!
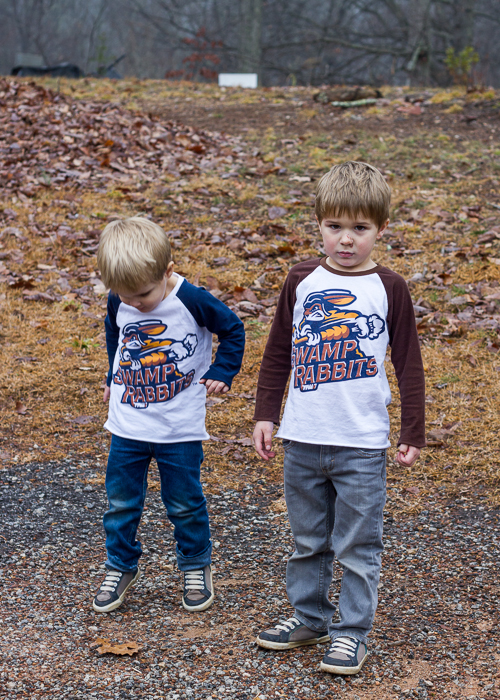


 I cut apart the panel pieces and arranged them in a 3×3 rectangle of blocks. I added some white kona cotton as necessary to even the blocks out. I was really trying not to spend any more money on fabric so I used the two green Grinch prints that I had to border the quilt. In retrospect, the two greens together are a little too busy and I wish I would have spent a little more time and money to put a border between them . Especially for something like a quilt that’s going to last a long time, I have learned it’s not worth it to make something I’m 100% happy with.
 I didn’t have quite enough of the Santa Grinch print for the backing so I used a red and white stripe print from my stash to complete the back. I do so love the little pop those stripes give it. For the binding, I just used a pre-made red binding….which I would not recommend! It bled all over the white spots in the quilt and I had to do a lot of re-washing and sun-bleaching to get the red stains out. Thankfully they did eventually come out.
 The quilting is just a basic stippling in gray. Love the texture a stipple quilting pattern gives without taking away from the main focus of the quilt.
")
")
")
")
")
")
")
 The stencil didn’t turn out exactly as I had planned but overall I think their Christmas pjs are really cute. And they’re happy so that’s really what matters. Now the hard part is to keep them put away until Christmas Eve! And of course get busy sewing mine and the hubby’s pair. But, I almost forgot, if you check out my latest

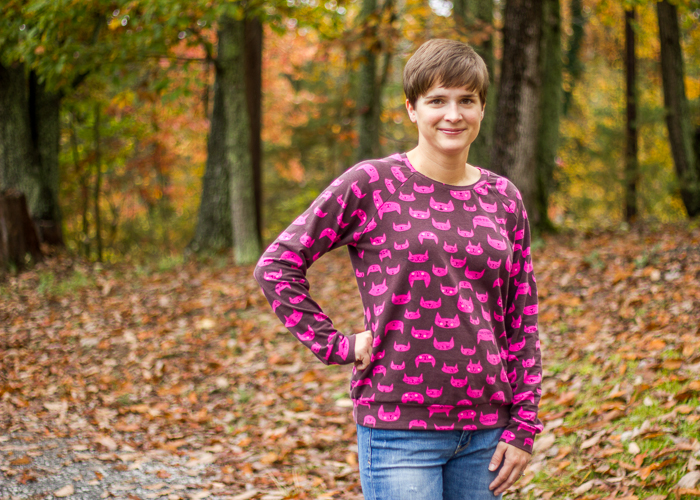
 The Hawthorn comes with two options- a full zip or half zip sweatshirt with a collar. I really wanted to make a hoodie so I figured I would see if the hood from the
 And presto- everything lined up perfectly and the jacket turned out so nice! Happy, happy dance!! I am so, so pumped at how awesome this looks. You know I’m a huge fan of Laura’s patterns anyway so I had high hopes that this hack would work out, but it turned out even better than I had anticipated!


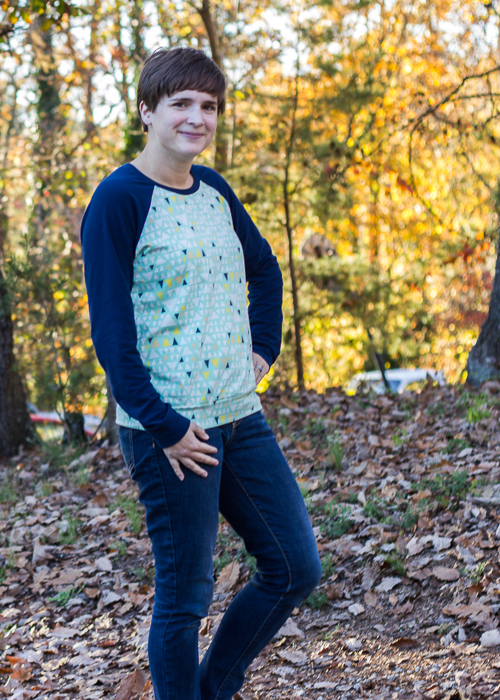
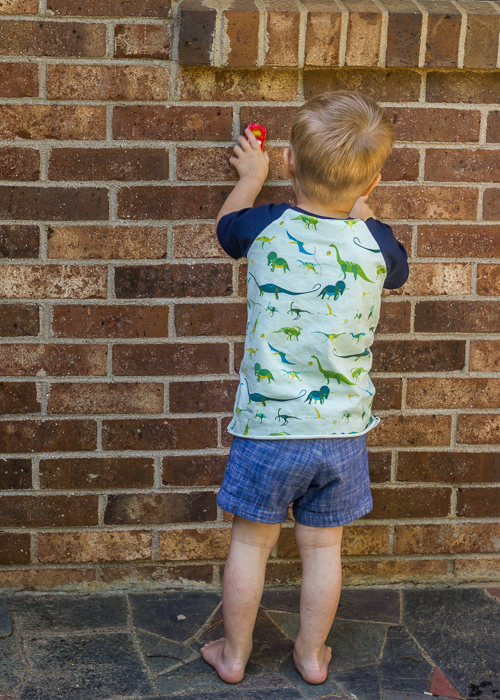
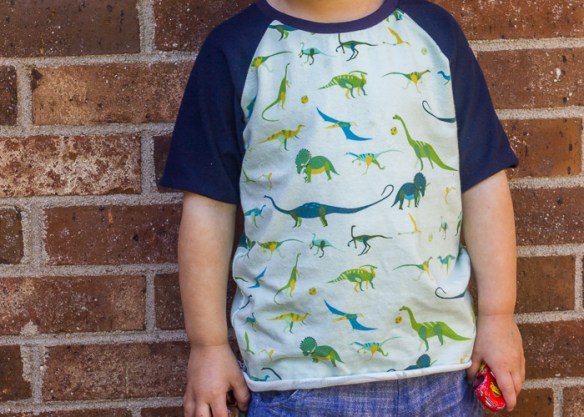
 I bought several different Leah Duncan knits from
  I just so happened to have the perfect navy laguna knit in my stash to coordinate- justifying my stockpile immensely 😉 , and so I used that for the sleeves and neck binding. I made the size 6 per usual. I did make one mistake that kinda bums me out. I forgot to add the 1/2″ length to the bottom like I did with the previous version. So it still fits fine but that extra bit of length takes it to the perfection level. Oh well, next time I will remember! And I’ll just wear a tank top under this one so that it doesn’t bug me with pulling the hem down all the time.