Unknown's avatar

About oliver's fancy

I am wife to a patient husband named Ian and stay-at-home mom to a busy little boy named Oliver. When not running around after him, I enjoy dabbling in all sorts of craftiness. I am a self-proclaimed fabric-aholic and proud of it! I have started this blog to document my journey of bettering my sewing/ crafting skills and show off occasional pictures of my little man and superb culinary creations:).

kcw spring 2015: stormtrooper birthday tee

stormtrooper fb tee (6 of 6)
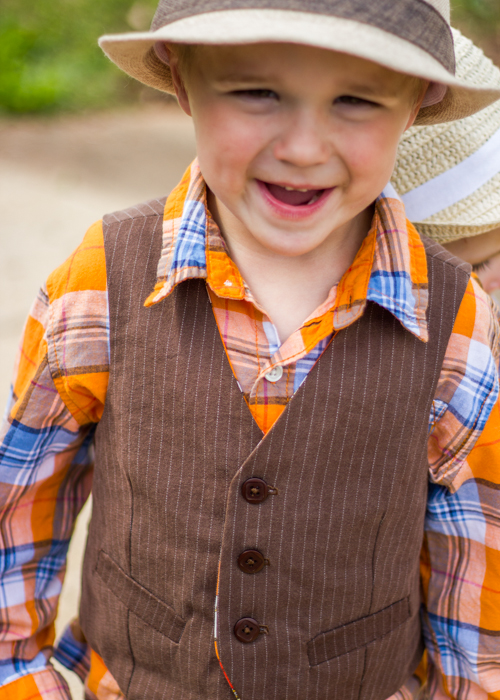
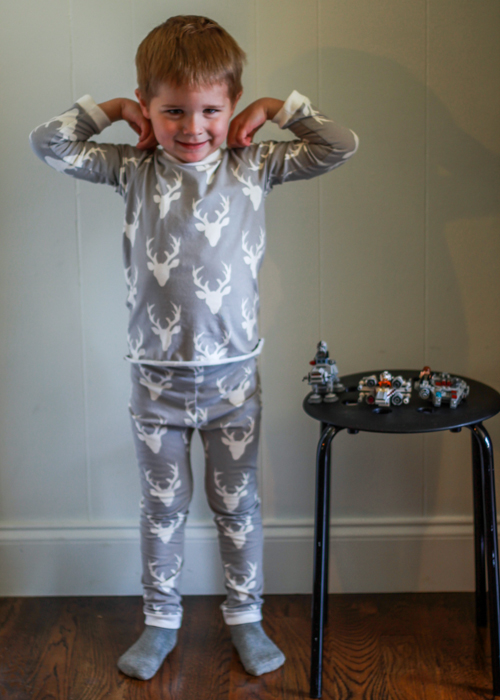
Oliver turned 4 today….sigh. On the one hand, it feels like I’ve been a mom forever, but on the other hand, it feels like just yesterday he was a teeny little baby. Four is just such a big kid age! And while I really am excited to get to enjoy all the fun that comes with the big kid stage, I’m mourning just a bit the loss of my little toddler. Okay, enough sentimentality, on to some crazy cute pictures of this kid. Can you tell Daddy was around to take pictures today? Yeah, maybe one day I’ll have his photog skills.

stormtrooper fb tee (2 of 6)

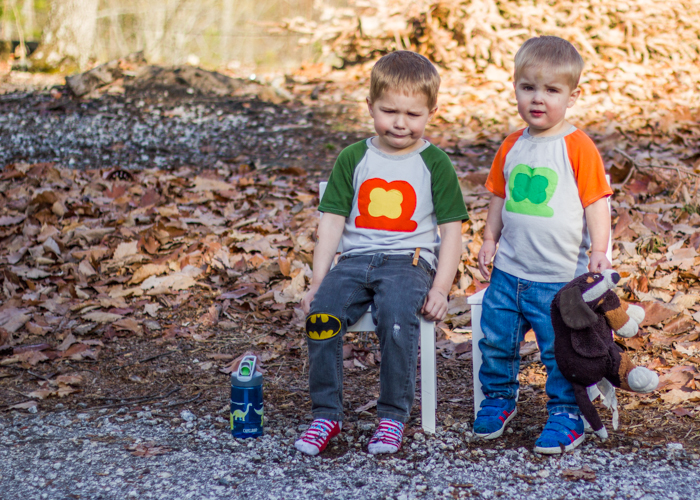
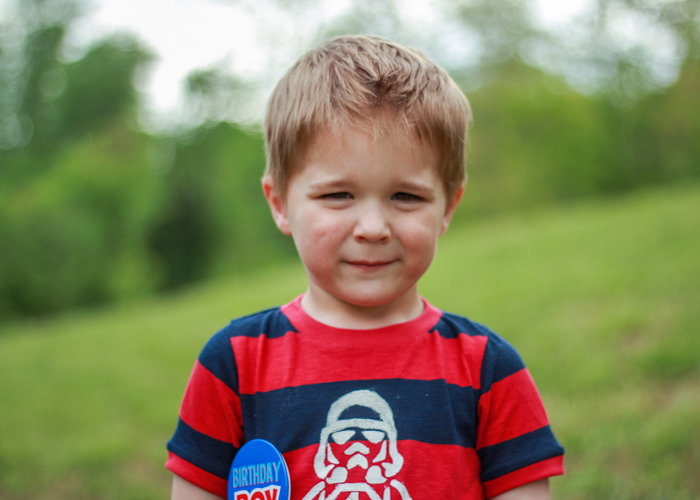
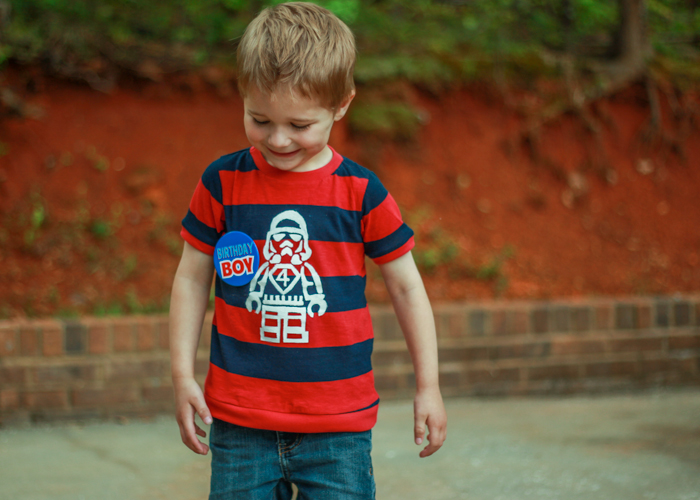
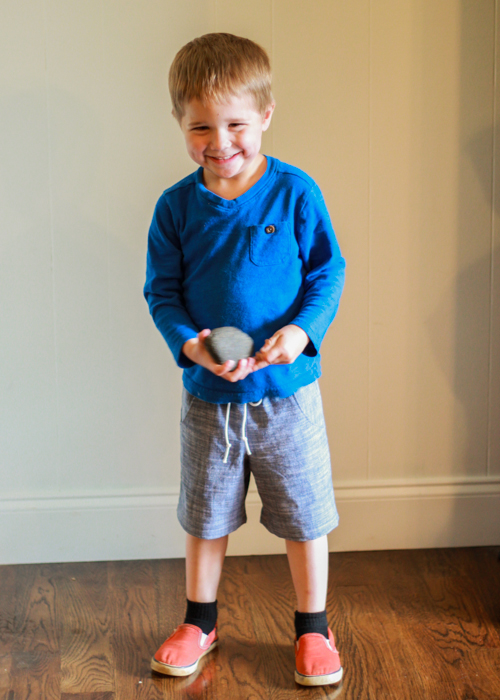
The birthday shirt is a tradition around here. And like all good traditions, it’s always made the night before the birth day itself. 😉 In the past, I’ve done mostly traditional number shirts. You can see my previous ones here (three, two, one), but this year I wanted to do something different. Something that would mesh into his every day wardrobe a little easier. So I consulted Oliver, of course. He picked out this navy and red striped knit from my stash for the fabric. (bought on a recent trip to Charleston where I stopped in at Five-Eigths Seams and raided their knit stash. Unknown substrate info except it’s a lightweight jersey knit that feels like mostly cotton with maybe a little bit of spandex).

stormtrooper fb tee (4 of 6)
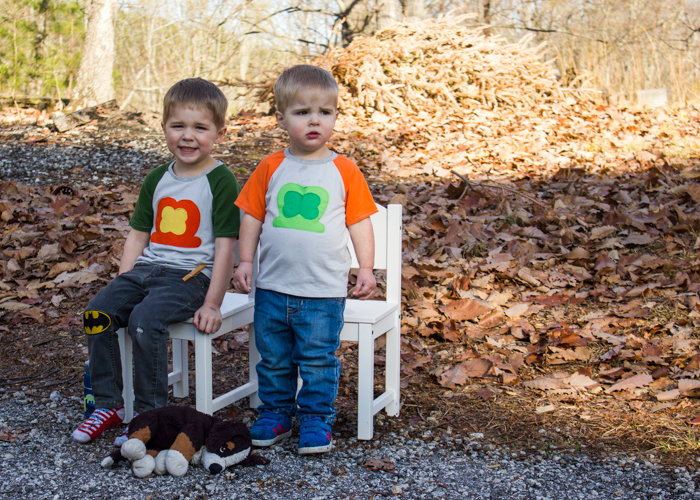
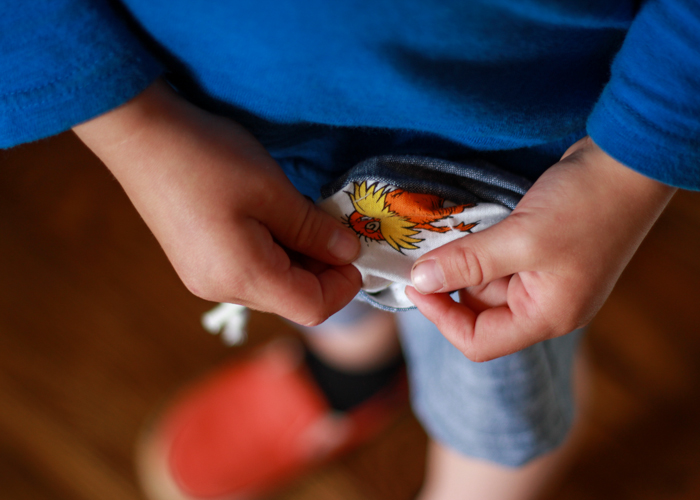
I searched the internets for birthday number tee ideas until I came up with several options for O to choose from. He, of course, wanted all the options so we decided to combine the superhero shirt with the stormtrooper. I used a free stormtrooper printable (found here) and added Superman’s logo to the chest along with the 4. It might not be super obvious that it is a Superman logo, but Oliver gets a kick out it so that’s what counts.

stormtrooper fb tee (5 of 6) The stormtrooper is freezer paper stenciled onto the shirt. Cutting out all those pieces was a bit tedious but I really like the end result. Note on freezer paper stenciling: less is more. I put my paint on a little too thick and the stencil didn’t come off very neatly, so I had to go back with a small brush and touch up a bunch of spots. Ended up being fixable but wouldn’t have been an issue if I had used thinner layers to begin with.

stormtrooper fb tee (3 of 6)

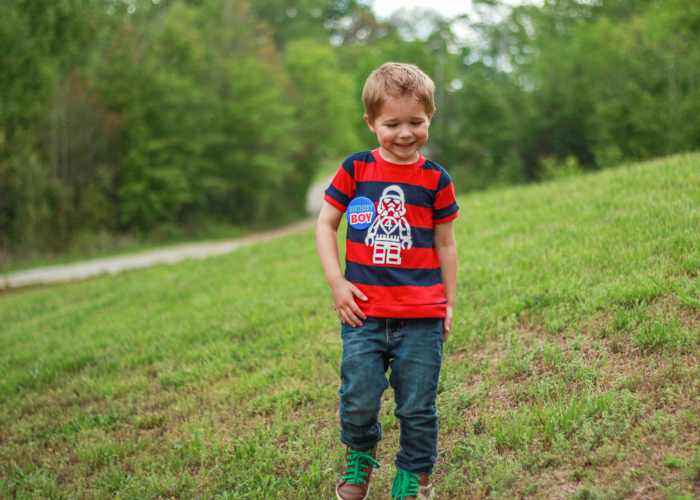
Pattern is the flashback tee in a modified size 4. I wanted it to be a little looser fit so I added about 1/4″ to the width on both sides when I was cutting it out. I wasn’t thinking and cut off some of the bottom hem to even out the stripes and ended up cutting off too much and making it too short. So I used the same rib knit that I bound the neckline and armholes with and made a binding for the bottom hem. It’s not my fave hem but at least it’s not too short! I must admit to being pretty happy with how well the stripes matched up on the sides and the sleeves!

stormtrooper fb tee (1 of 6)
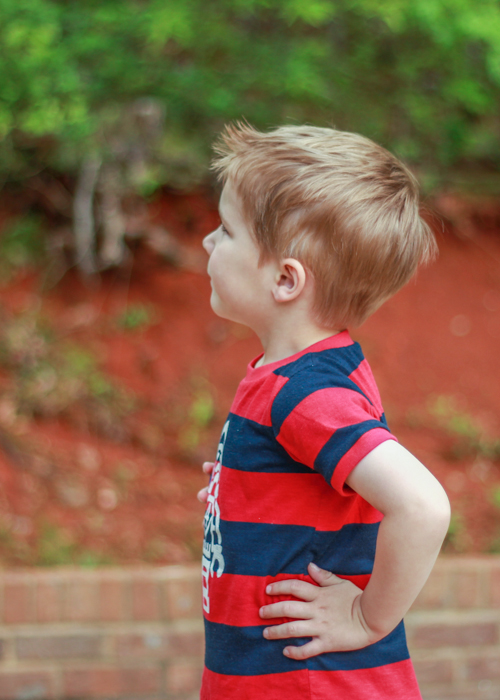
The entire shirt was sewn with my serger so it was a pretty quick sew- made up for the time-consuming stencil. And that wraps up a pretty successful Kid’s Clothes Week. I don’t always get to whole heartedly participate anymore, but I really enjoyed getting into my sewing groove this week and cranking out a bunch of stuff. I’ve got a few more things to show you next week after I put the finishing touches on them.

kid's clothes week

kcw spring 2015: rhino jammies

rhino version (2 of 9)I’m back with another pair of pjs for Oliver. This pair is basically the exact same at the previous pair except for different fabric and the rhino addition. I bought this jersey knit from Imagine Gnats at the same time I bought the deer fabric. She has a great selection of stripes, and I had Oliver look through and decide which stripes were his favorite. I would not have picked the red and grey for him but he loves it.

rhino version (6 of 9)

Again, flashback skinny tee in a 4T for the top. Coordinating grey ribbing for the neck and sleeve bands. I have yet to hem this version either. My husband just asked me why I never hem the knit tees….ummm, because I’m lazy? lol.

rhino version (3 of 9)I wanted to have some fun with the “wild things” theme for kid’s clothes week so Oliver and I brainstormed different animals until we decided upon a rhino for his shirt. I decided to keep the rhino understated so I just freezer paper stenciled the outline in black fabric paint. I can always go back and fill in the outline if I decide it needs more substance. What do you think? Is it good as-is?

rhino version (7 of 9)

Pants are the fancy pants leggings, yet again. 4t. I used 1.25″ elastic in the waistband this time, and it fit perfectly and gives the waistband some nice structure. For added fun, I rotated the stripes in the bum panel.

rhino version (5 of 9)Oliver’s first comment when trying these pjs on was “these are so cozy”. Score! I think the extra cozy factor is due to the rayon in the jersey. I normally just use cotton/spandex blend jersey but went out on a limb to try the rayon blend this time. It’s a little more slippery to sew with and quite drapey, but once sewn together I was pretty happy with it.

rhino version (1 of 9)

In case you haven’t noticed, we are going super simple on the photo shoots this week. KCW is all about sewing, and that means less time for shoots, so hope the less-than-stellar photography doesn’t bother anyone. Plus, photo shoot with pjs need to involve comfy couches and doggie pillows, right?

rhino version (8 of 9)

Hope your kcw sewing is going well. I’m loving all the “wild things” I’ve seen so far and am excited we still have 3 more days to go. Next up on my list are some more pjs- but this time summer versions with tank tops and woven shorts…so I am switching things up just a bit. 😉 Can’t wait to show you the fun fabric the boys picked out for these!

rhino version (9 of 9)

kid's clothes week

kcw spring 2015: hello bear pajamas

hello bear version (2 of 7)

So far I am on a roll this kcw! Eliot has been taking good naps and Oliver is actually spending an hour all by himself for his quiet time! Whew. I have no idea how long this will last so I’m taking full advantage of the sewing time while I can!hello bear version (1 of 7)

Today’s project was one of several pairs of pjs I have planned for Oliver. These pjs are made with some Art Gallery Knit (Hello Bear by Bonnie Christine) that I picked up during Imagine Gnat’s spring break sale. I had Oliver go through the shop’s knit selection and pick out a few prints that he would like for pjs- again, part of my plan to make sure my handmades get worn! I was able to squeeze of these garments from one yard of fabric- love sewing with wide knits. Even with the bit extra priciness of AGF knits, this comes out as a pretty thrifty outfit.

hello bear version (6 of 7)

Tee pattern is the good ol’ Flashback Skinny Tee from Made by Rae. I made a 4T and it fits pretty perfectly. I just realized only have one more size till I size out of my pattern. Going to have to get the larger sizes one soon. Hard to believe my little baby is getting that big. Wah! Oh also, I was going to hem this but I used my serger for the entire construction and was too lazy to change my sewing machine needles and thread for hemming so we’re sticking with the un-hemmed look for now. It’s in, right?

hello bear version (5 of 7)

Bottoms are the fancy pants leggings from Laura at Titchy Threads. I thought about trying to find another legging pattern for the bottoms since I didn’t necessarily need the bum panel for these pants, but I already own this pattern and had the 4t size traced and ready to go so I just went with them. Even without using contrast fabric, I do think that bum panel is pretty cute. My ribbing is pretty thin and doesn’t have great recovery so I inserted some 1″ wide elastic in the waistband to help the pants stay up.

hello bear version (7 of 7)

Oliver requested taking pictures with his daddy’s new Star Wars lego mini fighters. The boys and I picked them out for daddy’s birthday last week and we are all enjoying them. The mini AT-AT is so stinking cute, I might steal it for myself.

hello bear version (3 of 7)

Anyway, these pjs might be a bit of the easy way to fit into the wild things theme for this week, but hey, Oliver picked the fabric himself so can’t blame me. I’m hoping to have some fun with fabric paint and wild things on another pair of pjs later this week. Fingers crossed for continued good sewing time!hello bear version (4 of 7)

kid's clothes week

kcw spring 2015: sunny day shorts

oliver beach bum version (4 of 6)

I am so excited that it’s Kid’s Clothes Week time again! I’ve got a pile of things to finish for Oliver and am hoping to get them all done this week. Mostly basics- the kid only has one pair of summer pjs! But since I know how easy it is to make pjs, I just can’t bring myself to buy him any. I let him pick out some fabric for new ones and plan to get them whipped up over the next few days.

oliver beach bum version (1 of 6)

First off, some new shorts! I have yet to have much success with getting Oliver to wear shorts this spring. He loves to wear his jeans every day- so I’m introducing him to the “jean” (aka chambray) shorts. Chambray used is the Kaufman Union Stretch Shirting– bought from Fabric.com a while back. This is a super lightweight chambray so it’s perfect for summer shorts. The pattern is the free Oliver+S Sunny Day Shorts.

oliver beach bum version (2 of 6)

I used Kristin’s tutorial to add pockets and a drawstring waistband to the shorts. If these look familiar, I made almost the same exact pair for him last year. (blogged here) That pair is too short for him now so he needed another pair. I made the 4T but added 1.5″ to the length because I think they run a bit on the short side. These are now a bit long but at the rate he’s growing, I’d like to give him a little length so hopefully they will fit all summer!oliver beach bum version (3 of 6)

oliver beach bum version (6 of 6)So theme for Spring 2015 KCW is Wild Things…You may think that this has nothing to do with wild animals. Think again. 🙂 I let Oliver pick out the lining fabric (my new trick for getting him to wear his handmades) and he picked out this Dr. Seuss menagerie print- from the Celebrate Seuss line- it has a mix of all the animals and creatures from a bunch of his books. Definitely fits the wild things label!oliver beach bum version (5 of 6)

And a happy dance for new shorts! Here’s hoping for a productive KCW! What about you?What’s on your sewing list this week? Can’t wait to peruse the site’s community pool and see all the fun outfits pop up!

kid's clothes week

Washi XP Easter Dress in Cotton + Steel

easter dress (3 of 8)I’m back to share with you my Easter dress! I don’t know how the rest of you are, but at times half my “sewing” time is spent searching for inspiration. I’m a visual person, and normally I have to see an idea of something before I get inspired and create something of my own. I was searching for weeks for the perfect pattern for an Easter dress and just couldn’t nail down something that I liked that would also be flattering on me.easter dress (1 of 8)

While I was searching for patterns, Pink Castle ran a 40% off apparel fabric sale, (seriously, how awesome is that and why did I not buy more? 😉 ) and I picked up several Cotton+Steel prints that I’d been admiring: some Ephemera double gauze and Mochi floral lawn. I had intended for the double gauze to be my Easter dress, but changed my mind after I saw the lawn in person. This lawn is my new favorite fabric. It is so lightweight, airy, and silky-smooth without feeling sticky or clingy.

easter dress (5 of 8)

I only bought two yards of the lawn so that narrowed down my dress options immensely. I decided to try out the Washi dress again, this time using the extension pack options. I have loved my previous washis (blogged here, here, and here) but they didn’t get much use during the pregnancy/nursing stages that I’ve been going through the past few years. Now that I’m not nursing anymore and my *ahem* bust is back to a normal size, I have been excited to add them back into my rotation.

easter dress (4 of 8)

I’ve been meaning to try out that Peter Pan collar option with the Washi XP ever since Rae released it but never managed to get around to it. Now was the perfect time to try some fun options! I made size M of version C from the expansion pack: sleeveless, fully lined bodice, pleated front, the elastic casing in the back, and the pointed collar. The one change I made was to piece the front bodice (similar to view A) in order to squeeze this dress out of my 2 yards. I also added some length to the back elastic due to being wide waisted.

t.easter dress (7 of 8)

I love, love, love how this turned out. It is so very comfy and perfect for hot summer days- did I mention pockets?! The collar is made from some Essex linen in Aqua that I picked up several years back from Pink Castle fabrics (she’s out of that color but has several other colors in stock still.) Such a happy accident that it matched my dress so well!

easter dress (2 of 8)Because the lawn is fairly sheer, I ended up lining the entire dress with a lightweight cotton batiste. The bodice lining instructions are included in the washi xp pattern, and I just gathered a rectangle of fabric and attached it to the bodice/elastic casing seams for the skirt lining. Quite easy but it does take some of the give out of the elastic so you have to take a little more time getting the dress off and on. I loved making the lined bodice- so much nicer looking than facings in my opinion. And Rae is so good about walking you through techniques like this. Another reason to love Made by Rae patterns!

easter dress2 (1 of 1)As I mentioned earlier, I had to piece the front bodice due to limited fabric, and it ended up being a little too noticeable for my taste- you can see how it made some pulling across the bust. So I decided to add some buttons to the bodice, and I’m so glad I did because it totally completed the look of the dress. You can also see some wrinkling at the bottom of the bodice that showed up after I attached the lining. Sooo…. guess I still need to work on my lining skills a bit still. easter dress (6 of 8)
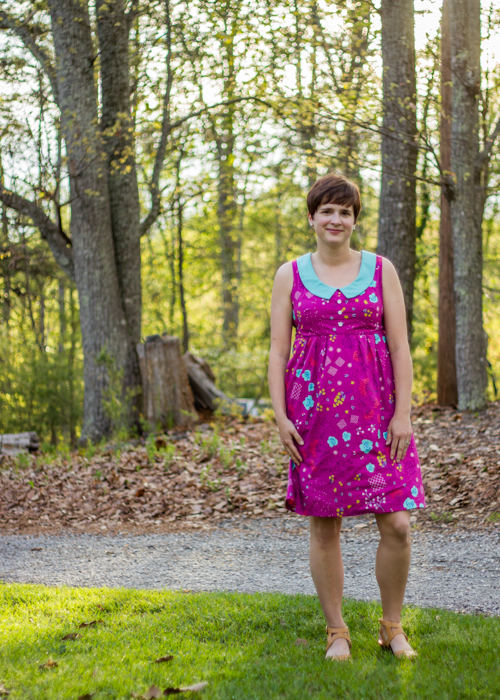
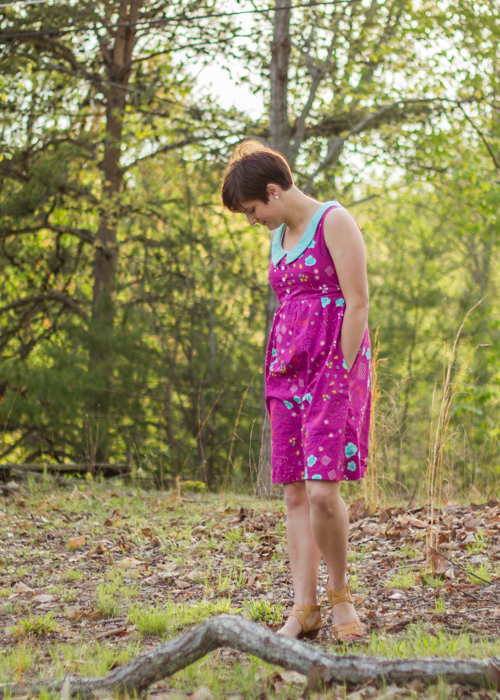
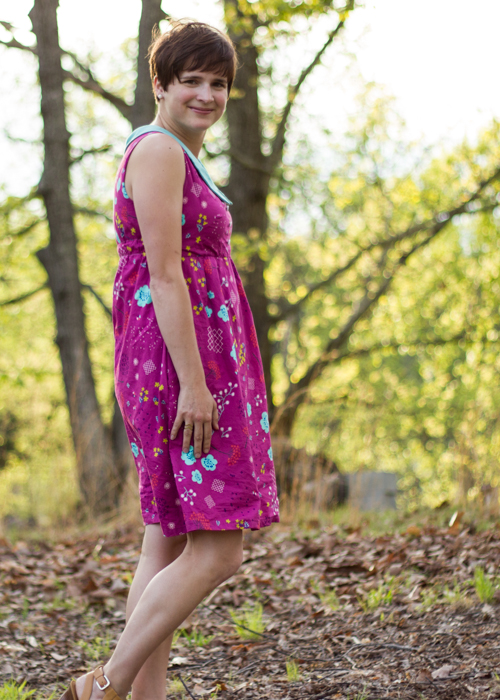
All little imperfections aside, I really do love this dress and foresee it getting lots of wear this summer as it is so easy to throw on and so crazy comfy to wear! Lawn is definitely going to be my go-to summer sewing fabric from now on- might even beat out my love of double gauze for a bit!

Art Museum Easter Outfits

I picked up the Art Museum vest + trousers pattern back in the fall when Oliver+S was running a 50% off sale. I love stocking up on some patterns from my want list during those sales! I hadn’t really given that pattern a second glance when it was released but after seeing Tara’s great buffalo check vest and Gail’s awesome plaid pants, I knew I had to have it for myself.art museums (1 of 9)

Easter is one of the few times a year where I try really hard to get the whole family in new (preferably handmade) clothes. Growing up in the south, the annual Easter dress search was a big deal and it’s kinda fun to continue that tradition with the boys- except not with new dresses obviously. 😉 art museums (7 of 9)

I started on these vests way back in February in order to make sure they were finished by Easter- the winter Kids’ Clothes week theme was upcycling so it was the perfect chance to get a head start! I’ve been working on them in bits and spurts whenever I could fit in some spare sewing time. And I actually finished them two weeks before Easter- a miracle for me. 🙂

art museums (8 of 9)

Eliot’s vest is a size 2T and made from an old pair of my husband’s dress pants. The lining is a blue sketch print from my stash.art museums (9 of 9)

Oliver’s vest is a size 4T and is made from an old pair of my dress pants- from way back in my school teaching days. I let him pick out the lining and he decided on a Lorax fabric from my stash- Dr. Seuss is always a great idea. I do think the vest runs a little short. Next time I make one I would probably add a little length so he won’t grow out of it so quickly.  art museums (2 of 9)

Oliver’s pants are also upcyced- another one of my husband’s old khakis. Though I think with his size we are reaching the end of being able to upcycle from old pants! I had to do some major seam ripping of waistband and patch pockets to have enough fabric. After I was all finished, I realized you could still see the needle holes on the front right pant leg. I used all the tricks up my sleeve to remove those marks- finger scrubbing, rubbing with a wet cloth then ironing, and finally rubbing with a white vinegar soaked cloth and a final press with the iron. All that work did help minimize the marks but they did not disappear like I’d hoped. I think that with all the time I spent seam ripping and such, it would have just been cheaper to go buy some khaki fabric- lesson learned for next time.

art museums (4 of 9)

Oliver’s measurements put him in the 2T waist with a 4T length. I was afraid to trust the measurements completely so I ended up making him the 3T with 4T length. I ended up cutting them back to the 3T length because they were super long- after reading a bunch of reviews, this seems to be a pretty common theme. I probably could have gone with the 2T width too but this way he’s got some room to grow for a while. art museums (5 of 9)

Have you noticed all the welt pockets- 6 to be exact! Yeah, my first time with welts and that was quite the workout. I managed ok on the vests, and then I realized that my pal Kristin had written up a picture tutorial for the O+S blog so that was super helpful and so I used that when I made the pants- much easier. The pockets all turned out pretty well, if I say so myself. I used the Lorax print for the inside of Oliver’s welts, and he is pretty pumped to have Lorax pants as well as the vest. Anything to get him excited about his handmades!art museums (6 of 9)

Eliot already had a pair of pants to coordinate with his vest and shirt so I decided not to make him a pair. Final handmade tally- 2 vest and 1 pair of pants. The boys’ shirts are from Target, and Eliot’s hat was a steal in the Target dollar bin! They loved wearing the Fedoras and actually managed to keep them on most of the day. Their cuteness was just too much for me!

Cropped Ginger Jeans

Hey guys, if you follow me on instagram (@oliversfancy) you will have noticed some sneak peeks of my latest sewing project- jeans for me! And today I’m over at Imagine Gnats sharing the final reveal with all the gory details… so hop on over and check out some pretty awesome jeans and some of my classically awkward facial expressions. 😉 mint gingers (7 of 7)

Lucky Charms Tee x2

Yep, I’m back…new blog post finally…spring puts me in the mood to blog it seems. 🙂 Also more light helps out on the photography front. Though tax season means my good photographer is out of commission so you’re stuck with my not-as-great skills. And Oliver’s favorite new picture face. Don’t know where he came up with that smirk/frown but he makes it every time I pull out the camera lately! lucky charm tees (7 of 7)

I wanted to do something fun for the boys for St. Patrick’s Day this year. BUT I didn’t want to just make a typical shamrock shirt because I have this inner need to be complicated and different. 😉 Both of the boys absolutely love Lucky Charms cereal. I know, I know, how do they even know about that cereal, right? Well it just so happens to be my one sugar cereal weakness and every now and then when I find it on sale, I just can’t resist picking up a box. So, there’s my bad mom confession for today. 🙂

lucky charm tees (3 of 7)I’m trying to be smarter about making Oliver’s clothes because last year he ended up with quite a few things in his closet that he never wore- not cool. Now, I’m involving him in the fabric selection part of sewing his clothes, and so far that’s really helping out with his willingness to wear said items! We decided to make different versions of Lucky’s hat for each boy. Oliver picked out the orange hat for himself, and I decided on the standard green hat for Eliot.

lucky charm tees (2 of 7)The pattern I used for the tees is a version of a raglan tee that I tested a while back for Titchy Threads. The pattern has not been released yet so I don’t have a link of it for you, but I’m pretty sure she’s planning on releasing sometime this year. I actually made the same size for both boys- the 24 month and just added 1.5″ to the length of Oliver’s. O’s ended up a teensy bit short so I left the bottom of his unhemmed.

lucky charm tees (4 of 7)The grey and orange knit solids are Robert Kaufman laguna jersey- love this knit for tees! Green solid is a french terry knit simply because it was the only green knit in my stash- lol. All fabrics were purchased from Fabric.com a while back. I got a 20% off coupon from them and stocked up on a bunch of different colors of those laguna jerseys. It’s so nice to have some in the stash to pull from when I get a project idea. I’m actually running low and need to get some more!

lucky charm tees (6 of 7)I traced the hat stencil freehand onto a piece of swedish tracing paper (risky for me since my drawing skills are not great), then I used that to cut out the pieces onto some Kona cotton, and appliquéd the hats to the tees using some Heat n Bond lite.

lucky charm tees (1 of 7)I love how fun these turned out and the boys do too. In fact, they have worn them several times already in the week since I made them, so I’m calling that a project success!

lucky charm tees (5 of 7)

A Winged 241 Tote

Today I get to be part of the Winged blog tour. I met Bonnie Christine from Going Home to Roost this past spring at the Maker’s Summit here in town. I was so excited to discover that an Art Gallery Fabric designer lives so close to me! I made sure to pick her brain for all kinds of fabric and blog ideas during the after party at the conference. She is such a sweet person, and I love her fabric aesthetic so I am pretty pumped to be part of the tour for her recent fabric line.

winged 241-6 (1 of 1)

I decided to use this tour as a chance to make a pattern that’s been sitting on my shelf for exactly a year now- the 241 Tote! I bought this pattern last year during Anna’s black Friday sale and have just never got around to making it. I figured this tour would be the perfect push to get me to finally try out this pattern. Note: I am finding bag photography requires skills that I am still developing so bear with my photos!

winged 241 (3 of 4)I have loved all of Anna’s patterns that I have tried so far and this one is true to form. Great instructions and great finished result. My only complaint with bag patterns is so. much. interfacing. That’s par for the course with bag-making, but since I don’t make bags very often, I’m just not used to it. I should have put on a Christmas movie during the cutting and interfacing part! Woulda made it more enjoyable. The good news is once you get that part over with, the bag construction is very easy and sews together quickly.

winged 241 (4 of 4)I didn’t have any magnetic snaps on hand and didn’t have time to go to the store and pick up one so I’m going to add a small strip of velcro for my closure. Not quite as nice as a snap but it’ll do. I love the inside pocket- perfect to slip my cell phone into so it doesn’t get lost in the bag.

winged 241 (2 of 4)I loved both the butterfly and the birds prints from Bonnie’s fabric line so I found a way to use both of them in my bag! Love how well they mesh together. The purse side and handle fabric is a lightweight denim that I had in my stash. Very happy with how this bag turned out and can’t wait to put it to good use! My current purse is in a sad state of disrepair so this was a sorely needed addition to my wardrobe!winged 241 (1 of 4)

That’s my stop on the Winged blog tour. Be sure to go to the main tour page to check out all the other stops along the way. Yesterday’s post was Kelley MacDonald of The City and Us with some pretty awesome fabric-covered terra cotta pots! Monday’s post will be Rachael McKeeman of The Floral Suitcasewinged-blog-tour

Denim + Leather Messenger Bag

I’m back with another Pattern Parcel…. #7. This time, it’s the handbag edition. There’s a great roundup of handbags for you in this parcel. I’ve been eyeing that Betty Bowler for a while and can’t wait to try it out! I really wanted to try it for this post but I didn’t have the necessary hardware and have not had time to get to the store to get it.

Pattern Parcel #7: Choose your own price and support DonorsChoose. Win/win!

Parcel #7 includes:

Barcelona Bag and Wallet by Pat Bravo
Butterfly Sling Purse by Emmaline Patterns
Evelyn Hangbag by ChrisW Designs
Midtown Messenger Bag by Betz White
Betty Bowler by Swoon Sewing Patterns
BONUS PATTERN: Daphne Bag by Clover & Violet

A reminder about Pattern Parcel– You name your own price for the parcel and if you choose $32 or more you get to unlock the bonus pattern. I love the mission behind this parcel- a percentage of your payment goes straight to Donor’s Choice and helps provide educational tools and supplies to needy classrooms. It’s so cool to be able to support indie designers while also giving to those in need.

denim messenger (1 of 6)

I chose the Midtown Messenger Bag by Betz White for my pattern. I took the opportunity to make something for my husband. It’s fairly rare that I sew for him so I try to make up for it when I can! He’s very supportive of all my sewing craziness so he deserves something in return.

denim messenger (5 of 6)I knew he would like this messenger bag and could use it for work, but I would need to re-think it in more manly terms. I decided to use this heavy weight denim as the accent fabric and had a lightbulb moment when I realized I could use the wrong side of the denim for the main fabric. I wasn’t sure exactly how it would turn out but as soon as I got the flap sewn together, I knew this was going to be a winner! I just love the end result and it’s exactly my husband’s style.denim messenger (4 of 6)

A few modifications:

  • I used real leather for the flap accent. (from some assorted scraps sent to me by my good friend, April. Thanks April! So sweet of her to share.) The pattern calls for the front flap to be pieced together, but I chose to cut out the flap in one piece from the denim and then just sew the leather on top. I wanted that look anyway, and I was afraid piecing the leather would end up with some wonky sewing.
  • I did not interface the outer pieces because the denim is such a heavy weight that I didn’t think it would need it.
  • I didn’t use the tuck catches for the front closure. Mainly because I didn’t have any on hand. It’s not essential that this bag has a front closure because of the inner zipper, but I would eventually like to add some sort of closure.

This was my first experience sewing with leather and it went fairly smoothly. Because so many of the pieces used batting and there were bulky seams, I used my walking foot for the entire construction (sans the zipper install) and I think that helped a ton. I just sewed very slowly and carefully and did not end up with any huge issues.denim messenger (3 of 6)

The lining fabric is an Amy Butler print I had on hand that I actually had set aside for something for the boys but it went so well with the denim that I sacrificed it for the cause. This bag is the perfect size for my husband’s laptop. (mine is shown because he was at work when I took pictures) It also has a padded inner pocket that’s a great size for a tablet. I really like all the pockets included in this bag pattern. You can never have too many pockets in my opinion!denim messenger (6 of 6)

A note about this pattern: It ends up with a really professional finished product, but you definitely put the time into it! This is not a quick sew. Before you even get to the sewing there’s a bajillion pattern pieces to cut out- it might rival the cargo duffle for most pattern pieces! However, if you are willing to put the time into it, you can end up with such a fun bag at the end that I totally think it is worth it. The instructions and diagrams are very helpful and made the process as pain-free as possible. Just queue up a good movie or tv series of choice and have a cutting and sewing marathon! (FYI If you like BBC shows, I just discovered Lark Rise to Candleford on Amazon Prime and am loving it! Made the cutting time fly by.)

denim messenger (2 of 6)I think this parcel is a great idea for any who are thinking of doing handmade gifts for Christmas. There’s options for both the guys and girls on your list! I think both the Betty Bowler and this Messenger Bag are good guy patterns.  Remember this is available as a bundle for 2 weeks and then it’s gone.

Pattern Parcel #7: Choose your own price and support DonorsChoose. Win/win