
This is one of those projects that I finished earlier this summer but never got a chance to blog about. I made it as a prototype for a shop but ended up keeping it for myself because I liked it so much. I searched the internet for a good tutorial on how to make these but couldn’t come up with exactly what I wanted so I combined a few ideas to make my own.
 I didn’t take any pictures of my process- sorry! But I thought I would offer a little mini tutorial for anyone who was interested in making one for themselves.
Here’s what I did in a nutshell:
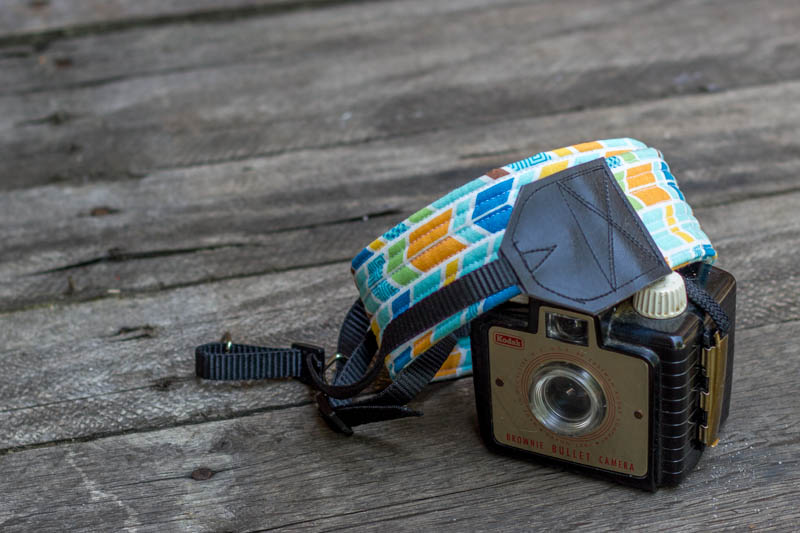
- Used my existing camera strap as a size guide and cut my strap 3x the width. (I cut mine 6″ wide) and then measured the length and added an inch on each side for seam allowance (mine was 23″ long). So total size was 6×23″.
- Fused the entire strap with SF 101.
- Ironed each side over 1″ lengthwise, then folded the entire length in half to make the final width about 2″ wide (basically like making double fold binding). I then opened it back up and fused a 2″ piece of fusible fleece along the fold line.
- Quilted the strap with straight line quilting rows about 1/4″ apart. (this first section is adapted from one shabby chick’s tutorial on guitar straps.)
- Followed the instructions here for using pet collars as the nylon strap and also for making and connecting the vinyl ends of the strap to the fabric and nylon straps. I bought the small dog collars at Walmart for about $1 each (you need 2 for each camera strap) and I cut up and old fake leather backpack for the vinyl end section.
- Below you can see the camera strap hanging out along with a guitar strap and some other fun stuff I made for a shop this summer.

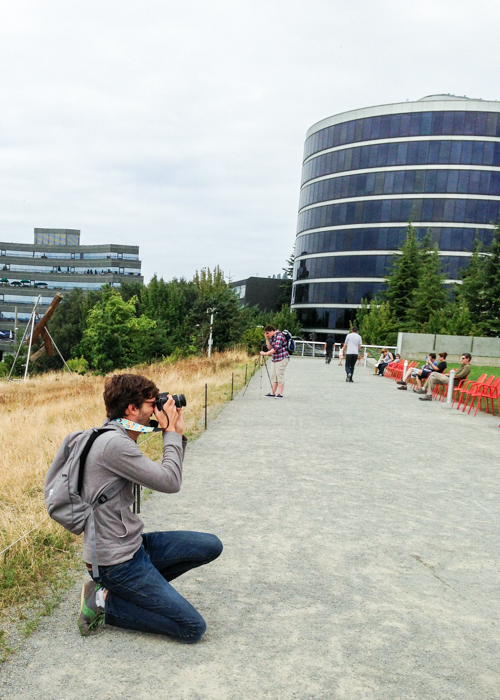
I really like how sturdy the camera strap turned out. And It’s a fun change of pace from the boring black strap that came with the camera. Here’s an picture of the camera strap in action during our trip to Seattle this summer!

Very cute strap, I like the colors
Thanks! I tried to make it gender neutral so my husband wouldn’t feel weird using it too!:)
Gorgeous!! Love the colours.
Thanks!