

So this is probably the most I’ve ever hacked a pattern for one garment! This shirt kind of evolved along the way to end up where it did, but I enjoyed the process. It took me several weeks to finish because I didn’t hurry through any of the decisions but it was nice to not have a deadline and really take my time to get something just perfect.
I started out with the Archer button-down, size 6. I knew I wanted a sleeveless shirt for summer so I used Jen’s tutorial here to take out some width from the shoulders- I think I ended up taking about 1.5″ off each shoulder and then a 3/8″ wedge from the back piece at the yoke seam line. I did have to take a little more off the sides due to armhole gaping so next time I would probably increase my wedge to 5/8″.
 At first I thought I wanted to do the v-neck mandarin collar variation of the shirt so I followed Andrea’s tutorial here for that. Super duper easy to do if you follow her instructions! I love how easy the plackets were to draft! Unfortunately, once I was finished with this part of the shirt, I decided that I didn’t like the mandarin collar. Because you take some width out of the collar, it ends up being really close around your neck and with this summer we are having, I knew I would never wear it because it was sooo hot!
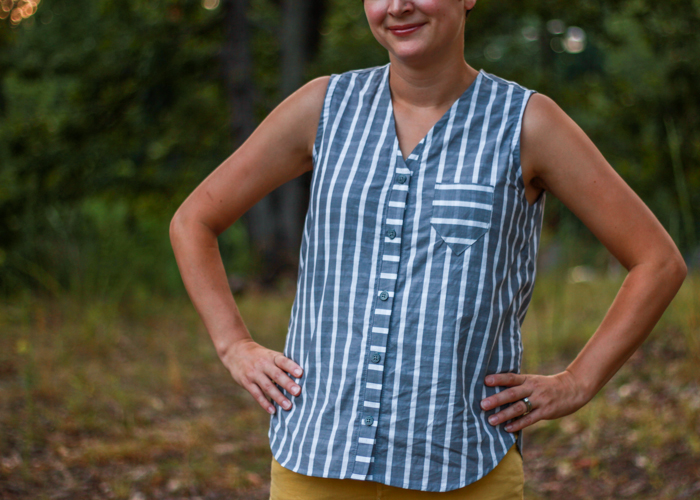
 I did an after-the-fact hack and used Jen’s v-neck alder variation as an example to help guide me. Basically I seam-ripped the collar stand, cut 3/4″ off the shirt back neckline, and then angled it down in the front to make a V- this cut out most of the v-neck that I had created with the placket so I kind of did this work twice, but oh well. It was a learning experience. Once I had the angle right on the shirt, I used bias binding to finish off the neck seam. I held my breath a bit during this part because I was so afraid that i wouldn’t be happy with the collar-less result but I am so happy to report that I love it! It’s so perfect for a summer top- so light and airy along the neck.
 I made a few more little tweaks to the shirt along the way just for fun. Instead of pleating the back, I gathered it between the pleat lines. The pockets were giving me some fits at the very end. I was going to leave them off completely, but my husband thought the shirt needed small pockets so I tried them out. Two pockets just wasn’t doing it for me- looked a little too symmetrical if you know what I mean? After polling the IG world, I took the majority’s advice and just did one pocket which I altered it into a v-shaped bottom to mirror the neckline. I’ve still wavered about leaving that one on, but I think I like it. Adds a little contrast to the front. One final tweak I made to the pattern was to try out a split hem at the side seams. That was a really easy tweak, and while it’s not super noticeable it’s still a fun added feature.
I bias bound the armholes to finish them off. Like I mentioned above, I had just a bit of armhole gaping once I was all done so I took the side seam in another 1/4″ at the armholes and angled that down to nothing to fix that problem. This fabric is one of the three fabrics I bought in London- such self control I showed there!! It doesn’t have any information on it but it feels like a light-weight shirting. I had plans to use it for the boys but it was just calling out to be made into this shirt and I’m glad I gave in to its siren call. 😉 I really love how this turned out and I think it will get a ton of wear during the rest of this HOT summer. Also, it’s another entry on my #GrainlineBingo card. ;). Yep, thanks to my friend, Kristin, that’s totally a thing now. hehe. 

Yeah, nice one! I like the pocket this way and this is a totally great top for summer and then to layer with a cardigan in the fall…smart move. I’ve been getting Archer fever lately again; apparently 3 Archers isn’t enough. Oh and I really love your split side alteration!
I think this is my 4th archer now… I’ve got a couple unblogged. It’s just such a practical but fun pattern. And with endless tweaking possibilities!